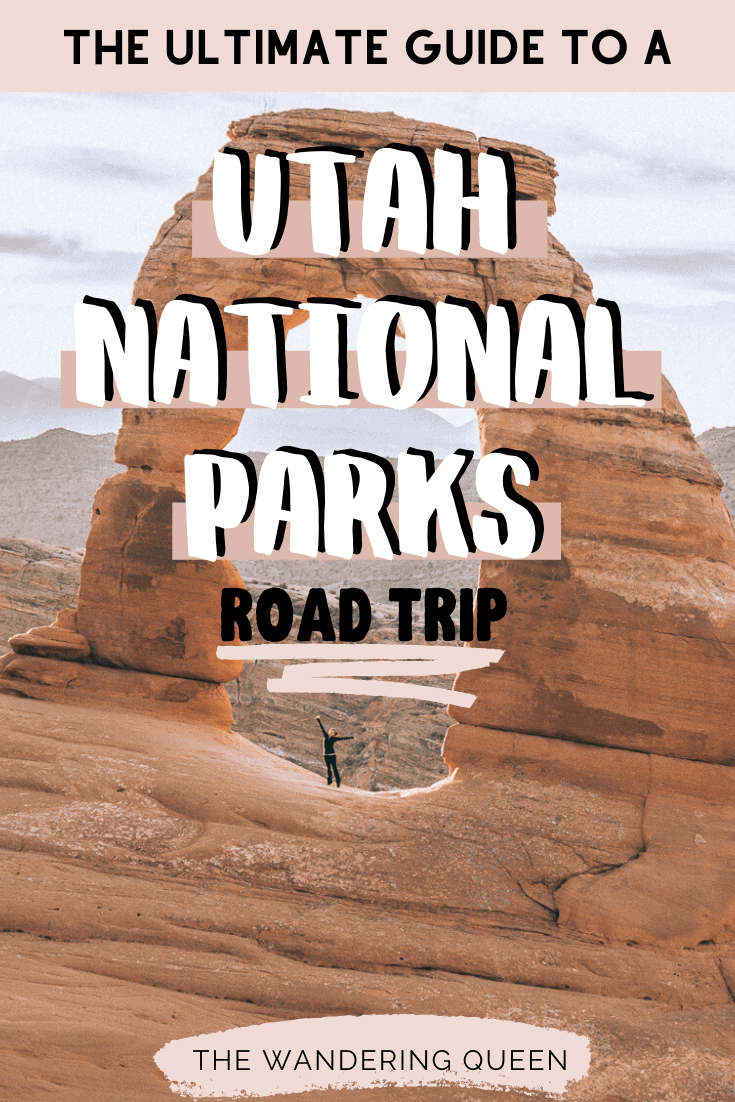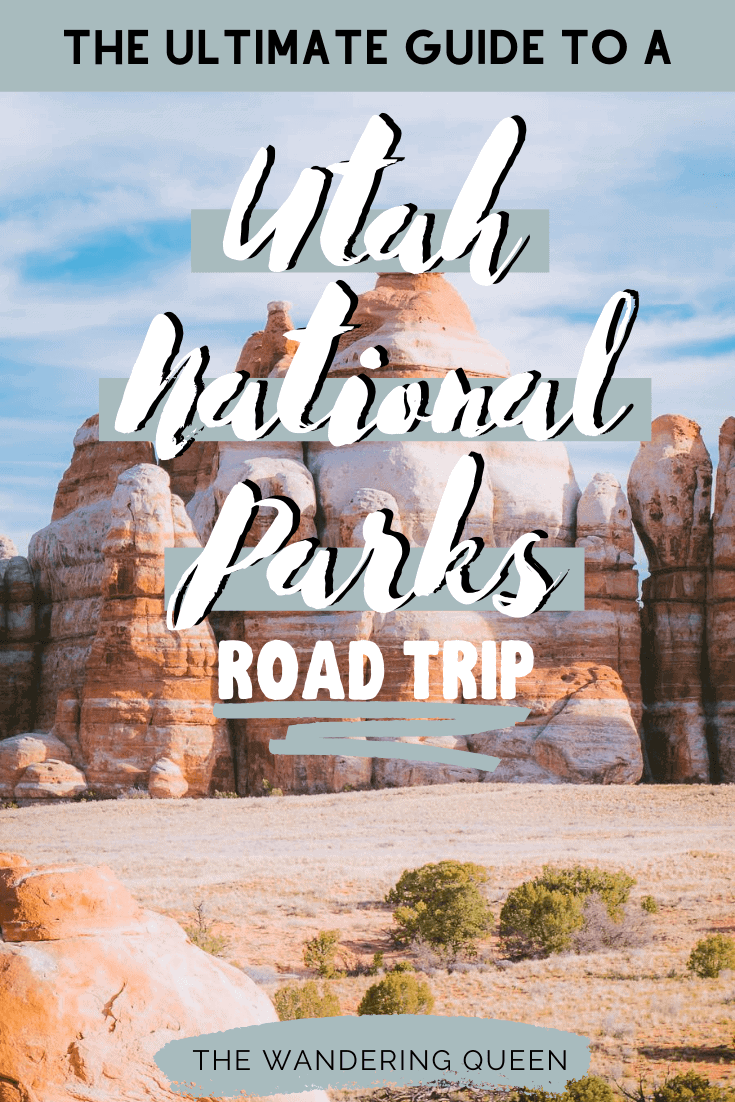
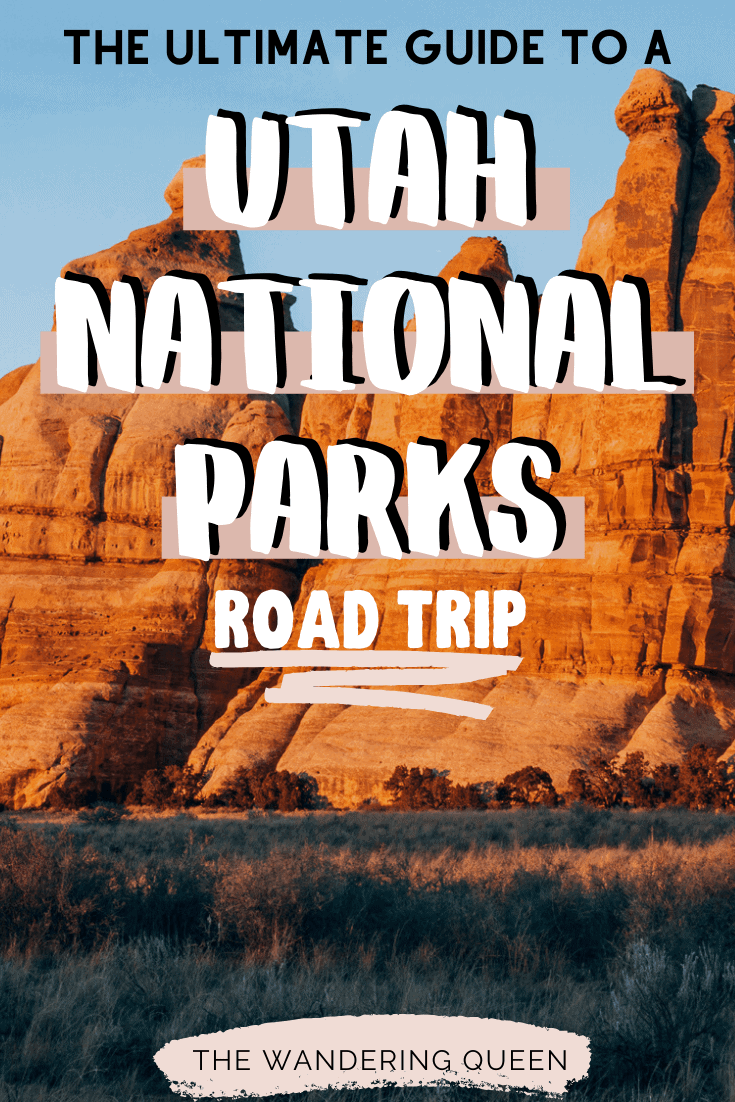
The Mighty 5 Utah: Utah National Parks Road Trip
My first ever national park was the world-famous Zion National Park. When I explored this magical place, I fell in love with Utah. It has some of the most beautiful natural formations I have ever seen. After that trip, I made sure to visit the rest of the national parks in Utah. And wow, none of the parks disappointed me, not even the least visited park, Capitol Reef. In this blog post, I will help you plan the perfect Utah National Parks road trip! Below I talk about the best things to do at each park, where to stay, and when to visit. This guide will help you plan the perfect trip! Enjoy!
Disclosure: This post contains affiliate links. If you click one of them, I may receive a small commission (for which I am very grateful for) at no extra cost to you.
Download my free Outdoor Photography Guide
What To Pack For The Mighty 5 Utah
Hiking
- Sunscreen: Super important and it is part of the ten essentials! >Buy Sunscreen
- Chapstick: This one has SPF so your lips won’t get burned in this hot sun! >Check Out This Chapstick
- Hiking Boots/Shoes: If you use tennis shoes, you can easily hurt your toes hitting a rock by accident (Trust me, I have done it so many times before). >Check Out My Hiking Shoes
- Hiking socks: Having the correct socks helps you prevent getting blisters. Smart Wool is probably my favorite brand out there. I also love how they now have pink socks too 🙂 >Buy Hiking Socks
- Water Reservoir: Water reservoirs help prevent me from getting dehydrated while hiking. The great thing about this reservoir is that it doesn’t have the plastic taste. >Here Is My Water Reservoir
- Water: Stay nice and hydrated.
- Sunglasses: It can get sunny, so make sure to pack some sunglasses. >Check Out These Sunglasses
- Snacks: The best snacks are jerky, nuts, and energy bars. Clif Bars are great for hiking.
- Camera: The Sony A6000 was one of the first cameras I started traveling with. The Sony A6000 is an excellent camera for people that want to start improving at travel photography. >Buy Sony Camera Here
- First Aid Kit: This is one of the first things I bought when I first started going on adventures. It is super portable. >Buy This Awesome First Aid Kit Here
- Day Pack to carry all your things: To carry all your gear, water, and food, you need a good backpack. Osprey is known to have some of the best backpacks in the market. >Buy This Great Quality Backpack
- Headlamp: A headlamp is an absolute must in case you get stranded in the dark! It is a lot more portable and easier to use than a flashlight. >Buy A Headlamp Now
- Leggings or Hiking Pants: I always wear leggings while hiking because it is what I feel most comfortable with! >Click For My Favorite Hiking Leggings
- Breathable sweat-wicking shirts: Cotton shirts soak up your sweat when hiking, so make sure to wear something breathable. >Check out this awesome breathable shirt here.
- Mid Base Layer: If you are hiking in the winter, this might be a great idea. >Check Out My Sweater Here
- Sports Bra: For women.
- Jacket: I always have a jacket in my backpack, even if it is hot. I do it just in case of an emergency. >Buy My Favorite Jacket
- Rain Jacket: The worst feeling in the world is being wet and cold while hiking. You can get hypothermia, so always carry a poncho or a rain jacket. >Check Out My Rain Jacket Here
- Tripod: This is an optional item, but it is excellent for getting the ideal sunset pictures. >Check out this tripod
- Knife: I always carry a knife in my backpack just in case. >Check Out My Knife Here
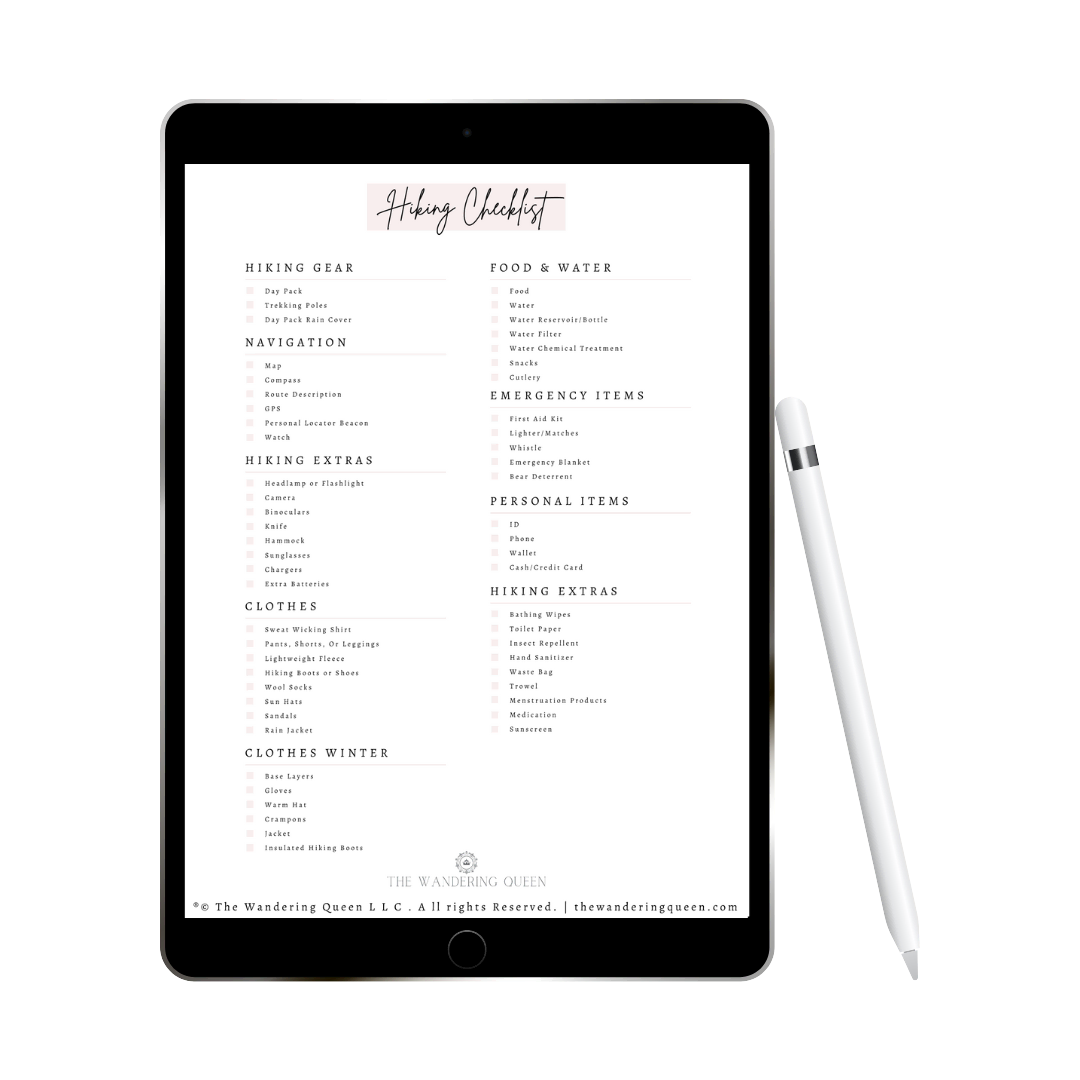
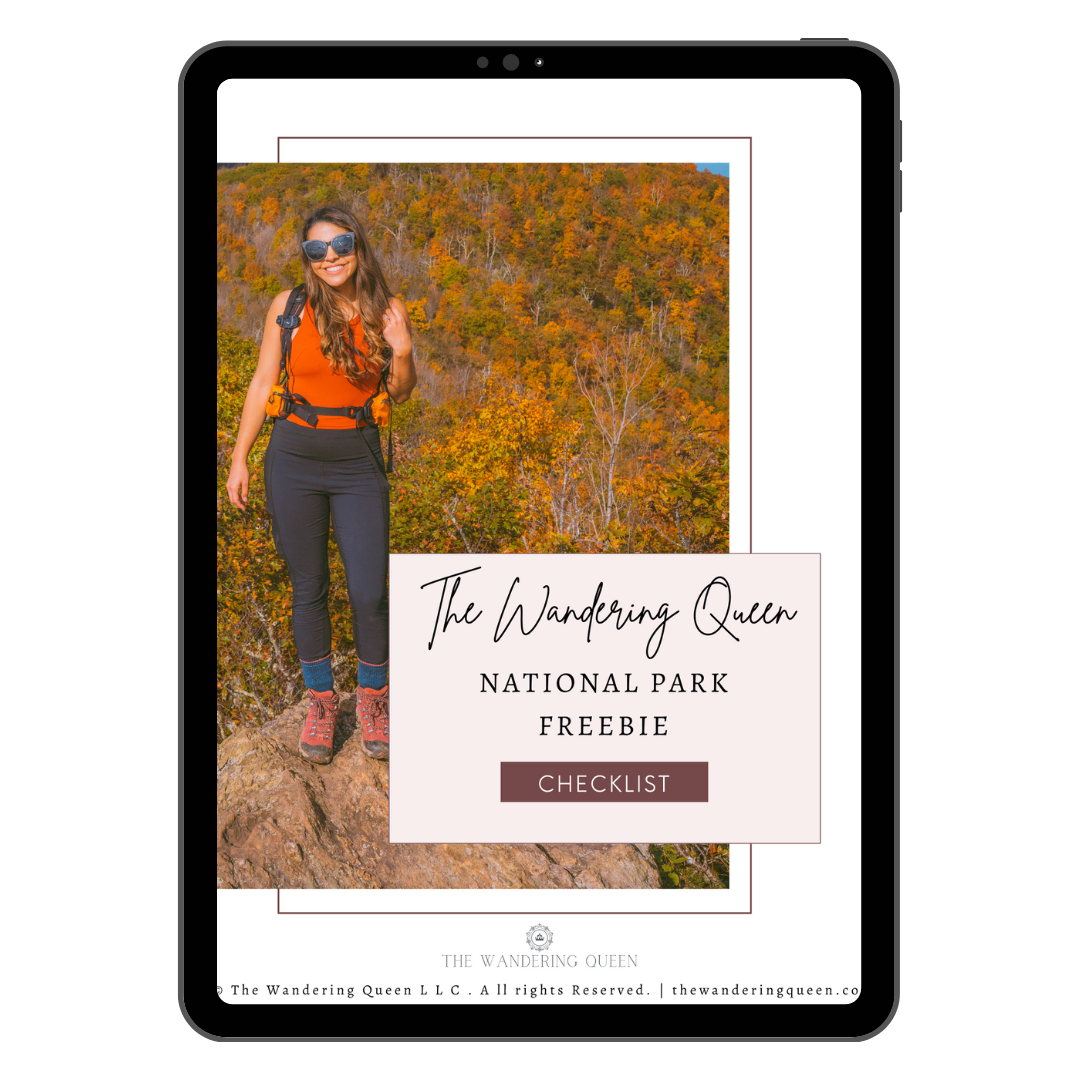
Claim your FREE Hiking Checklist
Ready to start hiking? Grab my free hiking checklist and never forget anything at home!
Camping
- Tent: I just bought this new Nemo 2 Person tent, and it packs so small, and it is light! >Buy The Nemo Backpacking Tent
- Jet Boil: This is a portable mini stove that will boil water for you. This is great if you are bringing dry food >Buy My Jet Boil
- Propane for Jet Boiler: You can buy this at Walmart or REI on the way to your campground.
- Sleeping Pad: A sleeping pad is pretty much a small, packable inflatable mattress. I have tried many types of sleeping pads (cheap ones, light ones, comfortable ones), and the one I have linked is probably the best one I have tried. My husband uses this pad. I will mention, it is on the heavier side, so I recommend this for car camping or short/easy backpacking trips. >Check Out My All-Time Favorite Sleeping Pad
- Spork: A spoon and fork in one. >Buy A Spork Now
- Headlamp: A headlamp is an absolute must! It is a lot more portable and easier to use than a flashlight. >Buy A Headlamp Now
- Pillows: Pillows can take a lot of room, so I recommend buying an inflatable one. The one I have linked, I have had for six years now, and it is STILL going strong. >Buy The EXTREMELY Packable Inflatable Pillows
- Sleeping Bag: One of the most critical aspects of getting a good nights sleep! Bringing a sleeping bag is a must. >Look At Prices
- Sandals: I hate wearing my hiking shoes when I am hanging around the campsite, so bringing some sandals for leisure is a must for me. I just bought these, and they are super comfortable. Perfect for camping. >Check Out These Sandals
- Trash Bags: Everything you pack in, you must pack out. Bring a few trash bags with you.
- Toothbrush, Toothpaste, Medicine & Toiletries
- Fire Starter: If you want to start a fire, this is an easier way. Just pile up the wood on top, and you are golden! >Buy This Cool No Match Needed Fire Starter
- Water Reservoir: You probably need more water than a water bottles’ worth. I use this when I go camping even if I don’t hike. It saves on waste on buying water bottles or water gallons and it saves money. >Here Is My Water Reservoir
- Coffee Maker: Y’all this coffee maker is awesome! It comes with a press and cute little cups! >Buy This Awesome Coffee set here
- Cookware Set: Love how packable my cookware set is. I can easily take it anywhere with me. We have used this countless times. >Buy My Cute Cookware Set
new on the shop
The Ultimate Camping Trip Planner!
Our camping trip planner helps you stay organized and plan all aspects of your adventure so that you can conquer new territories with ease.
Best Time To Visit Utah National Parks
I am a little biased since I lived in Texas my whole life, but, I will NOT visit a desert region in the summer. Sorry, I grew up experiencing the sweltering heat every day from April to October. I am not about to go hiking in hot weather like that, so I don’t recommend visiting Utah in the middle of summer.
But I do know that is when kids are out of school, so some can’t avoid it. Just bring extra water on your hikes and try to hike early in the morning. Zion, Canyonlands, Arches, and Capitol Reef was hot during the day, even though I went in the winter, but it would get cold at night.
- Spring/Fall: This is the best time to visit the national parks. The weather is pretty nice but that means more crowds!
- Summer: As I said above, I will probably never visit Utah during this time, but to each their own. Plan your hikes around the early morning or late afternoon.
- Winter: This is when I usually go to Utah. The weather is bearable, and there are not as many crowds. If you do go during this time, make sure you have enough winter clothes and camping gear. It does get pretty chilly at night.
Guide To Utah National Parks: Road Trip Tips
- I highly recommend buying the “America The Beautiful Pass”. It is a yearly pass that can get you into national forests and national parks. If you are doing all five national parks in Utah, it will save you money on the entrance fees. Plus you can go to other national parks for a year. >>>Buy It Here
- When you know you are going to a Utah National Park, I recommend booking accommodation ASAP. Things fill up fast nowadays. This includes campsites and permits, by the way.
- When it comes to experiencing a Utah National Park road trip, it is best to rent a campervan or a car if flying into an airport. You will be driving a lot! I recommend this over taking a tour bus.
- If you want to save money, the best way is by car camping or renting an RV. Hotels near national parks can be expensive. Plus you can usually cook food while camping.
- Get to the parks early! I know it is a pain to get up super early. I am ok with it, but my husband is not, but if you want more bang for your buck, get up early! People usually start to explore the parks around 10 am. If you can get there before then, you will enjoy it a lot more. I promise!
Want To Learn How To Plan A National Park Road Trip? Check Out This NP Planner Here
Map Of Utah National Parks
- A to B: McCarran International Airport to Zion National Park | 2 h 40 min – 3 h 10 min | 171 miles
- B to C: Zion National Park to Bryce Canyon National Park | 1 h 50 min | 85.0 miles
- C to D: Bryce Canyon National Park to Capitol Reef National Park | 2 h 20 min | 119 miles
- D to E: Capitol Reef National Park to Arches National Park | 2 h 20 min | 141 miles
- E to F: Arches National Park to Canyonlands National Park | 35 min | 28.7 miles
- F to G: Canyonlands National Park to Salt Lake City International Airport | 4 h – 4 h 20 min | 248 miles
Where To Fly Into For Utah National Parks
So the best airports to fly into are the Salt Lake City International Airport and the McCarran International Airport. If you fly into Salt Lake City, I would reverse this itinerary.
Read More: The Best National Park in Utah – All 5 Ranked From Best to Worst
Utah National Parks Road Trip
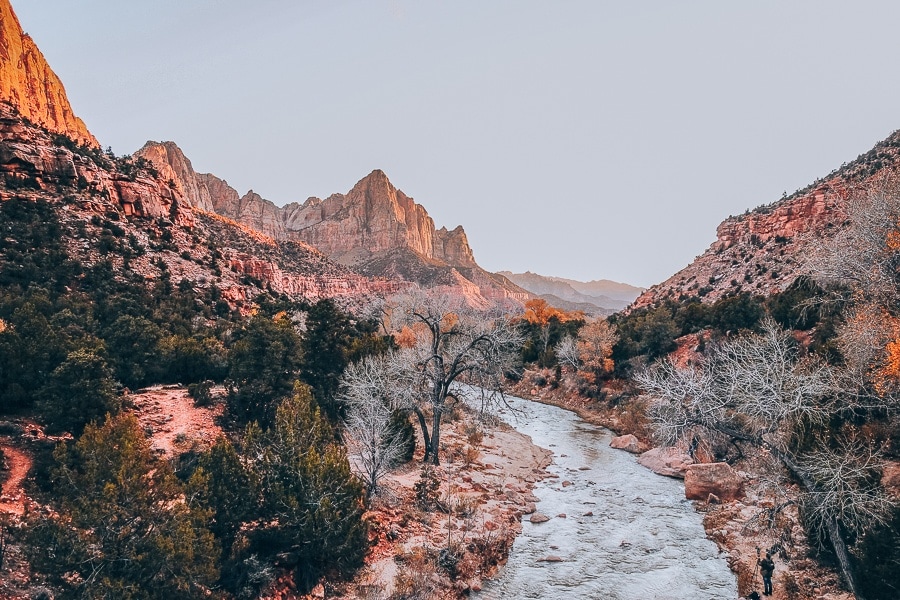
Zion National Park
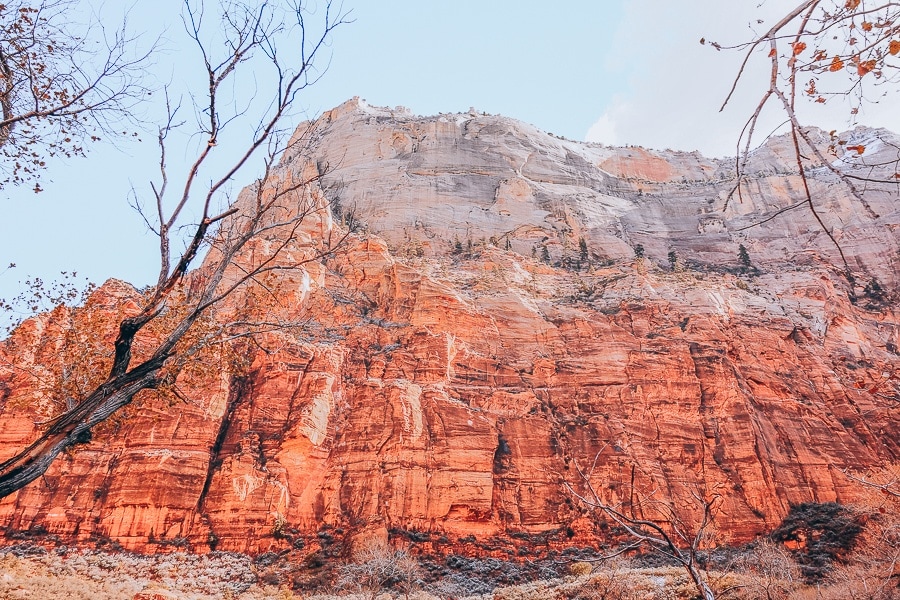
Ahhhh, Zion National Park. Wow, this park is my absolute favorite national park in the USA. Why? Because visiting this park made me fall in love with the outdoors which then catapulted my life into blogging and moving to Washington, where I am closer to trails. This park changed my life.
Now I am not saying it will change your life, but you will be astounded at the beauty surrounding you. The colors of the canyons look surreal at every angle, and you will want to stop every 5 minutes to take a picture. So out of all the parks on this list, I would put more days into this one (if you have any extra days). You will not be disappointed.
Please note that to get around this national park, you will need to get on shuttle buses. Be prepared to wait.
Read More: 15 Best Things To Do in Zion National Park
Things To Do In One Day
Angels Landing Hiking Trail
- Distance: 5.0 miles,
- Elevation Gain: 1,630 feet,
- Route Type: Out & Back
- Difficulty: Hard
- Trail Guide: Link
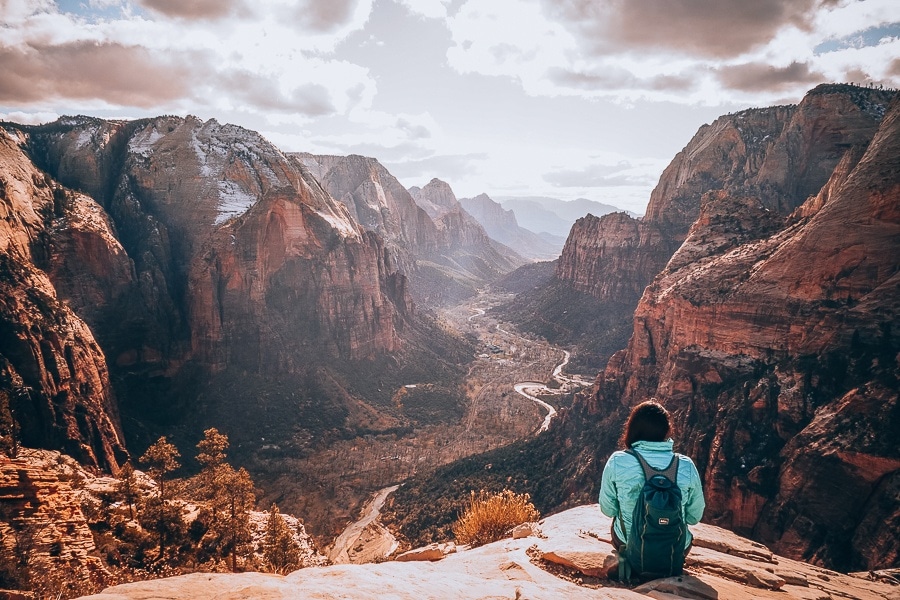
Okay, so since this park is one of the most beautiful ones in the USA, it will be crowded. I highly recommend you get up super early (yes before 8 am), to visit the world-famous Angels Landing. Angels Landing is probably the most popular hike at Zion and for a good reason. It has some of the best views, and it is a pretty unique hike. It can be a bit frightening for people with a fear of heights, and there are chains to help you get to the viewpoint.
I will note that I am afraid of heights, but luckily after rock climbing for years, I was able to temper my fears. I was still scared while doing Angels Landing, but I was able to control my fears.
Please, if you hike this trail, wear some hiking shoes, something with a good grip. It can get pretty icy at the top if you go during certain times of the year. We saw a guy nearly fall off the cliff, and he was wearing converse on icy terrain. Luckily a rock that was jutted out saved him, but it was still pretty crazy to witness someone almost falling to their death. Wear good shoes.
The Narrows Hiking Trail
- Distance: Up to 15 miles,
- Elevation Gain: 1,017 feet,
- Route Type: Out & Back
- Difficulty: Moderate
- Trail Guide: Link
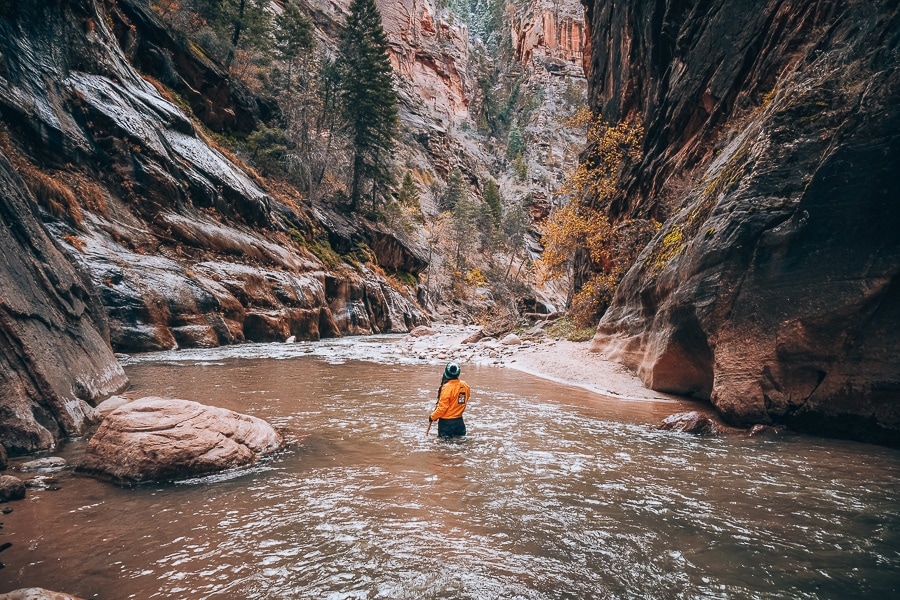
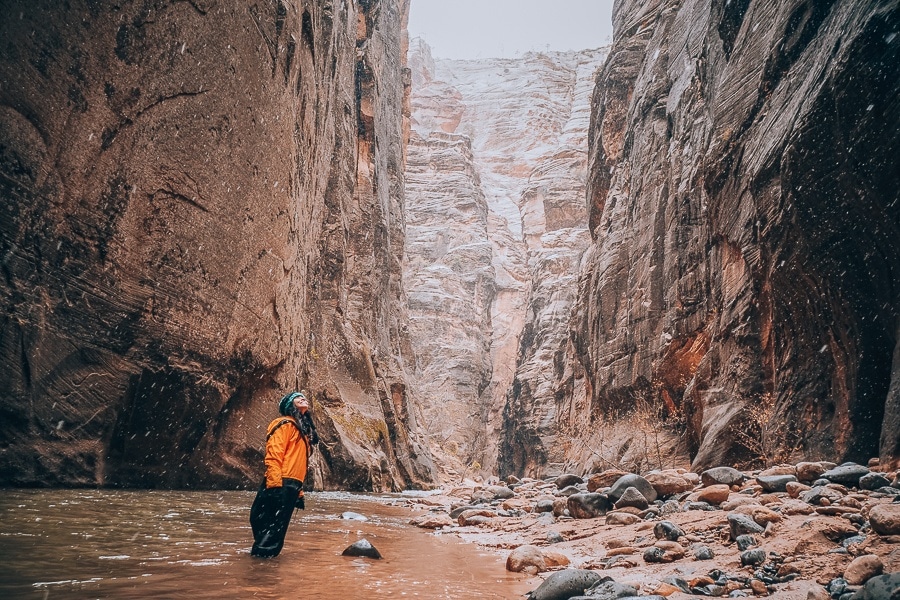
After getting up early to witness Angels Landing’s beauty, make sure you check out the Narrows. OMG, I love this trail!!! And it even snowed while we were hiking through it. It was fantastic. Since we went in the wintertime, there weren’t many people. But you do have to wear a dry suit or dry pants to keep you warm, so you don’t get hypothermia. You can rent the gear here. You can also rent warm weather gear like shoes and a stick. I think a stick or trekking poles are beneficial on this hike. You can not see where your feet are going, so it helps with balance.
Canyon Junction Bridge Viewpoint
This viewpoint was one of my first experiences at Zion. We got there around sunset, and we saw this spot, and we stopped to take pictures. It is a lovely area for sunset pictures.
If You Had More Time
I would try to stay more than one day at Zion National Park. There is just so much to do there and so many great hikes! Here are some other hikes I suggest doing if you have more time:
- Observation Point: Distance: 7.0 miles | Elevation Gain: 702 feet| Difficulty: Moderate | Trail Guide: Link
- Emerald Pools Trail: Distance: 3.0 miles | Elevation Gain: 646 feet | Difficulty: Easy | Trail Guide: Link
- The Subway: Distance: Distance: 7.0 miles | Elevation Gain: 1,305ft | Difficulty: Strenuous | Trail Guide: Link
- Canyon Overlook Trail: Distance: 1 mile | Elevation Gain: 442 feet | Difficulty: Moderate | Trail Guide: Link
Read More: 10 Best Hikes in Zion National Park | Top Trails & More
Places To Stay
- Zion National Park Lodge: If you want to stay inside the national park (Which I always recommend), you need to check out this lodge! Getting to your destinations will be so much easier, I promise. It is expensive but the location is worth it! >Check It Out Here
- La Quinta by Wyndham: This hotel is located outside of Zion National park, but it is pretty close. The views are pretty amazing, and it is a clean hotel to stay at. It is excellent if you want to save some money but still want to be close to Zion. >>>Book This Great Location Here
- Campgrounds: There are three campgrounds in Zion National Park. South and Watchman Campgrounds are in Zion Canyon. The Lava Point Campground is about a 1-hour drive from Zion Canyon. I stayed at one of the campgrounds (Watchman Campground) and enjoyed it. During certain times of the year, it is first come first serve, but you can reserve during peak season. I highly recommend reserving. I did it around six months in advance, and it was worth it. >>>Reserve Here
Read More: Where To Stay in Zion National Park
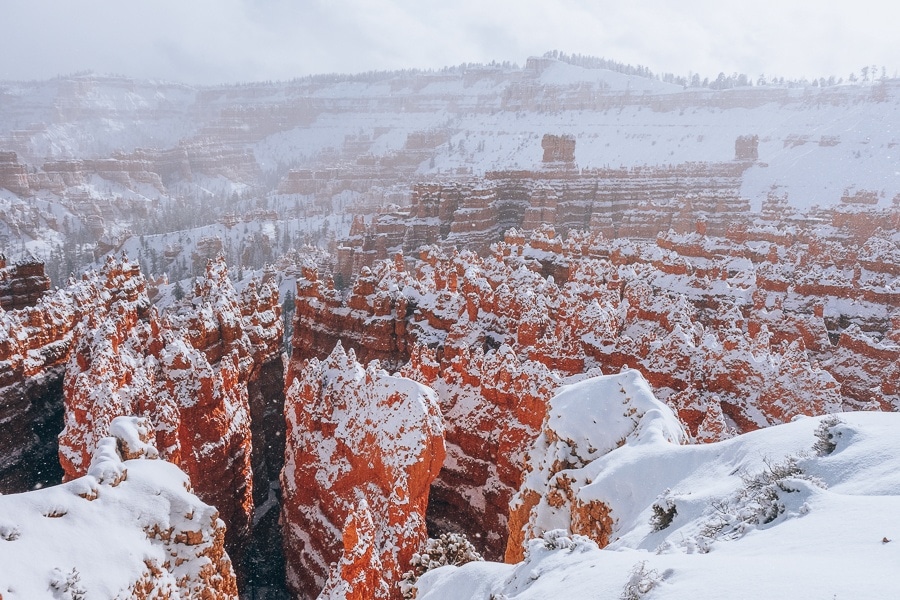
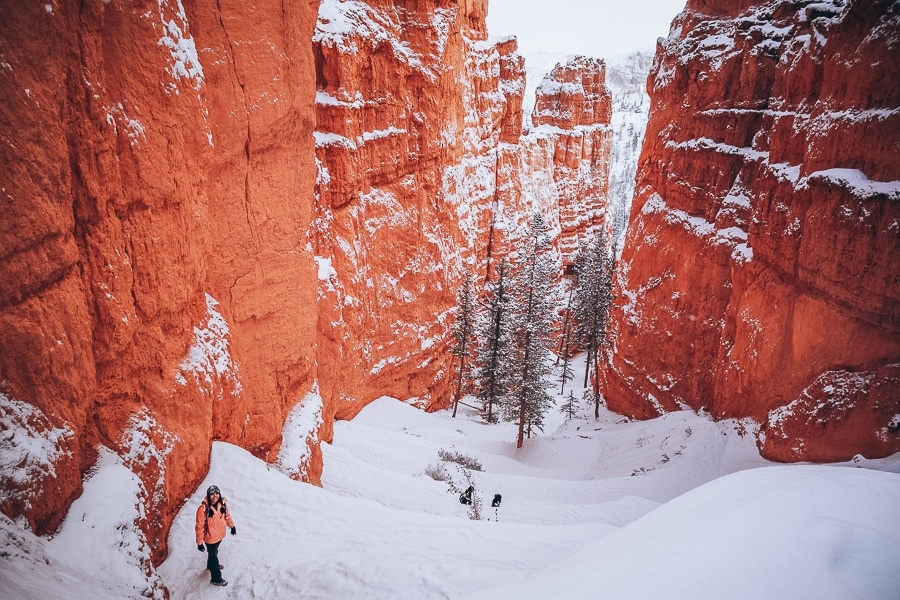
Bryce Canyon National Park
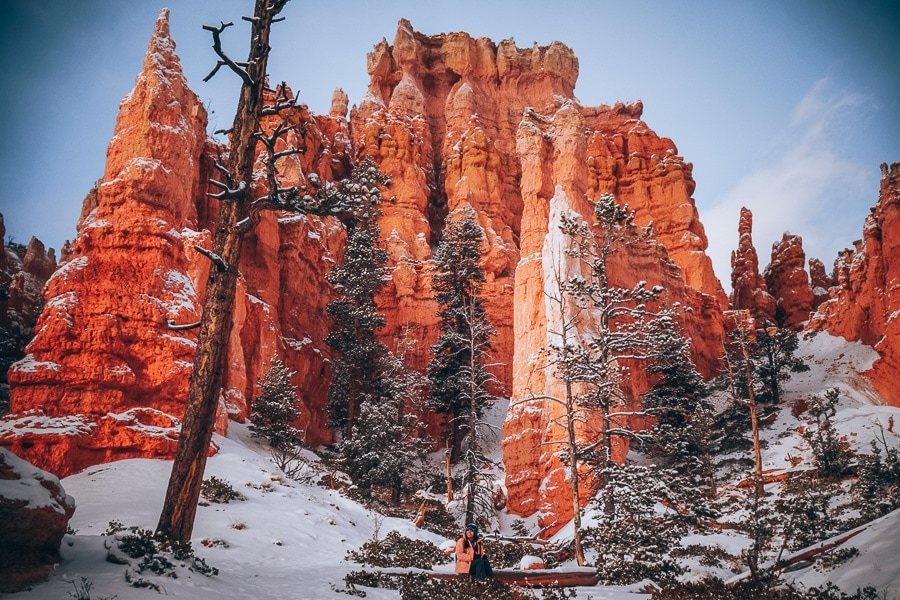
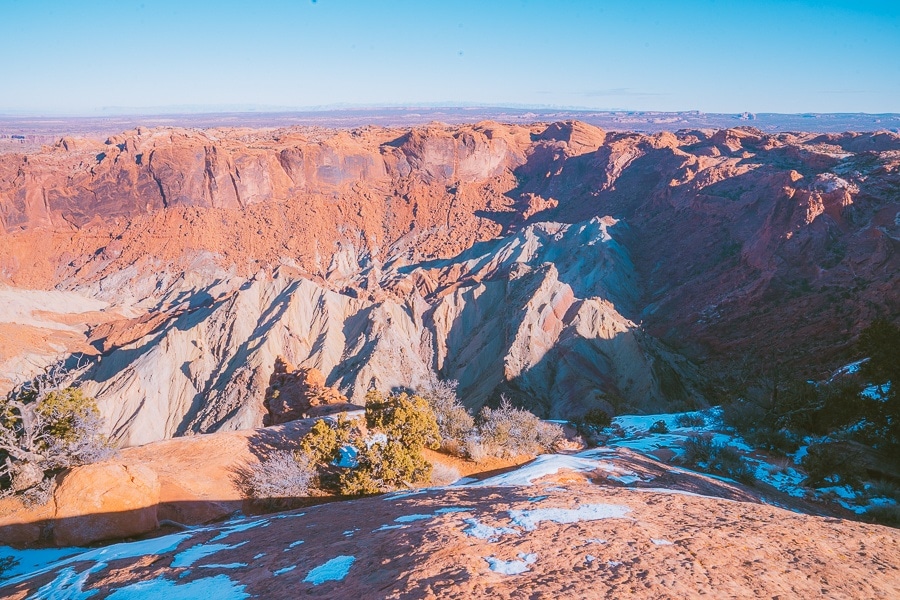
A lot of people compare Zion and Bryce Canyon since they are pretty close to each other. If you visit Zion National Park, you have to lump Bryce Canyon into your trip as well. Bryce is a pretty small park that doesn’t need much time to explore. It has beautiful views of hoodoos(my favorite word in the world), and sandstone pillars. I fell in love with this park the moment I saw it. I will say that if you visit in the winter, there will most likely be snow. It is at a higher elevation than Zion National Park. I don’t recommend camping in the winter unless you are a seasoned winter camper.
Read More: The Ultimate Bryce Canyon Winter Guide
Things To Do In One Day
Check Out The 4 Main Viewpoints: Sunrise Point, Sunset Point, Inspiration Point, and Bryce Point
I would start your day at sunrise point. The views here are glorious in the morning sun. Sunset Point and Inspiration Point are best in the afternoon glow, Bryce Point looks fabulous throughout the whole day and is also a popular birding spot; keep an eye out for the rare California condor.
Navajo Loop and Queen’s Garden Trail
- Distance: 2.9 miles,
- Elevation Gain: 629 feet,
- Route Type: Loop
- Difficulty: Moderate
- Trail Guide: Link
I loved this hike! It was super fun and adventurous, and getting close up to the hoodoos was terrific. We could not stop taking pictures. This was probably my favorite part of Bryce, and we were lucky to be one of the only people hiking this trail.
If You Had More Time
- Rainbow Point and Yovimpa Point: Beautiful viewpoint located in South Bryce Canyon.
- Peekaboo Loop Trail: Distance: 5.2 miles | Elevation Gain: 1,453 feet| Difficulty: Moderate | Trail Guide: Link
- Fairyland Loop Trail: Distance: 7.8 miles | Elevation Gain: 1,545 feet| Difficulty: Moderate | Trail Guide: Link
Places To Stay
- The Lodge at Bryce Canyon: This is the only hotel located in the national park. It was built in the 1920s, so it is pretty historic. There are no TV’s in the room to preserve the lodge’s rustic feel. >>>Book Here
- Best Western PLUS Ruby’s Inn: This is the hotel we stayed at. It is pretty close to the park, has a rustic feel to it, restaurants, and a little grocery store. >>>Check Prices Here
- Campgrounds: Bryce Canyon National Park has two campgrounds: North and Sunset. North is first come first serve, and Sunset Campground accepts reservations during peak season. >>>Make A Reservation Here
Read More: Where to Stay in Bryce Canyon National Park | 15 Amazing Lodging & Tips
Grab Your Free Car Camping Checklist! 🚗🌲
Ready to elevate your car camping game? Snag our essential checklist to ensure you’ve got everything you need for a stress-free, fun-filled adventure! Perfect for beginners and seasoned campers alike. Download now and hit the road prepared! 🌟🎒
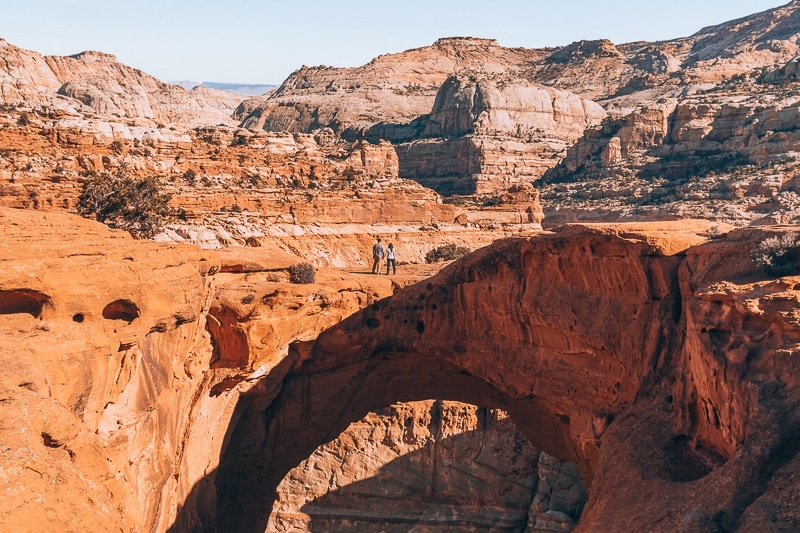
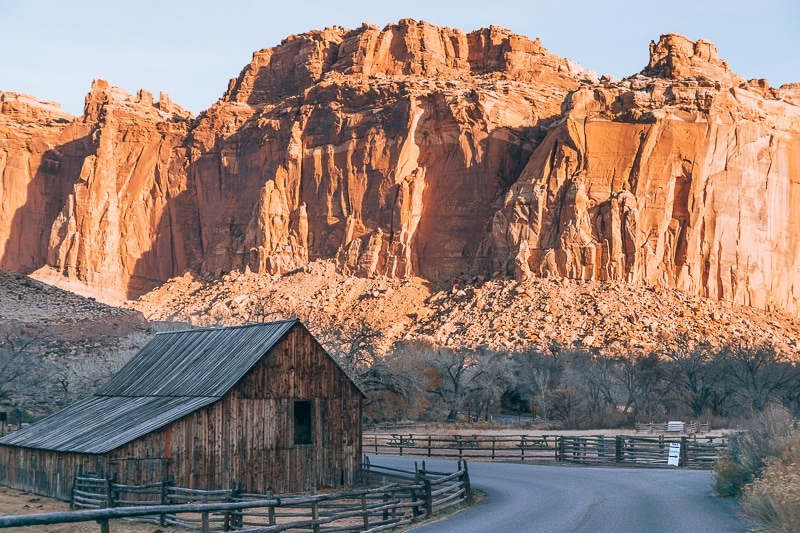
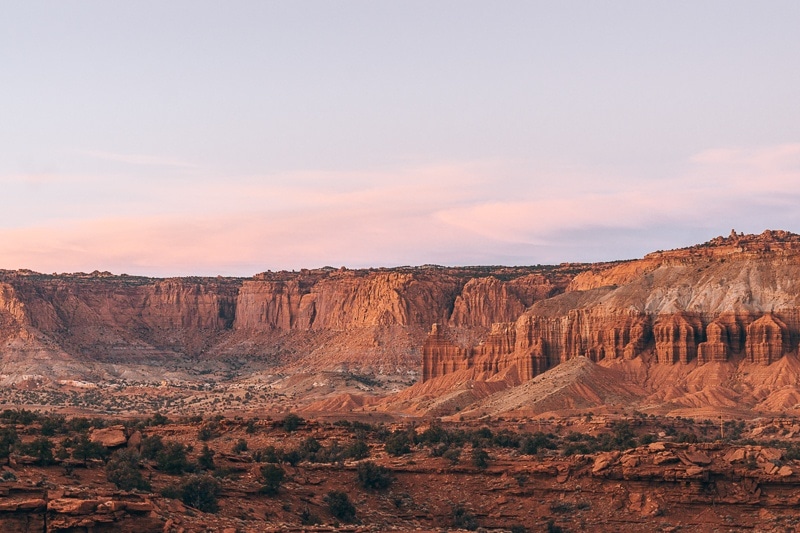
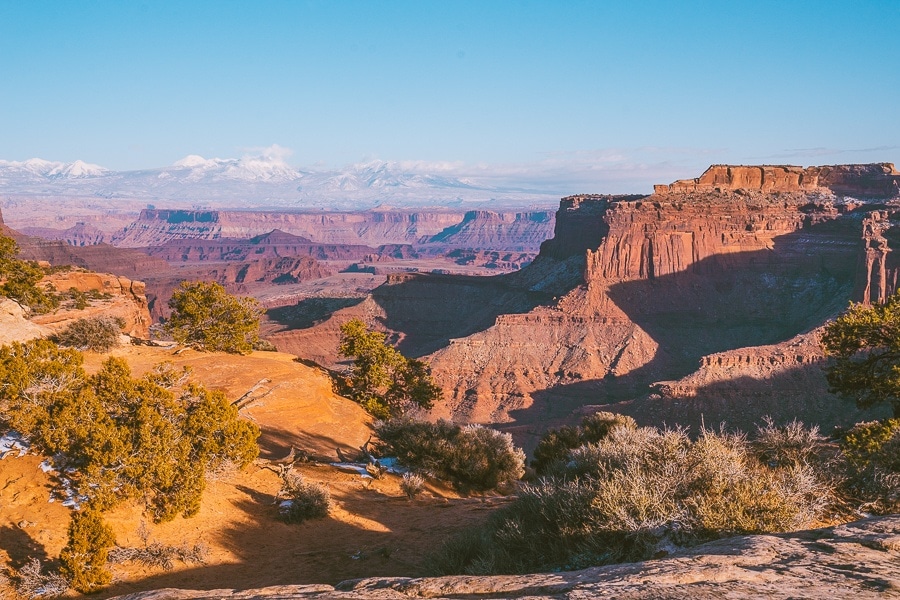
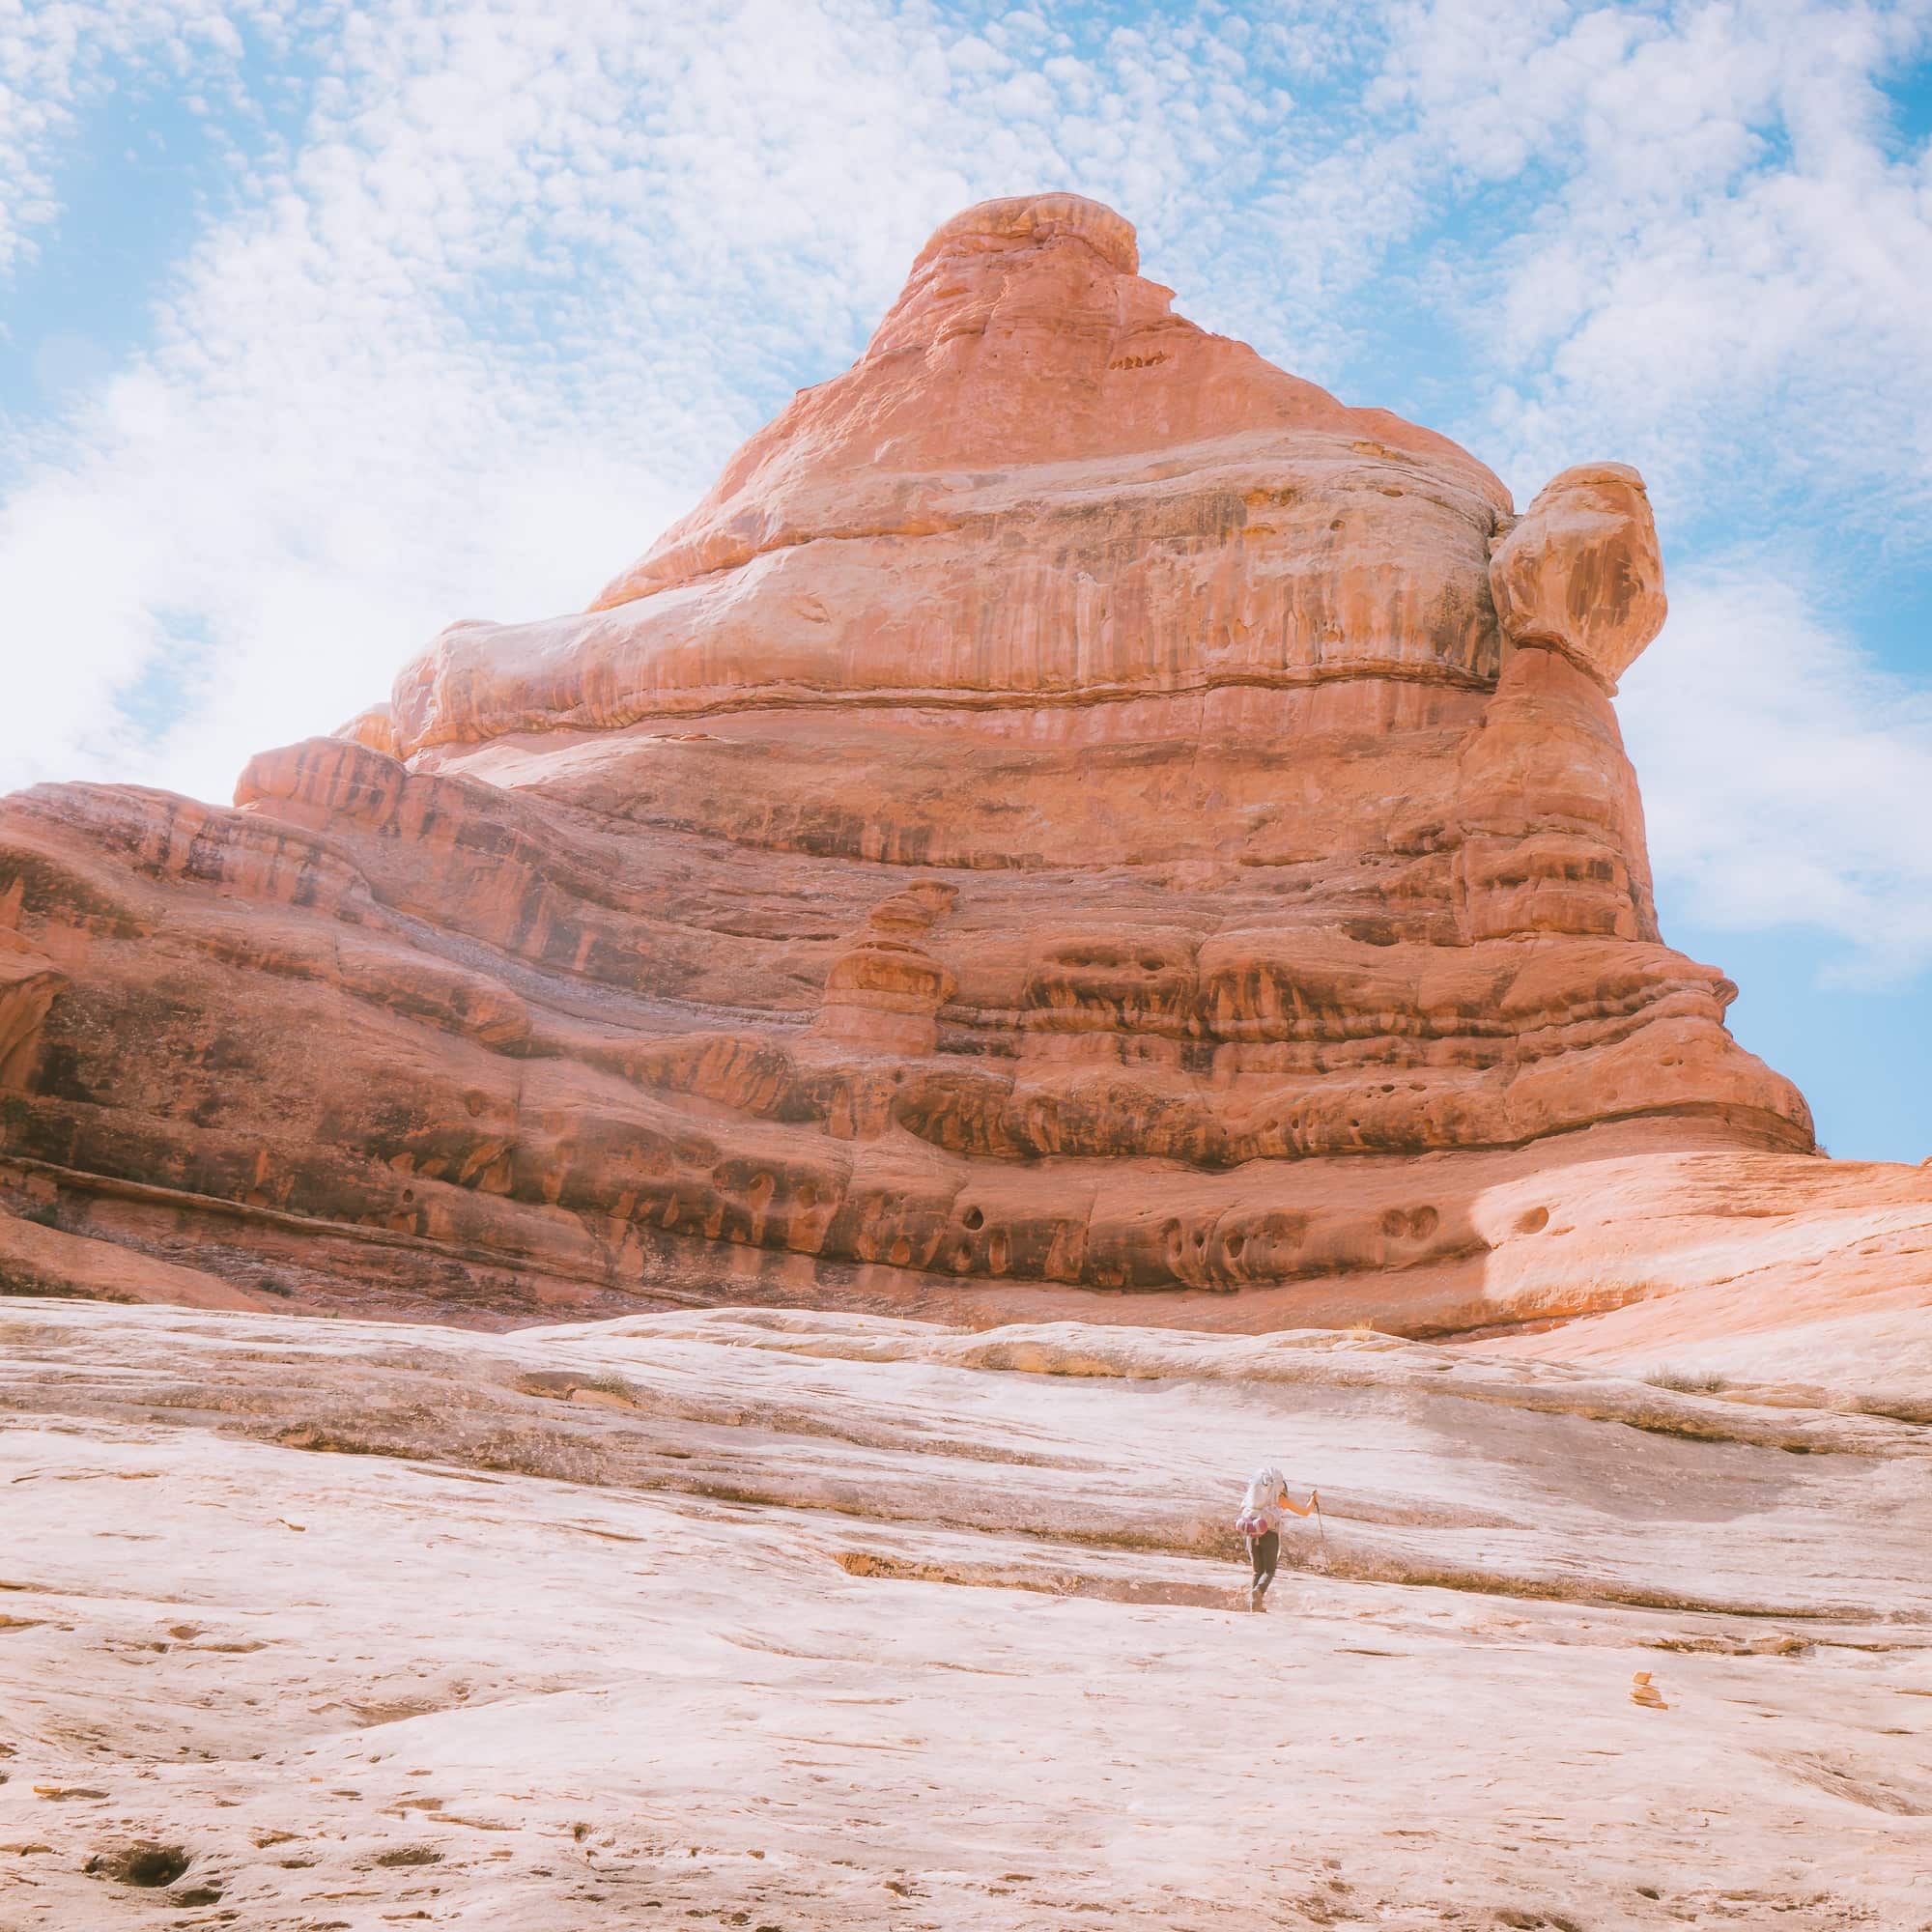
Capitol Reef National Park
Capitol Reef National Park is the least visited park on this list. I am not sure why, as it is still a phenomenal park. There are many things to do, and the views are outstanding.
I enjoyed all the hikes we did, and I wish we had stayed a lot longer. I, like many others before me, underestimated just how fantastic this national park was. I stayed for a night, but I wish I would have stayed for more.
Things To Do In One Day
Cassidy Arch Hike
- Distance: 3.1 miles
- Elevation Gain: 666 ft
- Route Type: Out and Back
- Difficulty: Moderate
- Trail Guide: Link
This was my favorite trail in Capitol Reef. It had fantastic views throughout the hike, and it was fairly doable. If you are only at Capitol Reef for the day, then you need to do this hike. I would probably do this hike first because it can get pretty hot. You are exposed to the sun throughout the whole walk.
Hickman Bridge Hike
- Distance: 1.8 miles
- Elevation Gain: 442 ft
- Route Type: Out and Back
- Difficulty: Moderate
- Trail Guide: Link
I hiked this trail after the Cassidy Arch hike, and it is a great short hike to do with the whole family. I like that you can explore the area around the arch. Please note that you can not get on top of the arch.
Historic Fruita and Gifford House
After you are done with the hikes, you have to check out the Historic Fruita area. If you are around at the right season, you can pick fruit and eat at the famous pies at the Gifford House.
Read More: Best Capitol Reef Hikes
Goosenecks and Sunset Point Hike
- Distance: 0.5 miles
- Elevation Gain: 50 ft
- Route Type: Out and Back
- Difficulty: Easy
- Trail Guide: Link
Okay, I know it is a lot to do in a day, but this is the last thing to do! This was my favorite sunset spot; it was so short and freaking worth it! I will note that the trail guide linked above has this hike at 2.5 miles long, but in Reality, you can park right next to Gooseneck and make it into 0.5 miles round trip.
If You Had More Time
- Cathedral Loop Drive: Beautiful views. Please note you shouldn’t drive here with a low clearance car.
- Petroglyphs Panel: A short trail to drawings made by Ancient Native Americans from approximately AD 600 to 1300.
- Panorama Point: Another great, easy to visit sunset viewpoint.
- Chimney Rock Trail: Distance: 3.3 miles | Elevation Gain: 793 feet| Difficulty: Moderate | Trail Guide: Link
- Rim Overlook Trail: Distance: 4.1 miles | Elevation Gain: 1,053 feet| Difficulty: Hard | Trail Guide: Link
Want To Read More On Capitol Reef: Click Here On A Capitol Reef National Park Guide
Places To Stay
Please note that there are no hotels inside of Capitol Reef National Park.
- Red Sands Hotel: I love how modern and chic this hotel is. It has this light, airy feel/vibe to it, that is not generally in hotels near national parks. It is only 3 miles away from Capitol Reef, so it is super close! >Book Your Hotel Here
- The Noor Hotel: The views and the location are incredible as there are many restaurants nearby. This is a great budget hotel. >Book Your Hotel Here
- Fruita Campground: The only developed campground in Capitol Reef, and I highly recommend staying here. You can make reservations from March 1st – October 31st, and it is first come first serve anytime before or after that. We were here during Thanksgiving, and we did not have a problem finding a spot as it was pretty empty. For more information on Fruita, click here.
Read More: Where to Stay Near Capitol Reef National Park | 12 Best Hotels
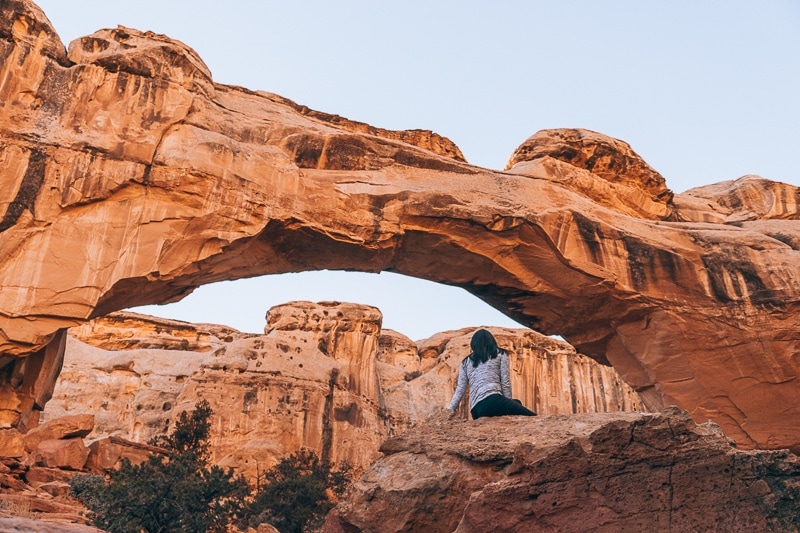
Arches National Park
Things To Do In One Day
Delicate Arch Trail
- Distance: 3.0 miles
- Elevation Gain: 610 ft
- Route Type: Out and Back
- Difficulty: Moderate
- Trail Guide: Link
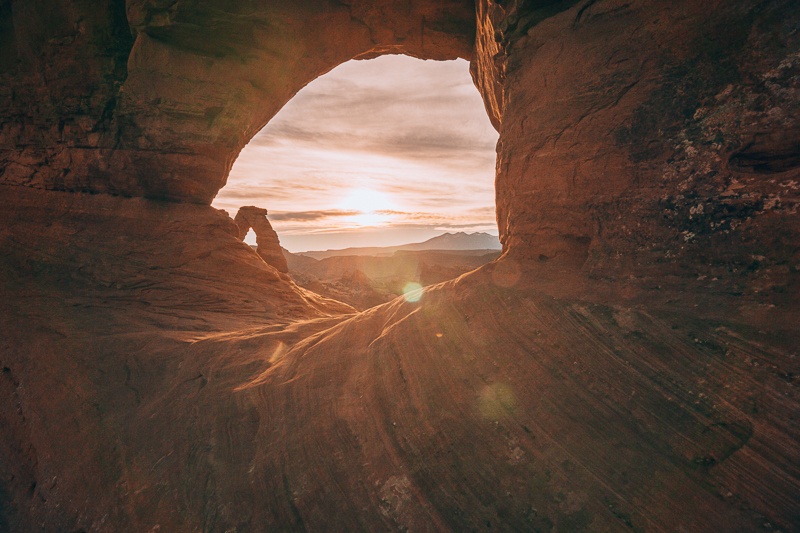
I did this hike for sunrise, and it did not disappoint!!! If you only had one hike to do at Arches, this would be it. If you go in the middle of the day, you will most likely have huge crowds, so I recommend sunrise. We had this all to ourselves (please note that this was in the winter when there are fewer crowds).
Need More Information On Hiking The Delicate Arch Check-Out: Hiking The Delicate Arch Trail
Devils Garden Loop Trail with 7 Arches
- Distance: 7.9 miles
- Elevation Gain: 610 ft
- Route Type: Loop
- Difficulty: Strenuous
- Trail Guide: Link
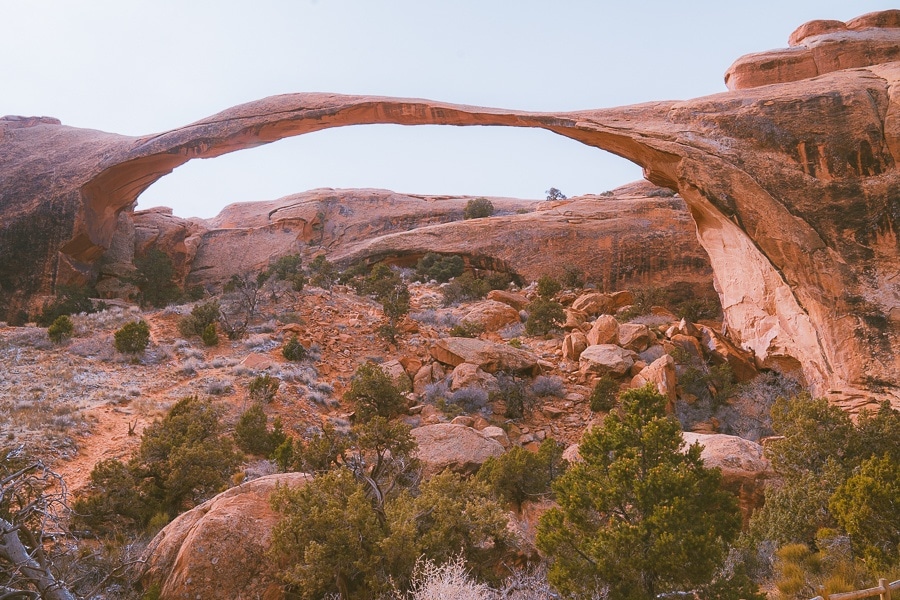
This is a fantastic hike with seven natural arches! How cool is that? It is a strenuous hike, so make sure you bring plenty of water, especially if you do this in the summer. If you feel like 7 miles is too much, no worries, you can always make it shorter by only viewing the famous Landscape Arch (1.6 miles round trip). The whole loop will consist of scrambling so bring good hiking boots. It can get sketchy in some areas so I only recommend the whole loop to moderate to advanced hikers.
If You Had More Time
- Fiery Furnace and Surprise Arch: Distance: 1.7 miles | Elevation Gain: 436 feet| Difficulty: Moderate | Trail Guide: Link | Need Permit From Visitors Center*
- Balanced Rock Loop Trail: Distance: 0.3 miles | Elevation Gain: 55 feet| Difficulty: Easy | Trail Guide: Link
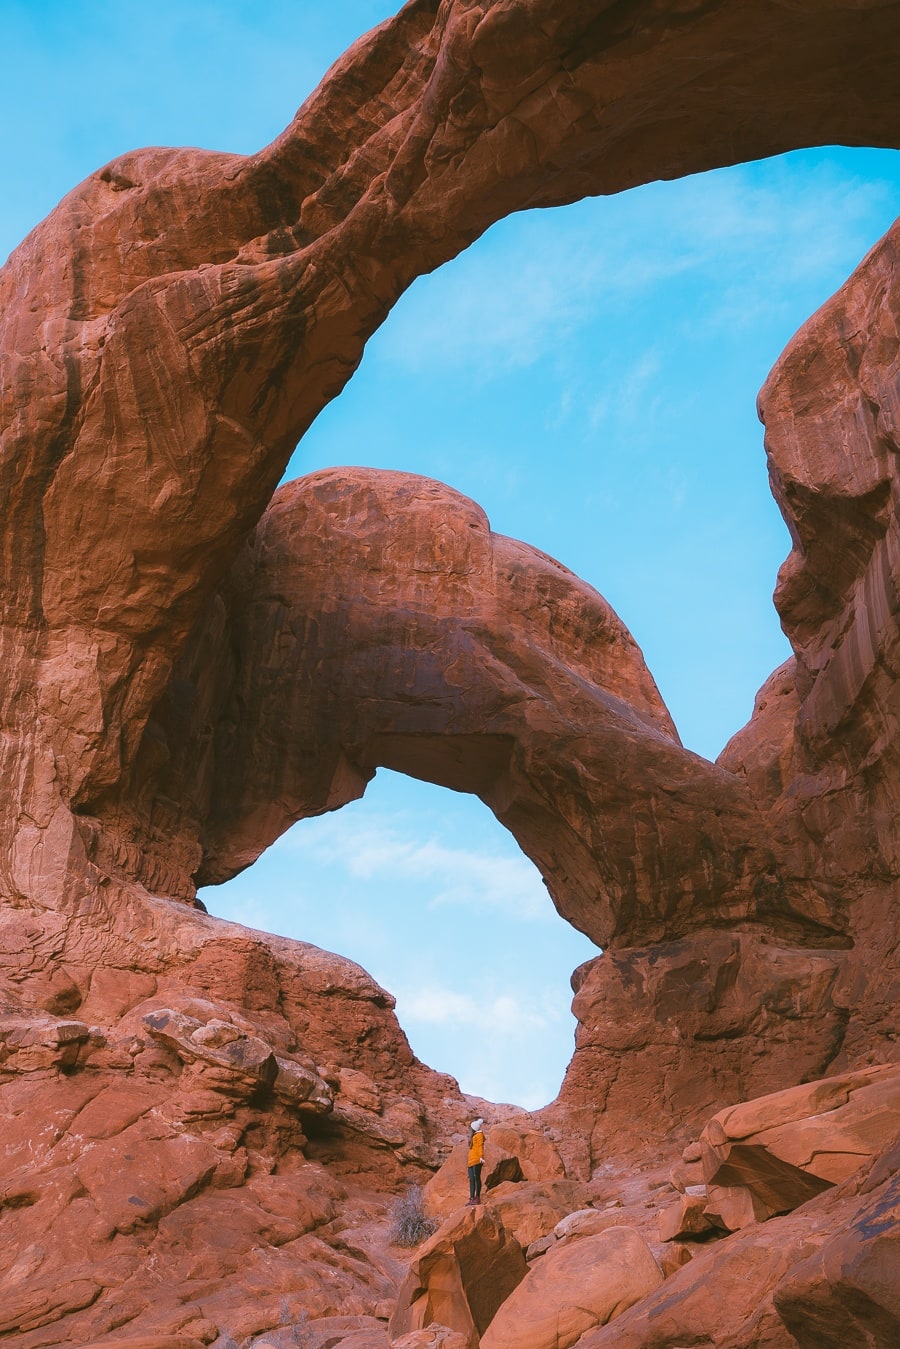
- Windows Loop and Turret Arch Trail: Distance: 1.2 miles | Elevation Gain: 154 feet| Difficulty: Easy | Trail Guide: Link
- Double Arch Trail: Distance: 0.6 miles | Elevation Gain: 95 feet| Difficulty: Easy | Trail Guide: Link
Read More On Arches National Park: The 10 Best Hikes In Arches National Park

Note: From April 1 to October 31st, 2024 Arches will implement a pilot timed entry system to help manage traffic and improve visitor experiences. I am so excited about this because the park was already crowded in the winter, so I can’t even imagine how it is in the spring and summer. Reserve your tickets here.
Places To Stay
Please note that there are no hotels inside of Arches National Park. The closest hotels are located in Moab, and I would stay there to experience both Arches and Canyonlands National Park.
- Red Cliffs Lodge: Has the impressive sunset views of the Colorado River, especially with your private patio. The area includes a winery, a western film museum, a horse corral, and an outdoor pool and gym. Yeah, this place has it all. >Check For Prices
- Expedition Lodge: It is a budget-friendly hotel with a swimming pool with a waterslide and a hot tub. There is also an option for private rooms for up to 6 people. A perfect choice for a family vacation. >Check For Prices
- Devils Garden Campground: This is the only campground in Arches National Park and you can reserve it from March-October. >You Can Make Reservations Here
Read More: Where to Stay in Moab, Utah – 12 Best Hotels, Lodges & Rentals
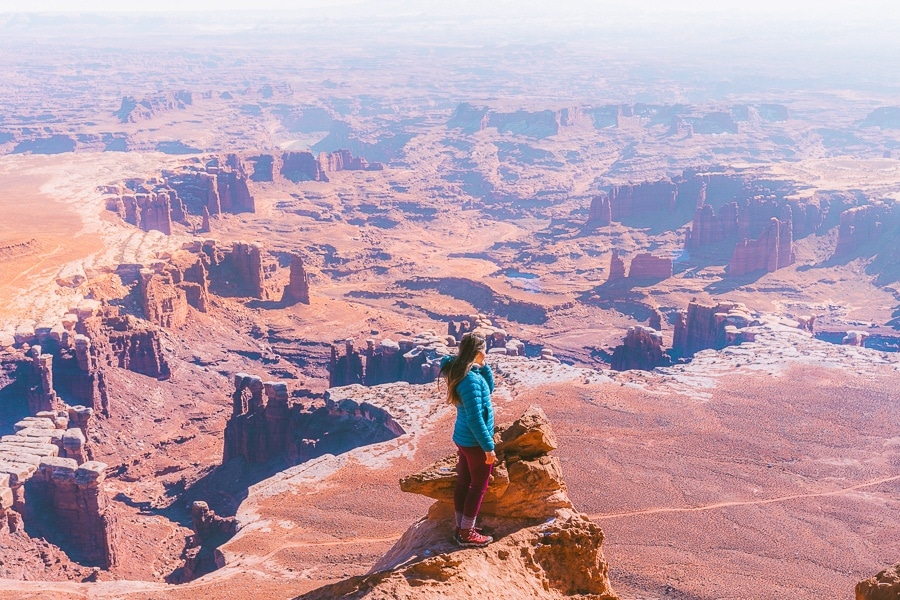
Canyonlands National Park
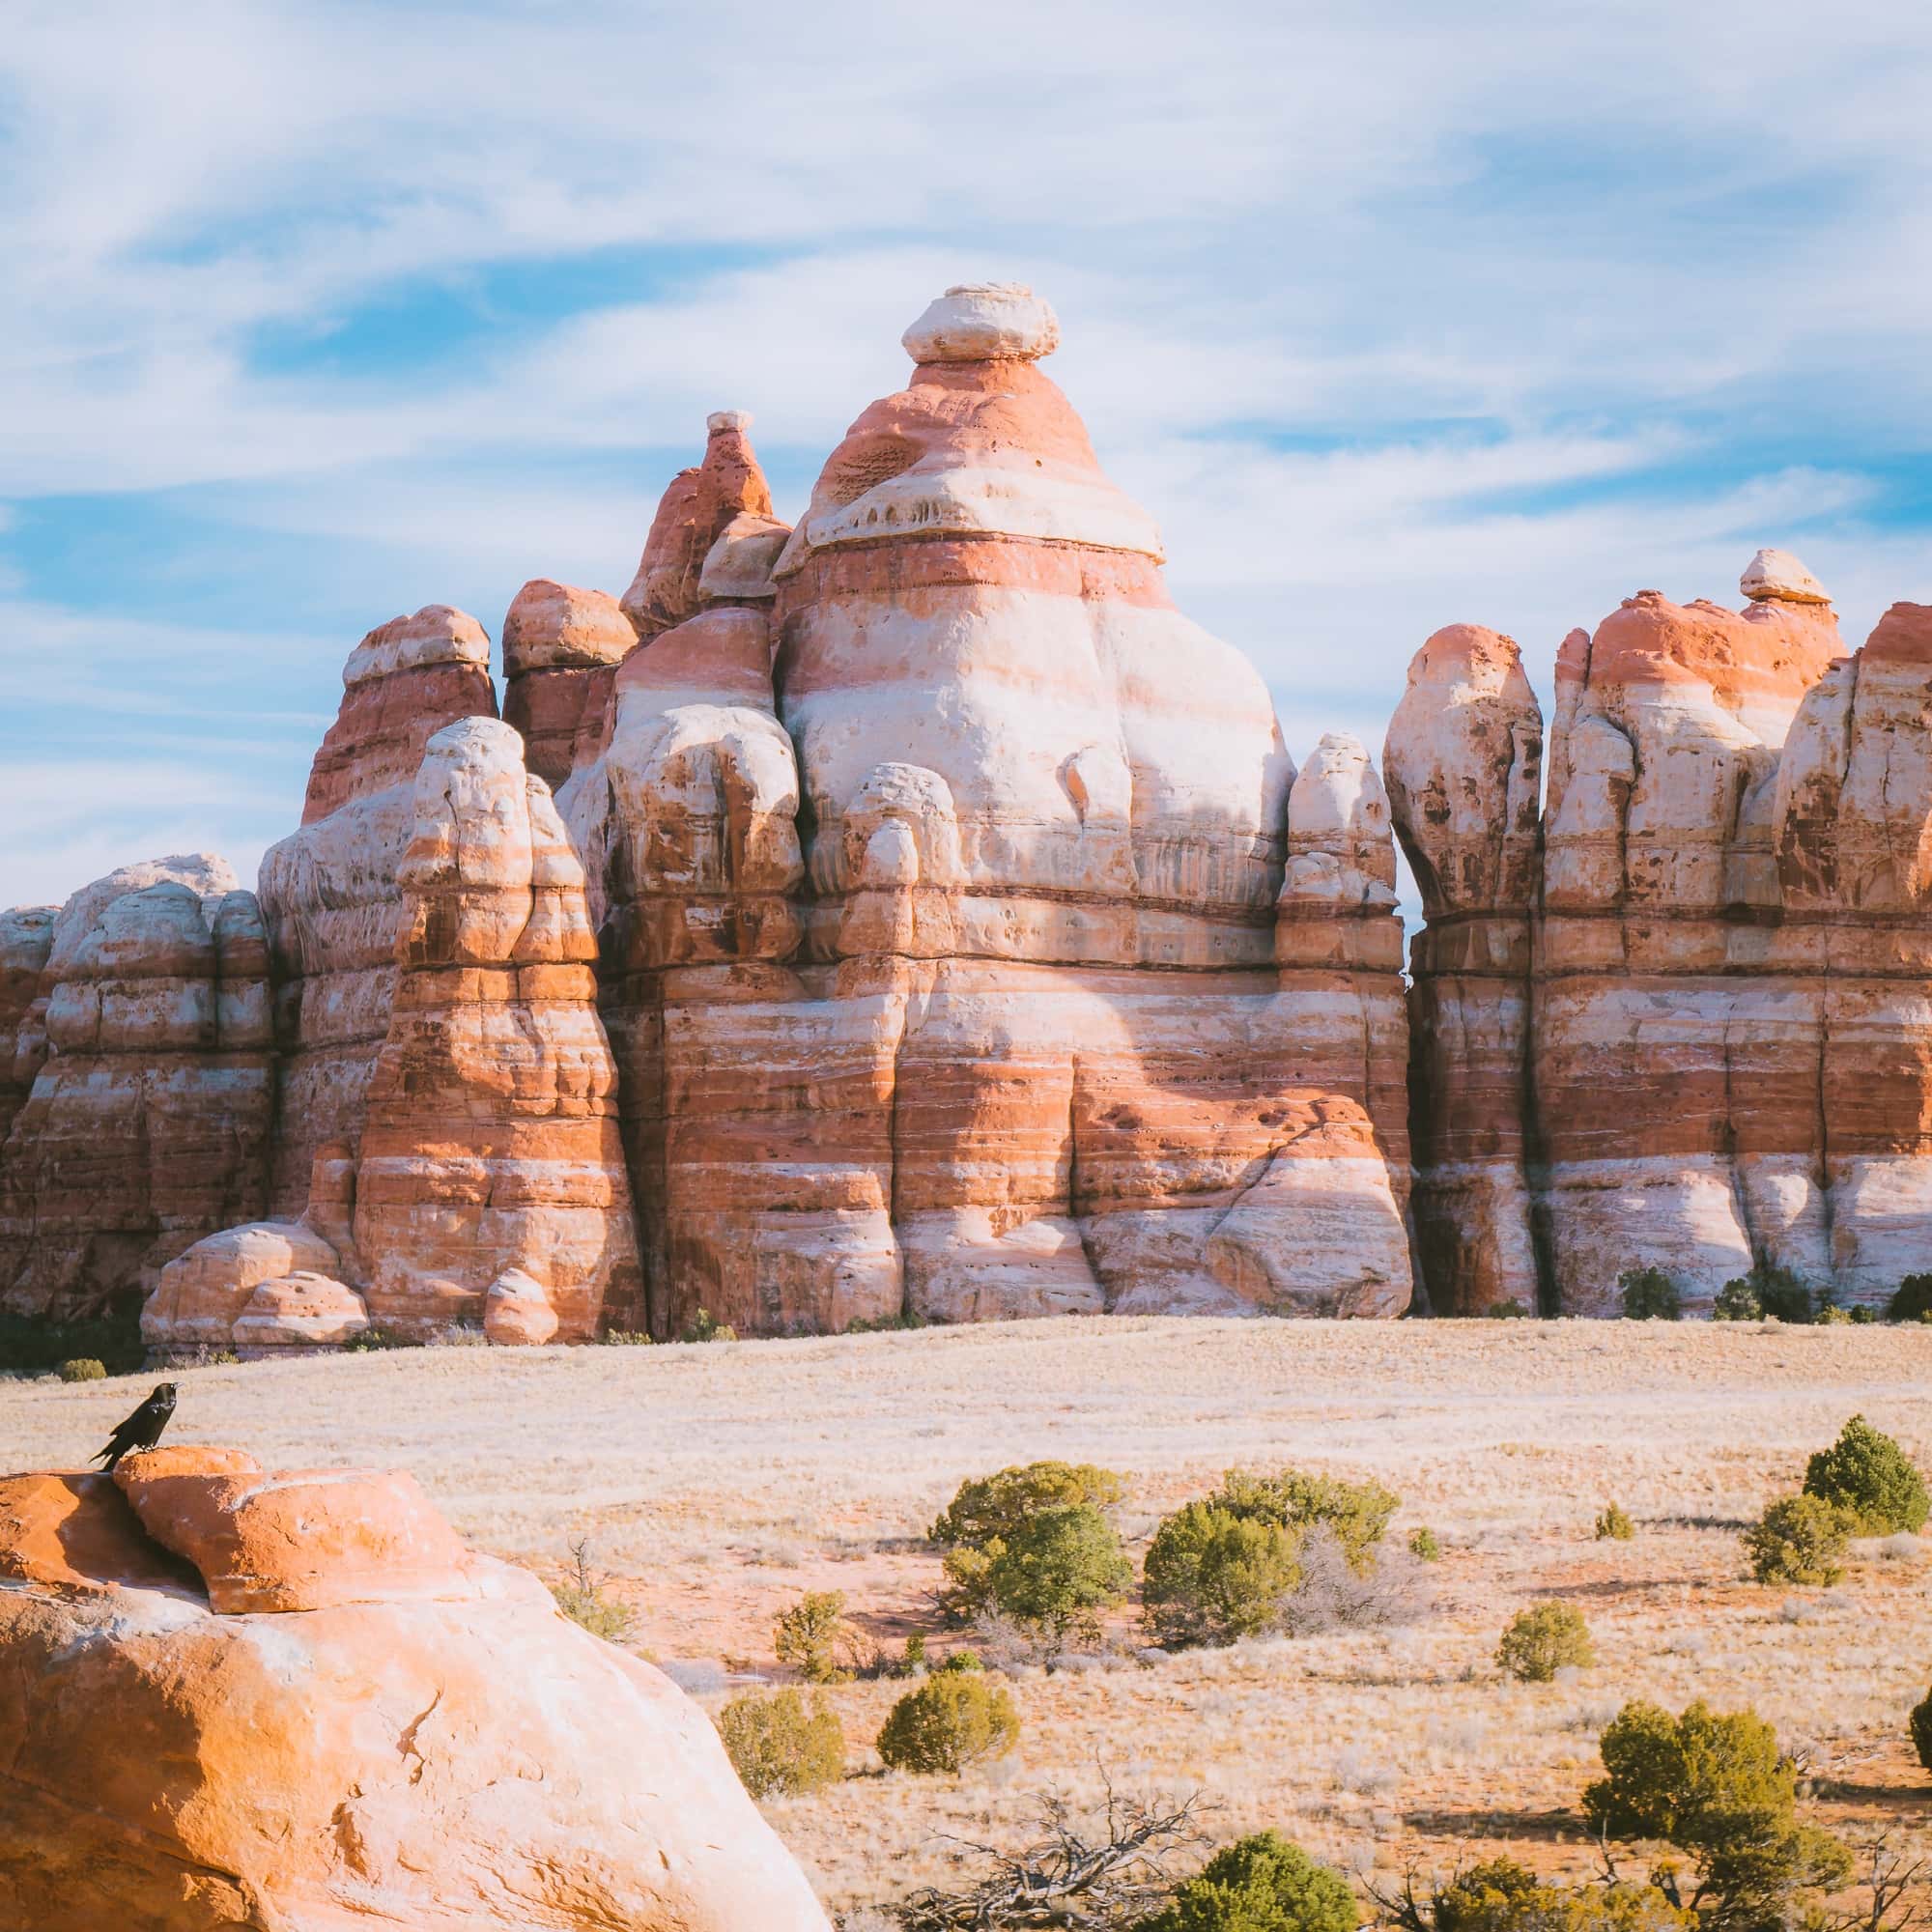
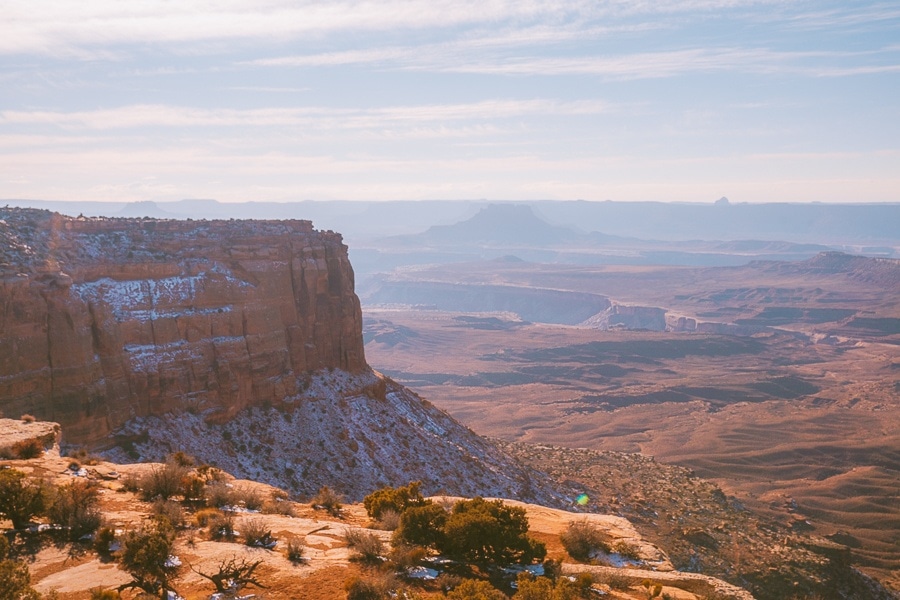
Canyonlands is such a stunning massive national park. It is divided into four different districts: Islands in The Sky, The Needles, The Maze, and Canyonlands Rivers. The district that most people visit is the Islands in The Sky District. This district is filled with beautiful hikes and viewpoints. My favorite district though, is The Needles. Backpacking is my favorite outdoor activity just because it involves fewer crowds. So, naturally, having the beautiful views of The Needles pretty much to myself was indeed a magical experience.
Things To Do In One Day
Mesa Arch Trail
- Distance: 0.7 miles
- Elevation Gain: 85 ft
- Route Type: Loop
- Difficulty: Easy
- Trail Guide: Link
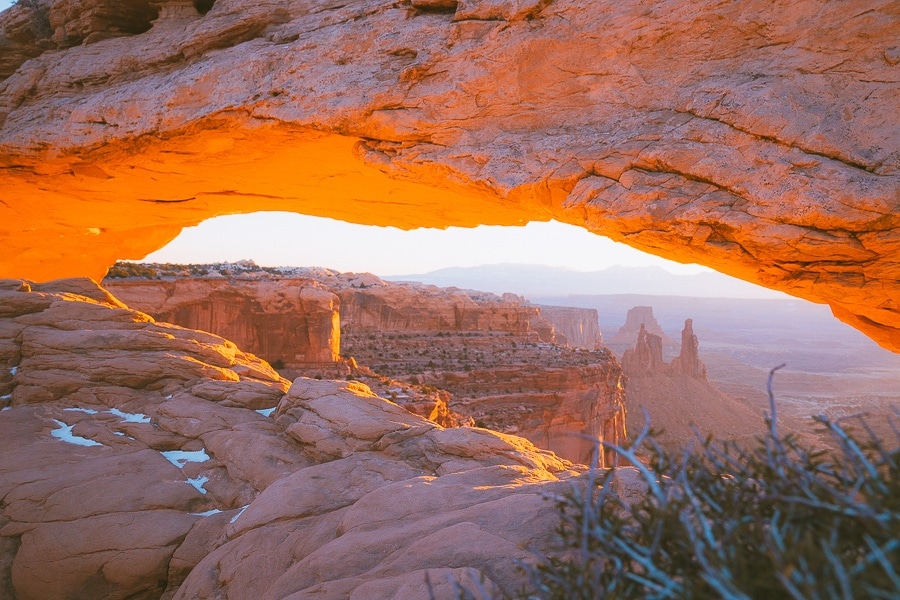
This viewpoint is what Canyonlands National Park is known for. It is highly recommended to do this for sunrise but please note that it will be crowded! Either way, the views behind this arch is stunning! Totally worth it even with the crowds.
Grand View Point Trail
- Distance: 1.8 miles
- Elevation Gain: 173 ft
- Route Type: Out and Back
- Difficulty: Easy
- Trail Guide: Link
White Rim Overlook
- Distance: 1.8 miles
- Elevation Gain: 160 ft
- Route Type: Out and Back
- Difficulty: Easy
- Trail Guide: Link
Upheaval Dome via Crater View Trail
- Distance: 1.3 miles
- Elevation Gain: 226 ft
- Route Type: Out and Back
- Difficulty: Moderate
- Trail Guide: Link
Shafer Canyon Overlook
- Distance: 0.3 miles
- Elevation Gain: 45 ft
- Route Type: Out and Back
- Difficulty: Easy
- Trail Guide: Link
Learn More On Hiking Canyonlands: Best Hikes In Cayonlands National Park
If You Had More Time
If you have a few more days, I recommend the Needles Canyonlands backpacking trip. It is such a beautiful area with almost no crowds. I did this for around four days, and it was worth it! Very challenging with stunning views.
Learn More About Backpacking Canyonlands: Ultimate Backpacking Guide To Canyonlands National Park
Places To Stay
Please note that there are no hotels inside of Canyonlands National Park. The closest hotels are located in Moab, and I would stay there to experience both Arches and Canyonlands National Park.
- Red Cliffs Lodge: Has the impressive sunset views of the Colorado River, especially with your private patio. The area includes a winery, a western film museum, a horse corral, and an outdoor pool and gym. Yeah, this place has it all. >Check For Prices
- Expedition Lodge: It is a budget-friendly hotel with a swimming pool with a waterslide, and a hot tub. There is also an option for private rooms for up to 6 people. A perfect choice for a family vacation. >Check For Prices
- Camping: There are only two campgrounds in Canyonlands national park. They are Island in the Sky (Willow Flat) Campground and Needles Campground. Please note that the Needles campground is very far away from the main attraction which is Islands In the Sky. >You Can Find More Information Here
Other Areas You Can Add To Utah National Parks Itinerary
- Monument Valley
- Page Arizona
- Goblin Valley State Park
- Grand Canyon
- Dead Horse Point State Park
Final Thoughts On National Park Road Trip Utah
Thanks for reading all about the Utah Mighty 5! Make sure to check out some of my other posts on National Parks and road trips:
- Best National Parks To Visit in The Spring
- Best National Parks To Visit In The Summer
- USA National Park Checklist
- The Ultimate Road Trip Checklist
- The Best Hikes In Utah

Get my free National Park Checklist
When you join the newsletter!
Pin For Later: Utah Road Trip National Parks