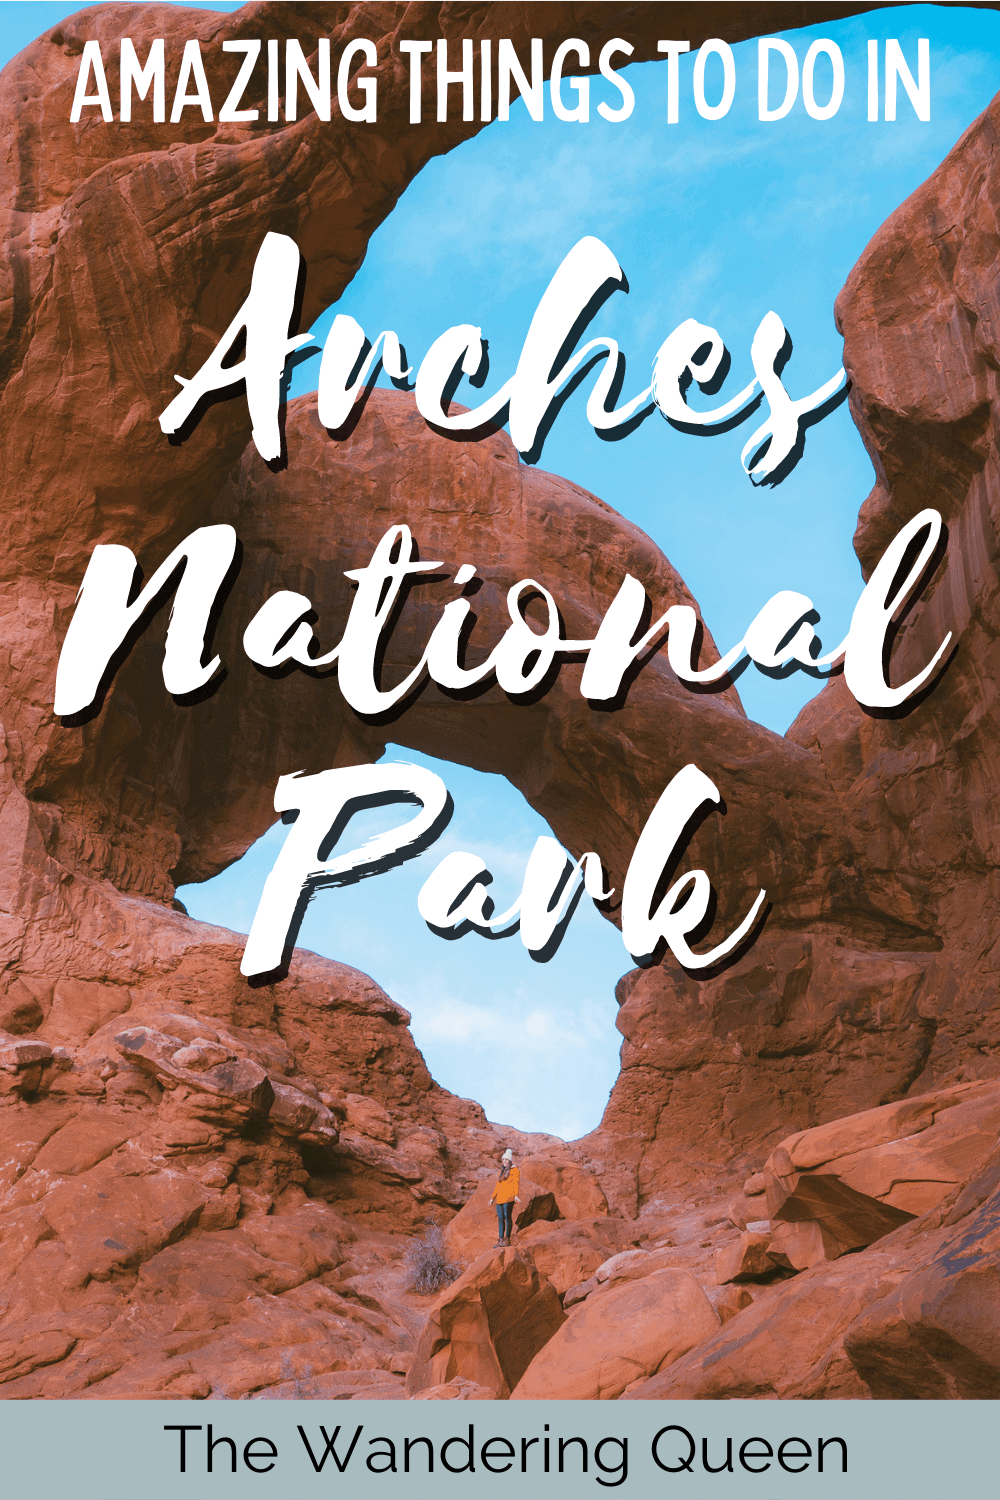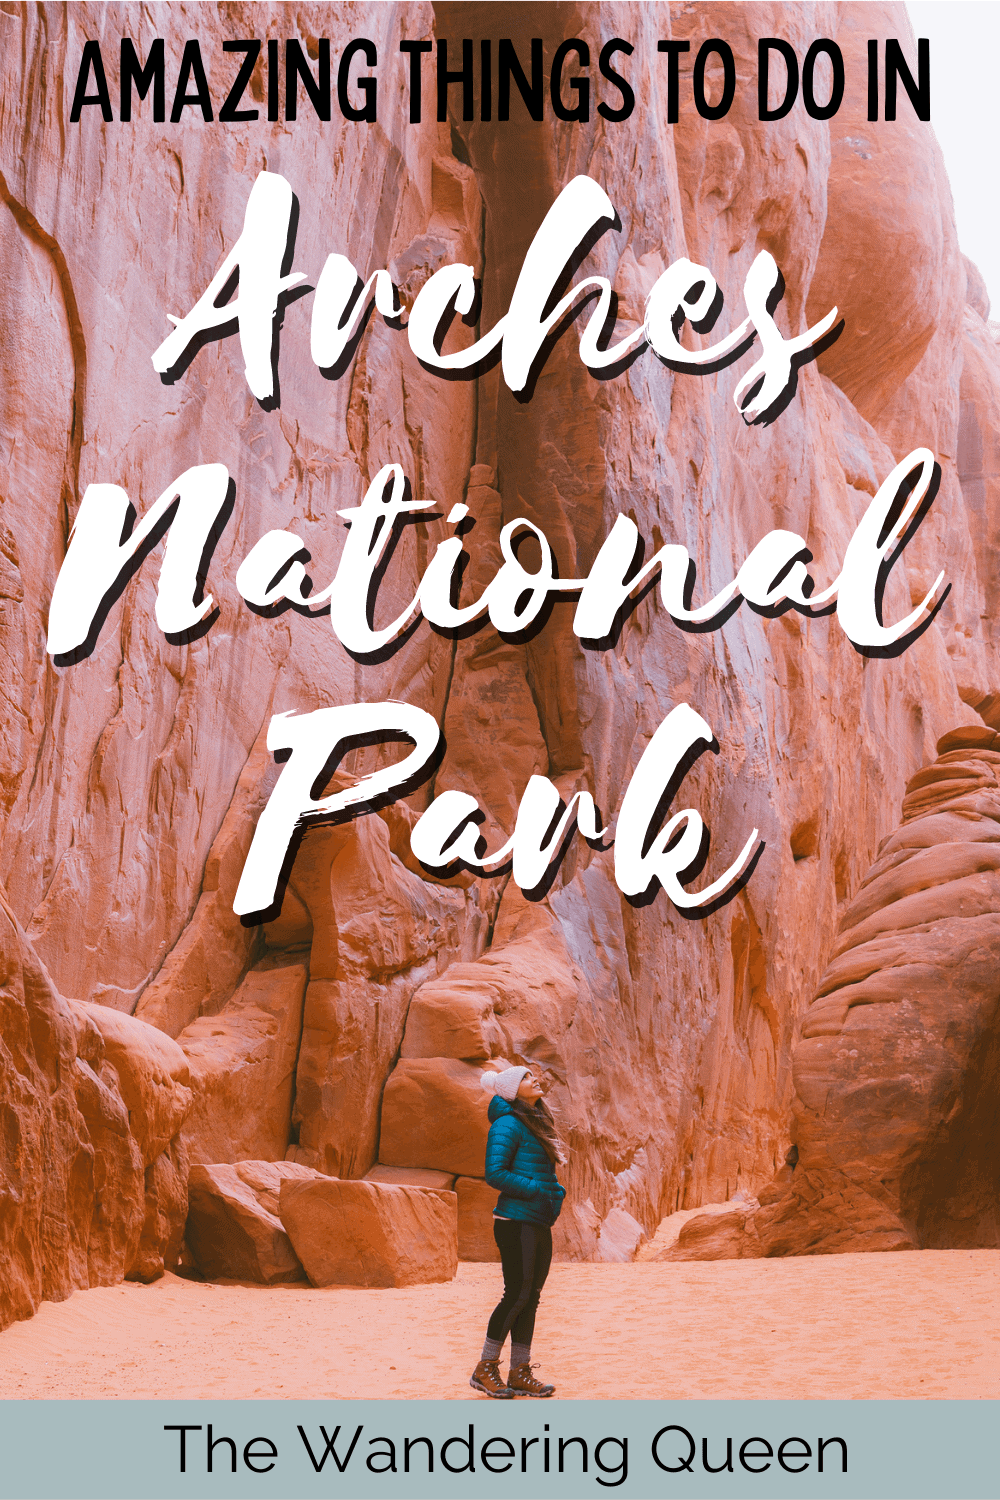
The 14 Best Hikes In Arches National Park
A few years back, I did an ultimate backpacking expedition through the Needles, Canyonlands National Park. After the experience, we had time for one trail near Moab for sunrise. We, of course, picked to do the Delicate Arch Trail, one of the most iconic viewpoints in Utah. It was a fantastic time, and I vowed to come back and experience Arches National Park even further. Welp, I finally came back to Arches and had an extraordinary time! I particularly loved the Devil’s Garden Trail. After staying in Moab for a week and exploring this awesome park, I have come up with a list of the best hikes in Arches National Park. This includes easy hikes, difficult hikes, maps, places to stay, and much more!
Disclosure: This post contains affiliate links. If you click one of them, I may receive a small commission (for which I am very grateful for) at no extra cost to you.
Arches National Park
Related Posts
Arches National Park Weather
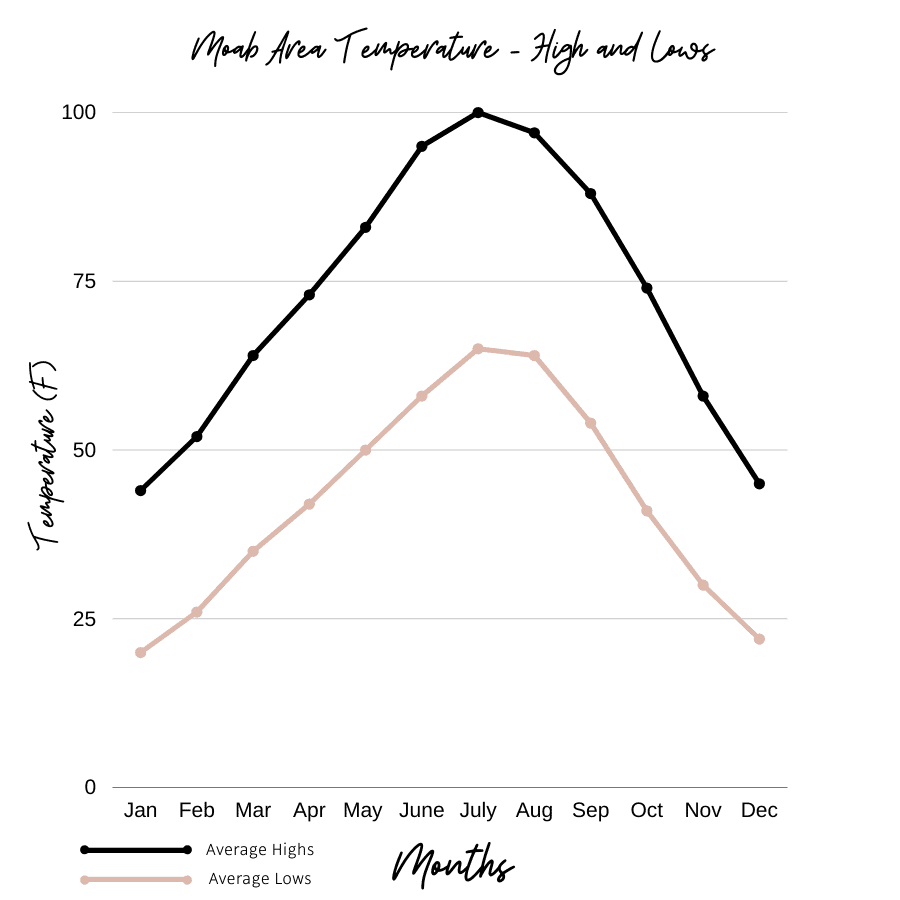
- Spring And Fall: These months are the best time to go because the temperatures are pretty mild. But they can be pretty crowded.
- Summer: I personally would not come here in the summer. I have had enough hot weather for a lifetime (I lived in Texas for 30 years), but if the only time you can come here is in the summer, then come! Just make sure you always have plenty of water, sunscreen, and sunglasses. Even though I have only been to Utah in the winter, the sun has been pretty intense, so I can’t even imagine in the summer.
- Winter: As I said, this is the only time I have visited Utah, and I love it because the crowds are thin, the hikes are chilly, but the sun usually helps throughout the day. Sometimes it does snow, so you might get outstanding pictures of the red rocks with the contrast of the white snow.
Read More: Best Time to Visit Arches National Park
How To Get To Arches National Park
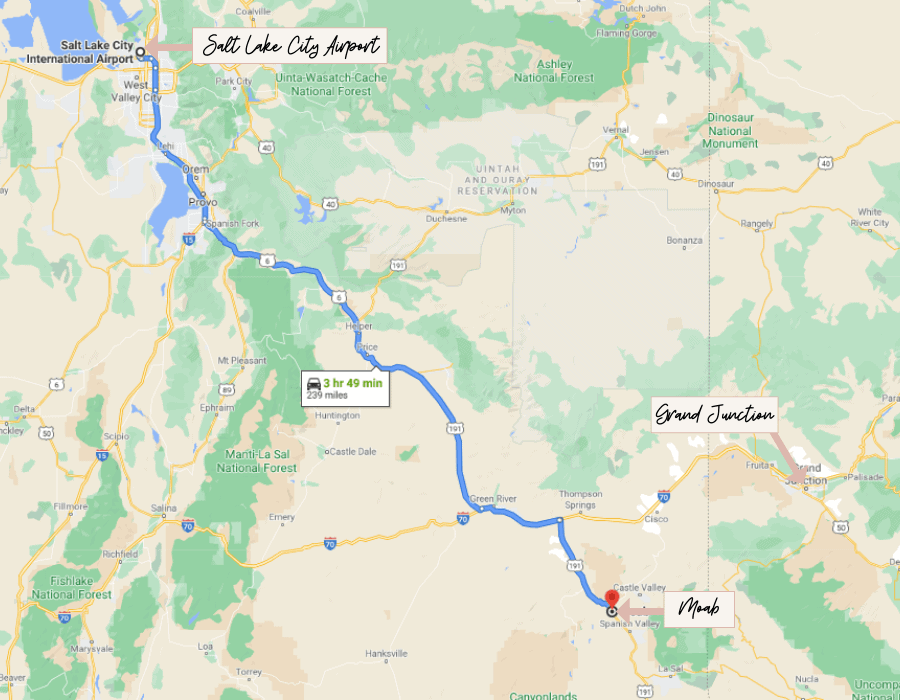
I have gotten to Arches National Park by flying into both Salt Lake City and Grand Junction. Grand Junction is a smaller airport, so it might be more expensive. The second time I visited the national park, I went in the off-season and realized that flying into Grand Junction was the same as flying into Salt Lake City, so I booked a Grand Junction ticket. Here is the driving information from each airport to Moab:
- Salt Lake City Airport To Moab: 3 hours and 50 minutes, 239 miles
- Grand Junction Airport To Moab: 1 hour and 45 minutes, 114 miles
Where To Stay
- Red Cliffs Lodge has impressive sunset views of the Colorado River, especially with your private patio. The area includes a winery, a western film museum, a horse corral, and an outdoor pool and gym. Yeah, this place has it all. >Check For Prices
- SpringHill Suites by Marriott Moab has more of a modern feel, a hot tub, free wifi, a fitness center, mountain views, and an outdoor pool. >Check For Prices
- Expedition Lodge is a budget-friendly hotel with a waterslide swimming pool and a hot tub. There is also an option for private rooms for up to 6 people. A perfect choice for a family vacation. >Check For Prices
Read More: Where to Stay in Moab, Utah – 12 Best Hotels, Lodges & Rentals
Where To Eat
The park does not have any restaurants inside Arches National Park; however, Moab has plenty of restaurants. I am only going to name the ones I really loved.
- Love Muffin: OMG. I loved this cute lunch/coffee spot, and so did my husband. We came here multiple days, and we were sad that they were closed on certain days of the week (might be different in the busy season). The breakfast sandwiches are absolutely scrumptious. And the lunch sandwiches were amazing as well. You can pack these sandwiches up in your backpack for your Arches hikes instead of driving all the way back into town.
- El Charro Loco: Good Mexican food! I especially loved the pineapple dish filled with all kinds of meats, salsa, and pico. My husband and I shared it, and it was a ton of food.
- The Blu Pig: This place had some pretty good BBQ and drinks.
- The Trailhead Public House and Eatery: I really enjoyed their burgers. So delish.
Map Of Arches National Park
Below I show the trail locations in Google Maps. If you would like the official Arches trail map click here.
Reservation For Arches National Park

Note: From April 1 to October 31st, 2024 Arches will implement a pilot timed entry system to help manage traffic and improve visitor experiences. I am so excited about this because the park was already crowded in the winter, so I can’t even imagine how it is in the spring and summer. Reserve your tickets here.
What To Pack When Hiking At Arches National Park
- Sunscreen: Super important and it is part of the ten essentials! >Buy Sunscreen
- Chapstick: This one has SPF so your lips won’t get burned! >Check Out This Chapstick
- Hiking Boots/Shoes: If you use tennis shoes, you can easily hurt your toes by hitting a rock by accident (Trust me, I have done it so many times before). Hiking boots helped tremendously in this park. They grip so well on the red rocks. >Check Out My Hiking Shoes
- Hiking socks: Having the correct socks helps prevent getting blisters. Smart Wool is probably my favorite brand out there. >Buy Hiking Socks
- Water Reservoir: Water reservoirs help prevent dehydration while hiking. The great thing about this reservoir is that it doesn’t have a plastic taste. >Here Is My Water Reservoir
- Water: Stay nice and hydrated.
- Sunglasses: It can get sunny in the summer and winter, so make sure to pack some sunglasses. I forgot mine and it was a pain! >Check Out These Sunglasses
- Snacks: The best snacks are jerky, nuts, and energy bars. >>>Check Out These Snacks
- Camera: The Sony A6000 was one of the first cameras I started traveling with. The Sony A6000 is an excellent camera for people that want to start improving at travel photography. >Buy Sony Camera Here
- First Aid Kit: This is one of the first things I bought when I first started going on adventures. It is super portable. >Buy This Awesome First Aid Kit Here
- Day Pack to carry all your things: To carry all your gear, water, and food, you need a good backpack.REI has some great beginner backpacks. >Buy This Great Quality Backpack
- Headlamp: A headlamp is an absolute must in case you get stranded in the dark! It is a lot more portable and easier to use than a flashlight. >Buy A Headlamp Now
- Leggings or Hiking Pants: I always wear leggings while hiking because it is what I feel most comfortable with! >Click For My Favorite Hiking Leggings
- Breathable sweat-wicking shirts: Cotton shirts soak up your sweat when hiking, so make sure to wear something breathable. >Check out this awesome breathable shirt here.
- Mid Base Layer: If you are hiking in the Winter, Spring Or Fall, this might be a great idea. >Check Out My Sweater Here
- Sports Bra: For women. >Check This One Here
- Jacket: I always have a jacket in my backpack, even if it is hot. I do it just in case of an emergency. >Buy My Favorite Jacket
- Rain Jacket: The worst feeling in the world is being wet and cold while hiking. >Check Out My Rain Jacket Here
- Tripod: This is an optional item, but it is excellent for getting the ideal sunset pictures. >Check out this tripod
- Knife: I always carry a knife in my backpack just in case. >Check Out My Knife Here
- National Park Pass: I highly recommend getting a year-long America The Beautiful Pass so you can get into both parks with ease. >Get It Here
- Map And Trail Guide: Start planning your trip with this. >Buy One Here
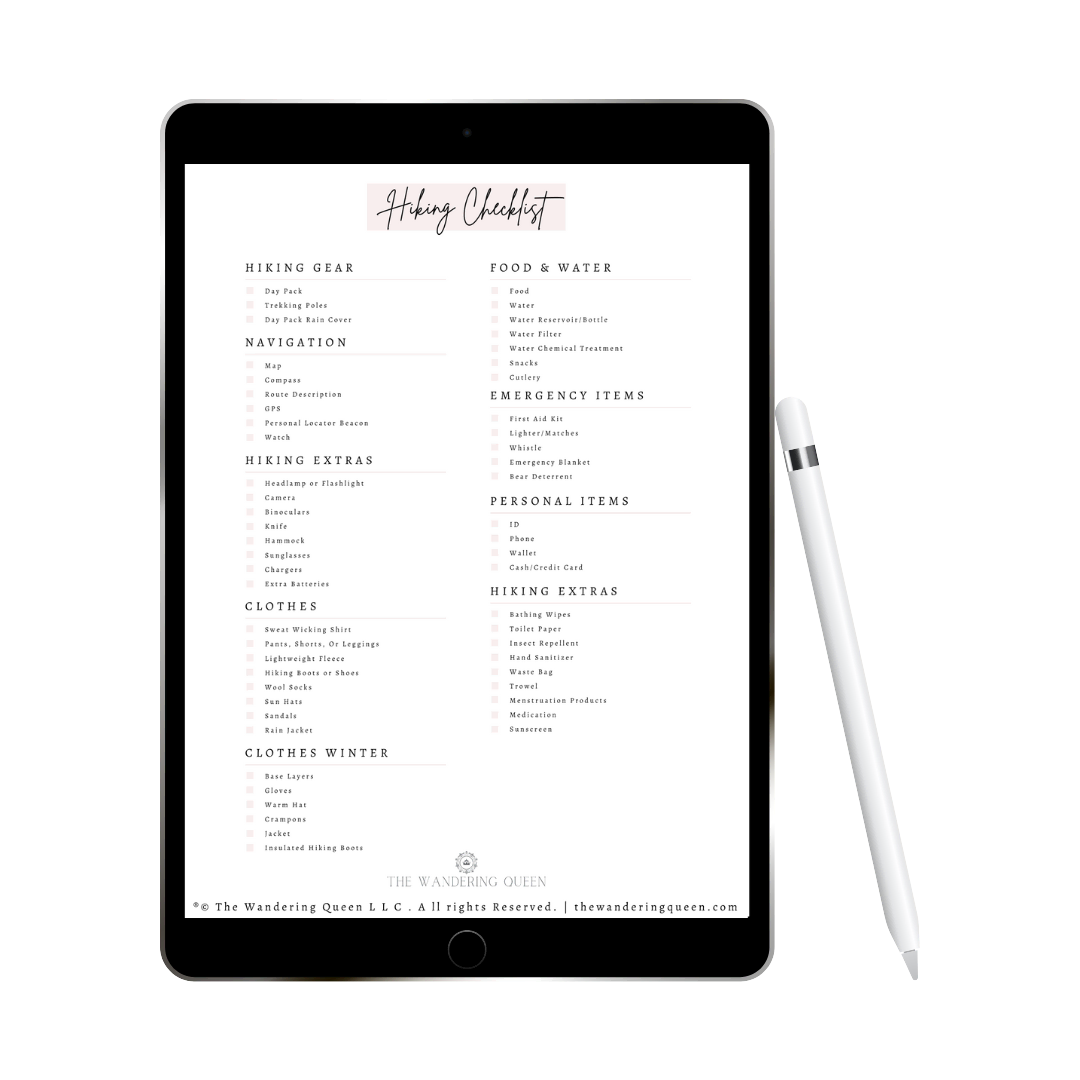
Claim your FREE Hiking Checklist
Ready to start hiking? Grab my free hiking checklist and never forget anything at home!
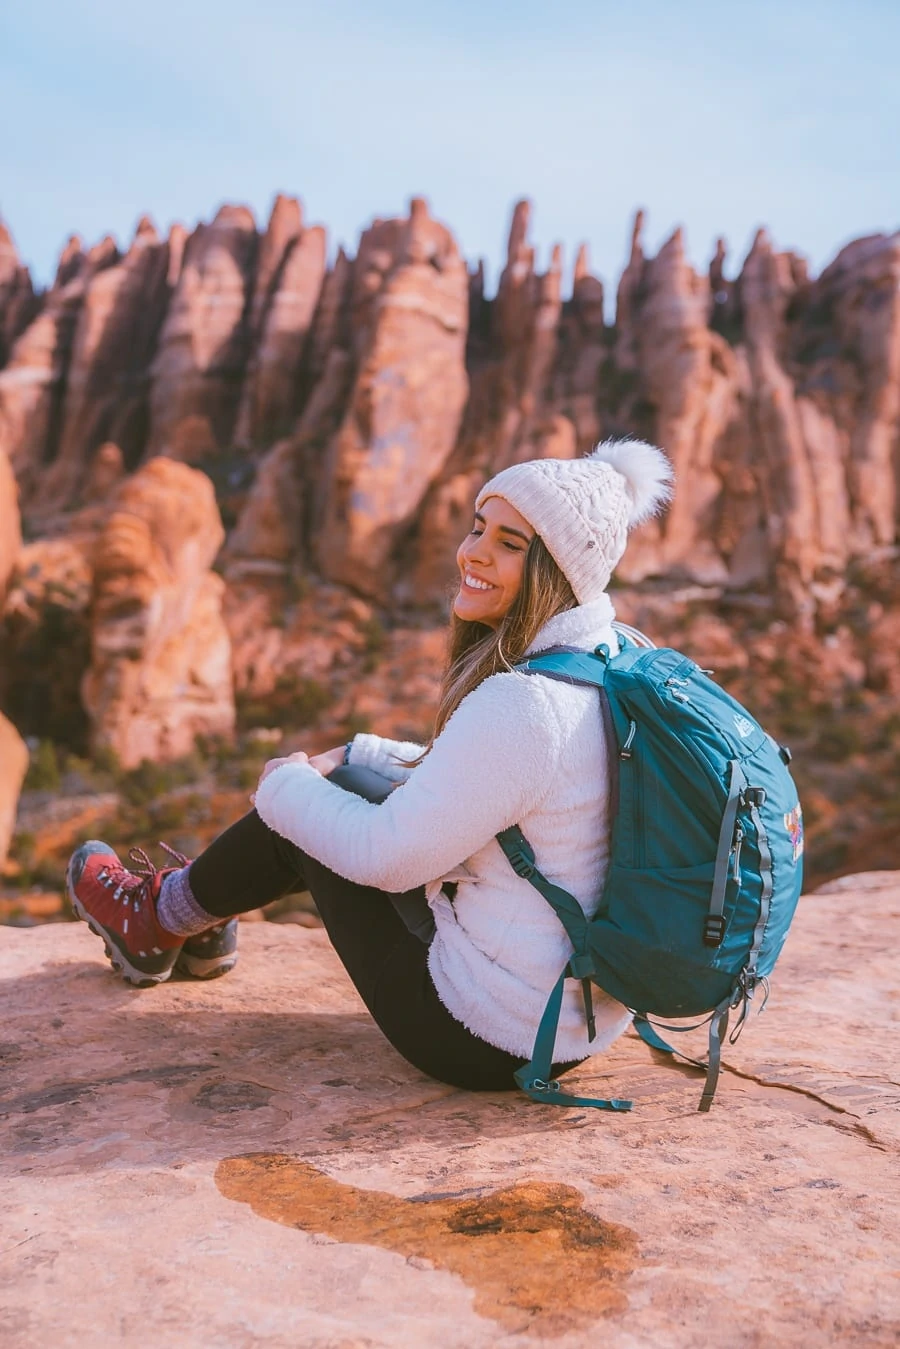
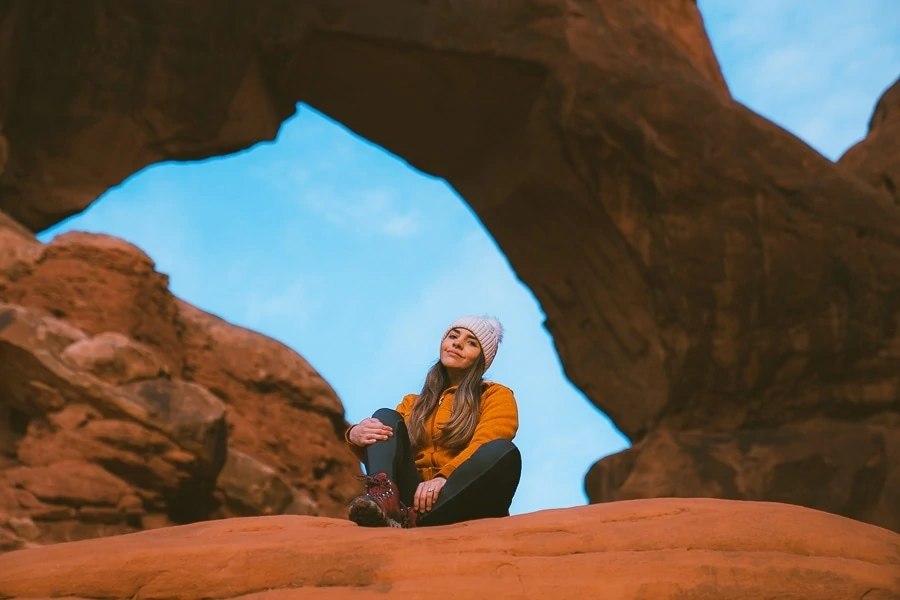
My Outfit While Hiking Arches National Park
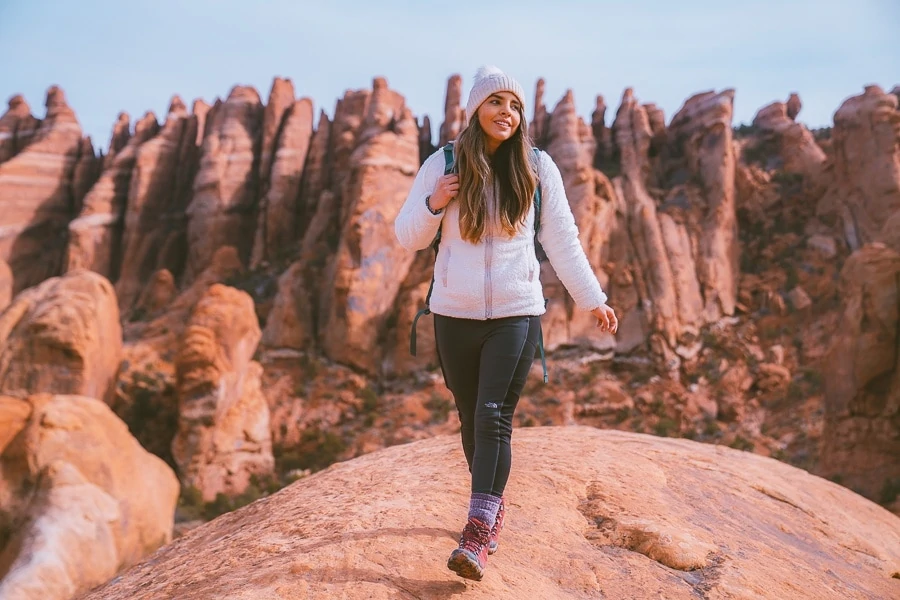
Many of the pictures below show me in a cute winter hiking outfit, and if you want to know the exact things I’m wearing, see below. However, you don’t need to pack this for an Arches trip in the summer. I went in the winter when it was pretty cold.
- Base Layers: Click Here
- Fleece Lined Leggings: Click Here
- Hiking Socks: Click Here
- Hiking Boots: Click Here
- Sweater: Click Here
- Backpack: Click Here
- Hat: Click Here
Best Hikes In Arches National Park
Delicate Arch Trail
- Distance: 3.4 miles, round trip
- Elevation Gain: 626 ft.
- Route Type: Out and Back
- Difficulty: Moderate
- Trail Guide: Link
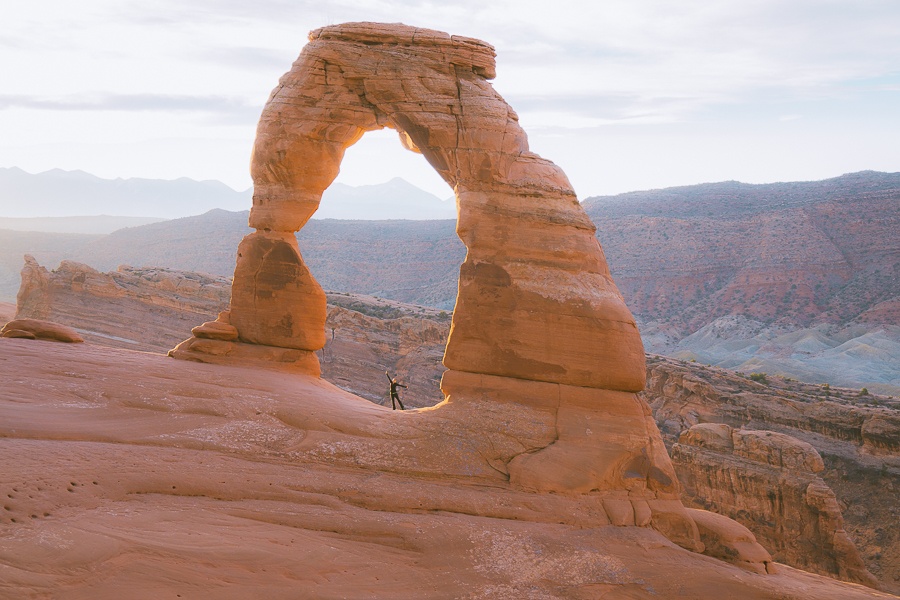
The most well-known arch in the state of Utah is absolutely breathtaking. Even after seeing so many arches and hiking in so many Utah areas, this remains one of my favorite viewpoints.
Let me note that I did view this stunning arch for sunrise in the off-season. So there was no one at the viewpoint but us and that is how we got this perfect picture shown above. But I have seen videos of people waiting in a very long line to take the same picture. What I am saying is the earlier you get here, the better.
If you only have time for one hike in this National Park, I would definitely pick this hike. I picked Delicate Arch years ago. We only had time for one sunrise hike and decided on Delicate Arch. Years later, after exploring the whole park, I feel like I made the right decision.
For more in-depth information on the Delicate Arch: Check Out My Blog Post
Delicate Arch Viewpoint
- Distance: 1.0 miles, round trip
- Elevation Gain: 177 ft.
- Route Type: Out and Back
- Difficulty: Easy
- Trail Guide: Link
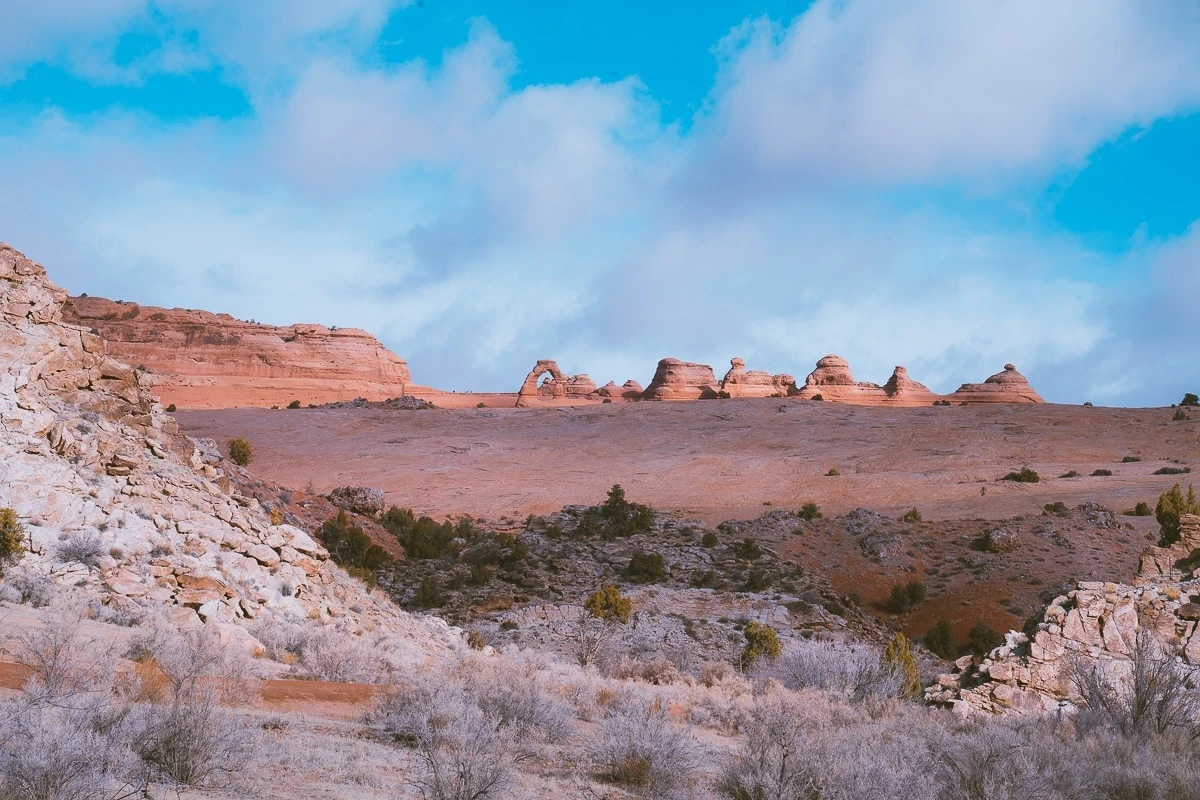
Since my husband didn’t see the Delicate Arch years ago, we decided to look at it from the viewpoint. As you can see in the picture above, the Delicate Arch is still pretty far away, but it is a nice alternative for people that don’t want to hike too much. We were exhausted from hiking non-stop for a week, so it is nice to still have the ability to see the Delicate Arch from afar.
Download my free Outdoor Photography Guide
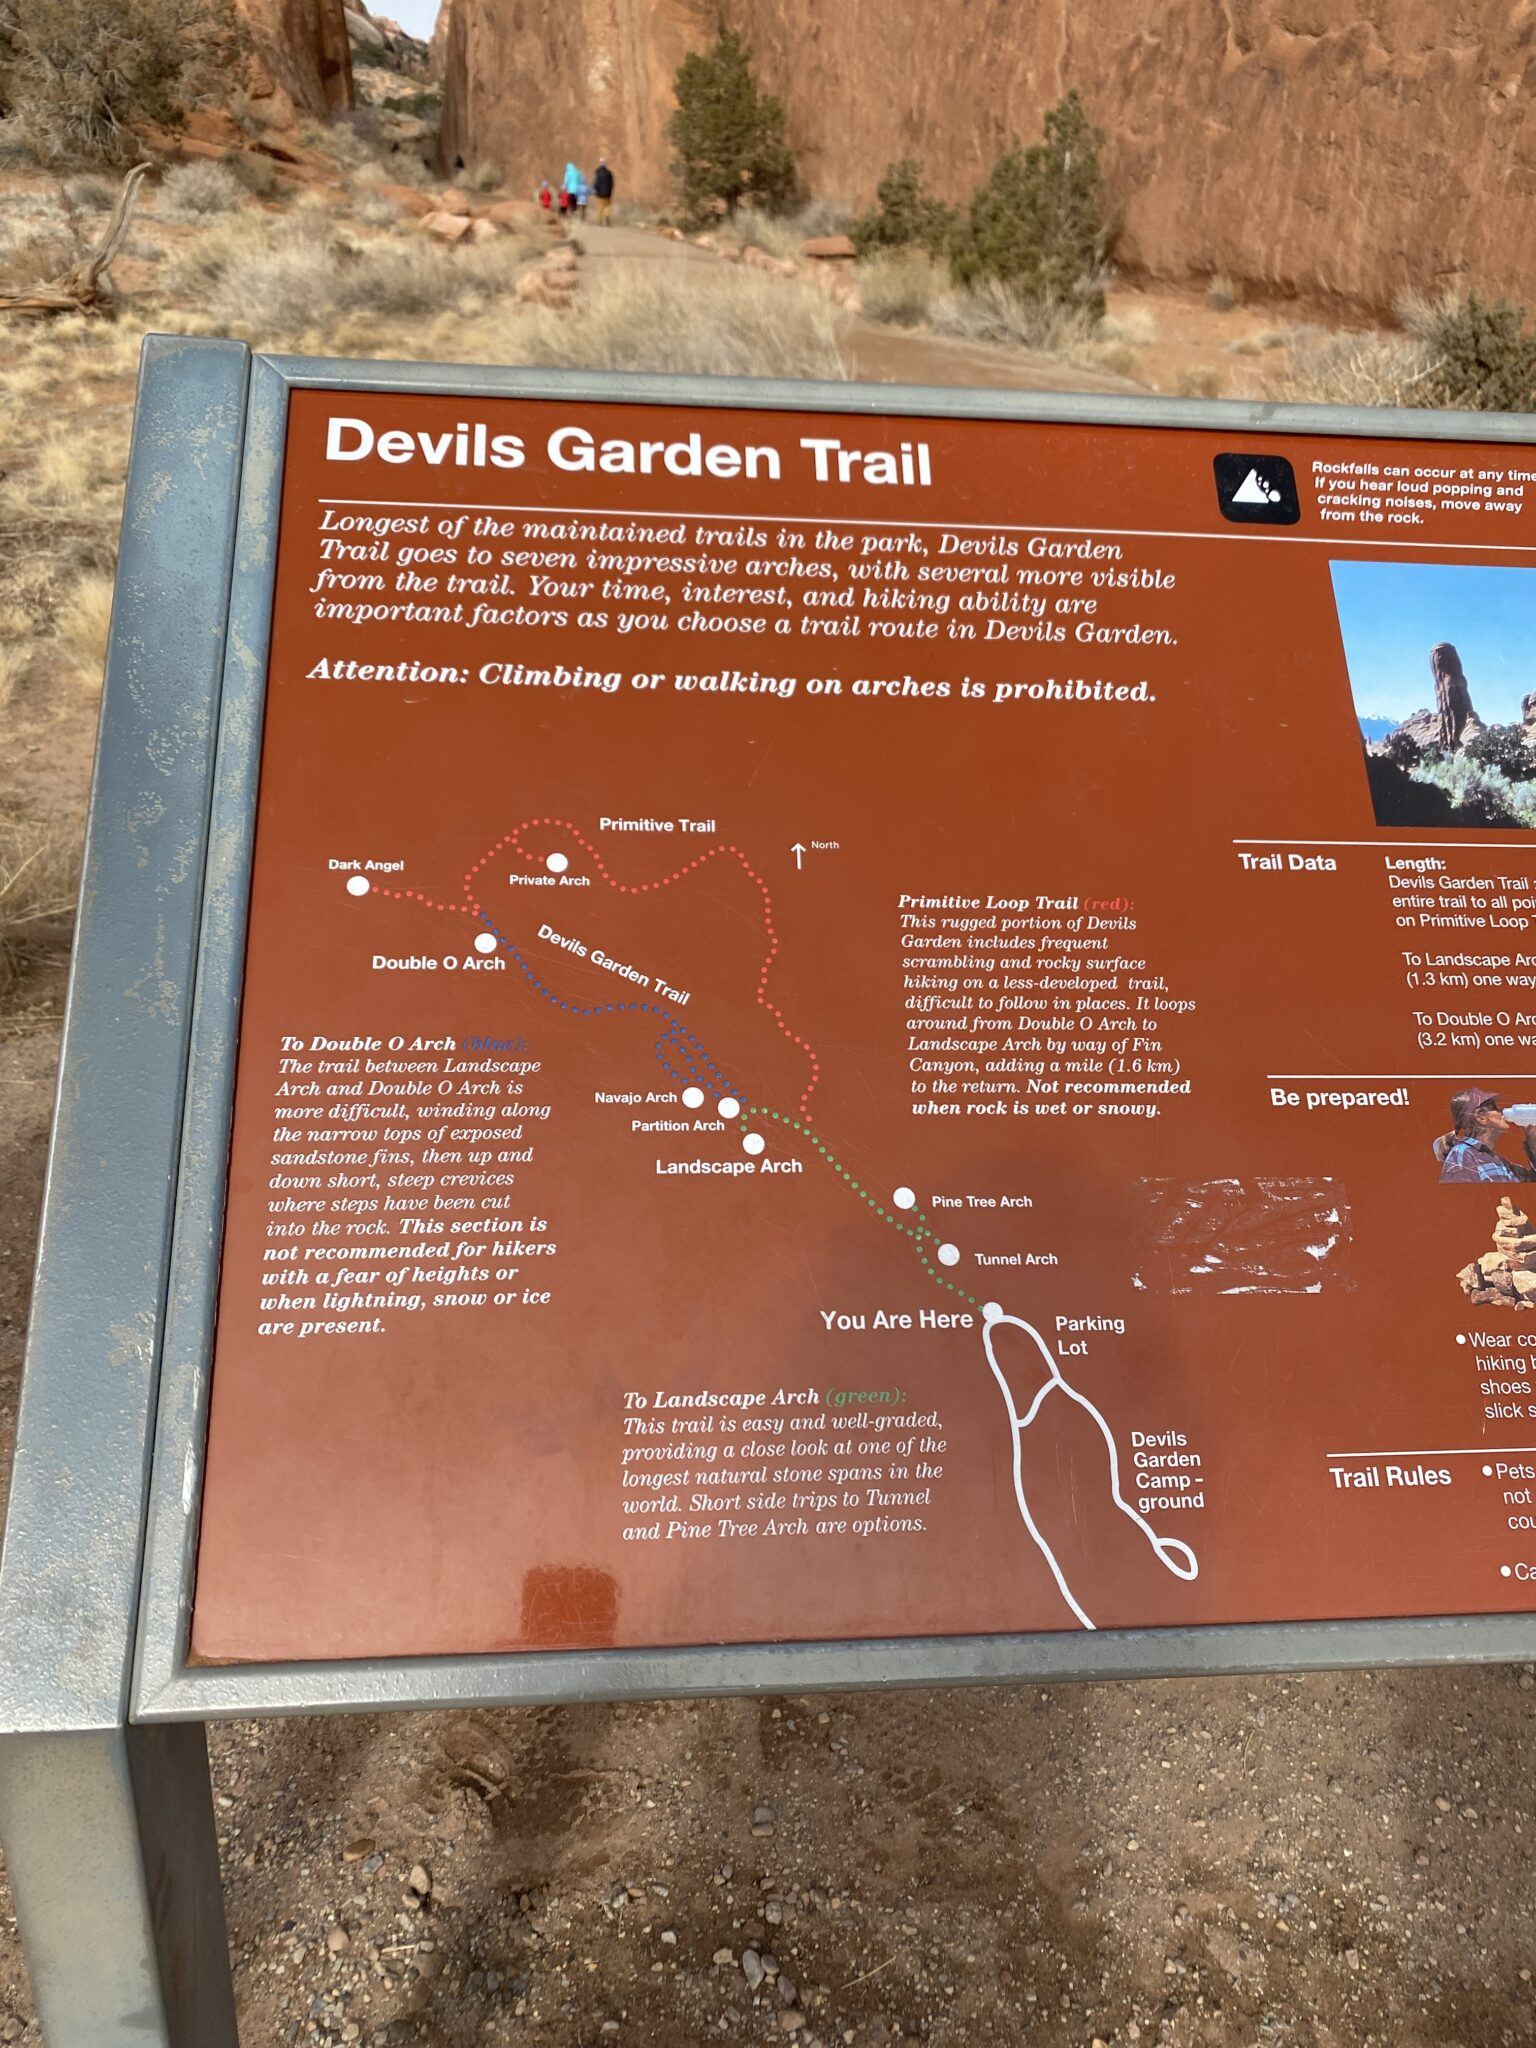
Devils Garden Loop Trail
- Distance: 7.9 miles, round trip
- Elevation Gain: 1,085 ft.
- Route Type: Loop
- Difficulty: Hard
- Trail Guide: Link
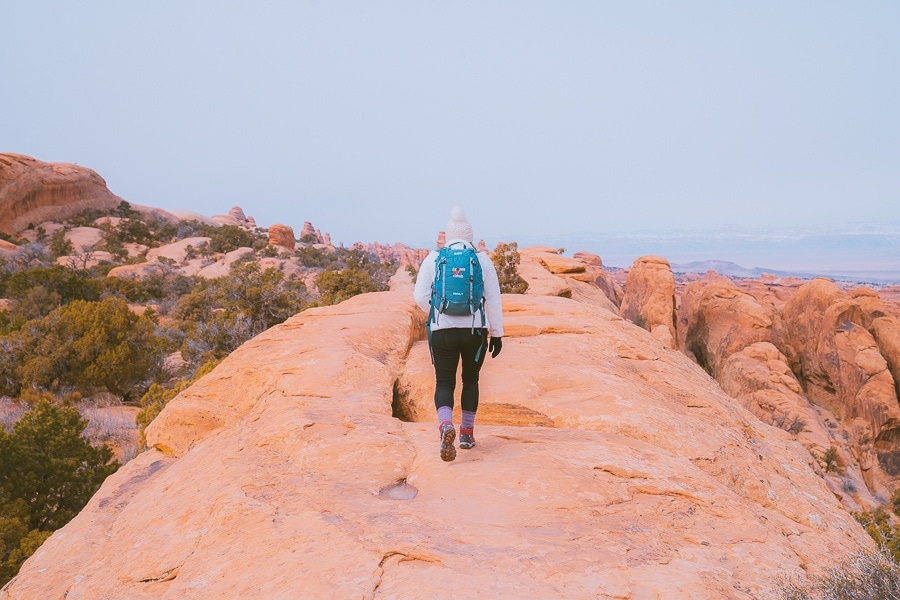
What I love most about the Devils Garden Trail is that this trail is great for everyone. If you look at the map below, you will notice a trail for beginners, intermediate, and more advanced hikers. I did the whole loop, and so I will talk about each section so you can choose which part of the trail is best for you. The parking area is pretty large, and when we arrived in the morning, there was plenty of space.
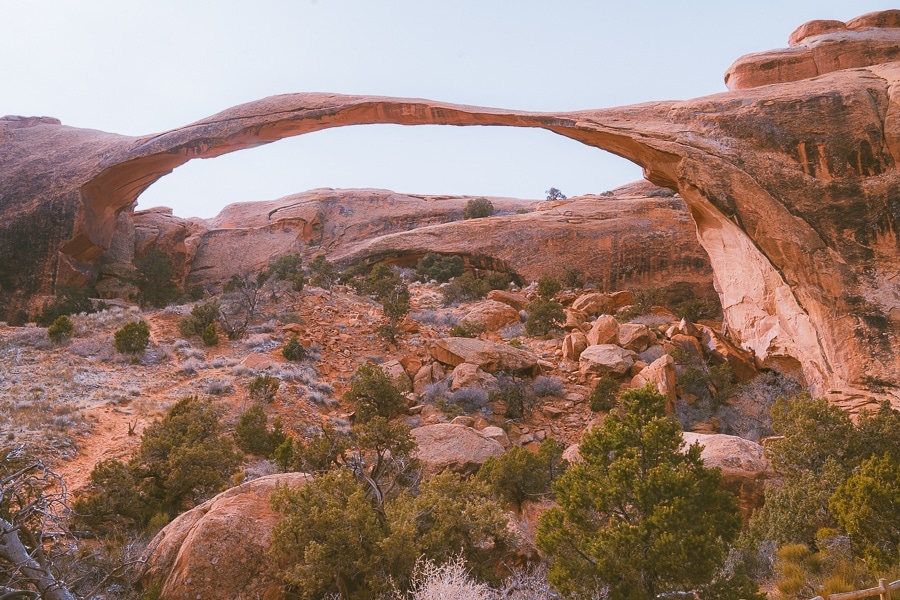
Landscape Arch Trail
- Distance: 1.9 miles, round trip
- Elevation Gain: 259 ft.
- Route Type: Out and Back
- Difficulty: Easy
- Trail Guide: Link
The Landscape Arch trail is the hike that most people do. It is pretty easy, and you don’t need hiking boots or shoes to see the Landscape Arch. I saw many families walking this trail leisurely.
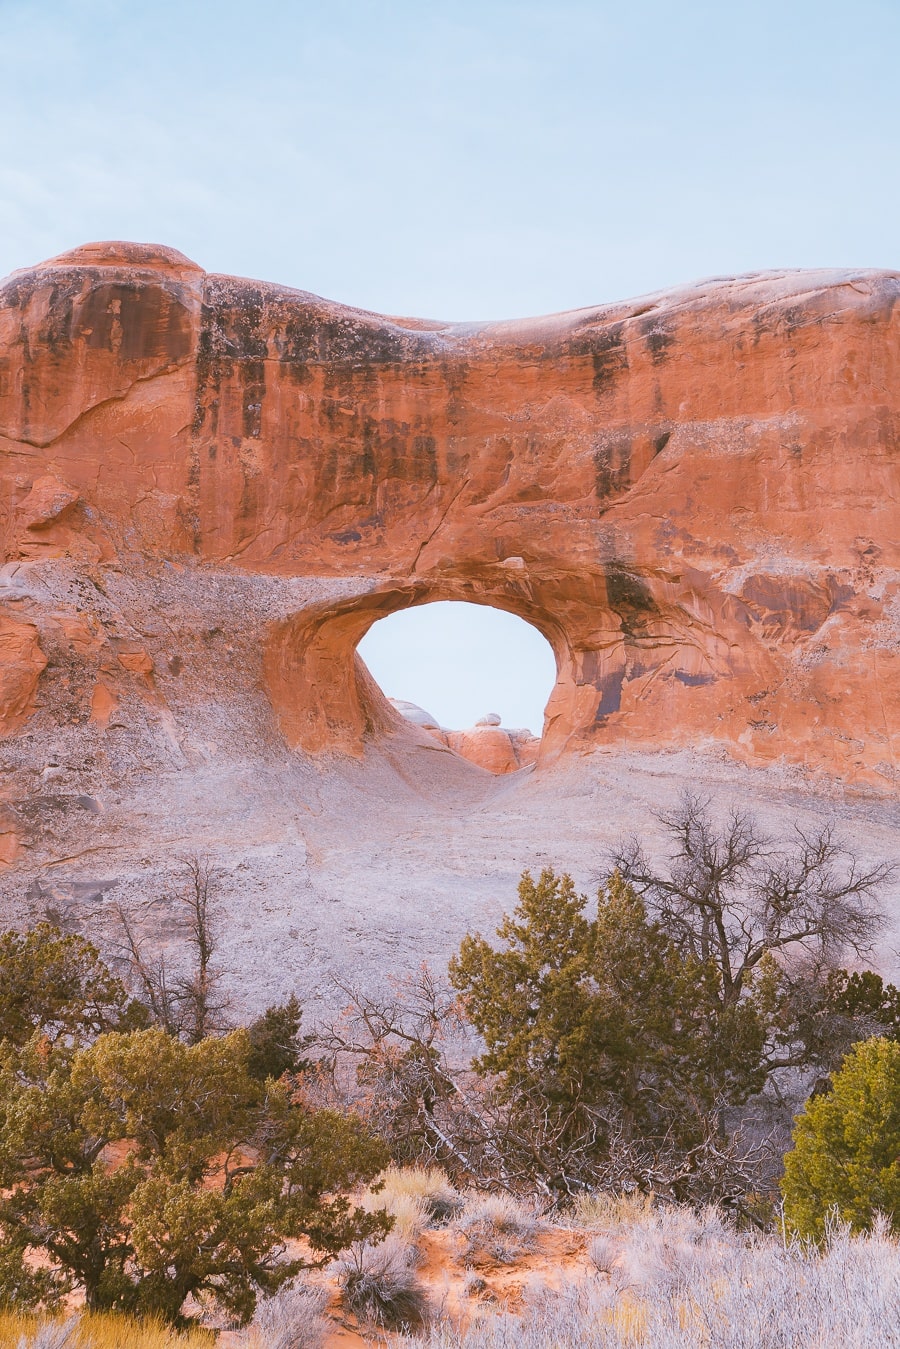
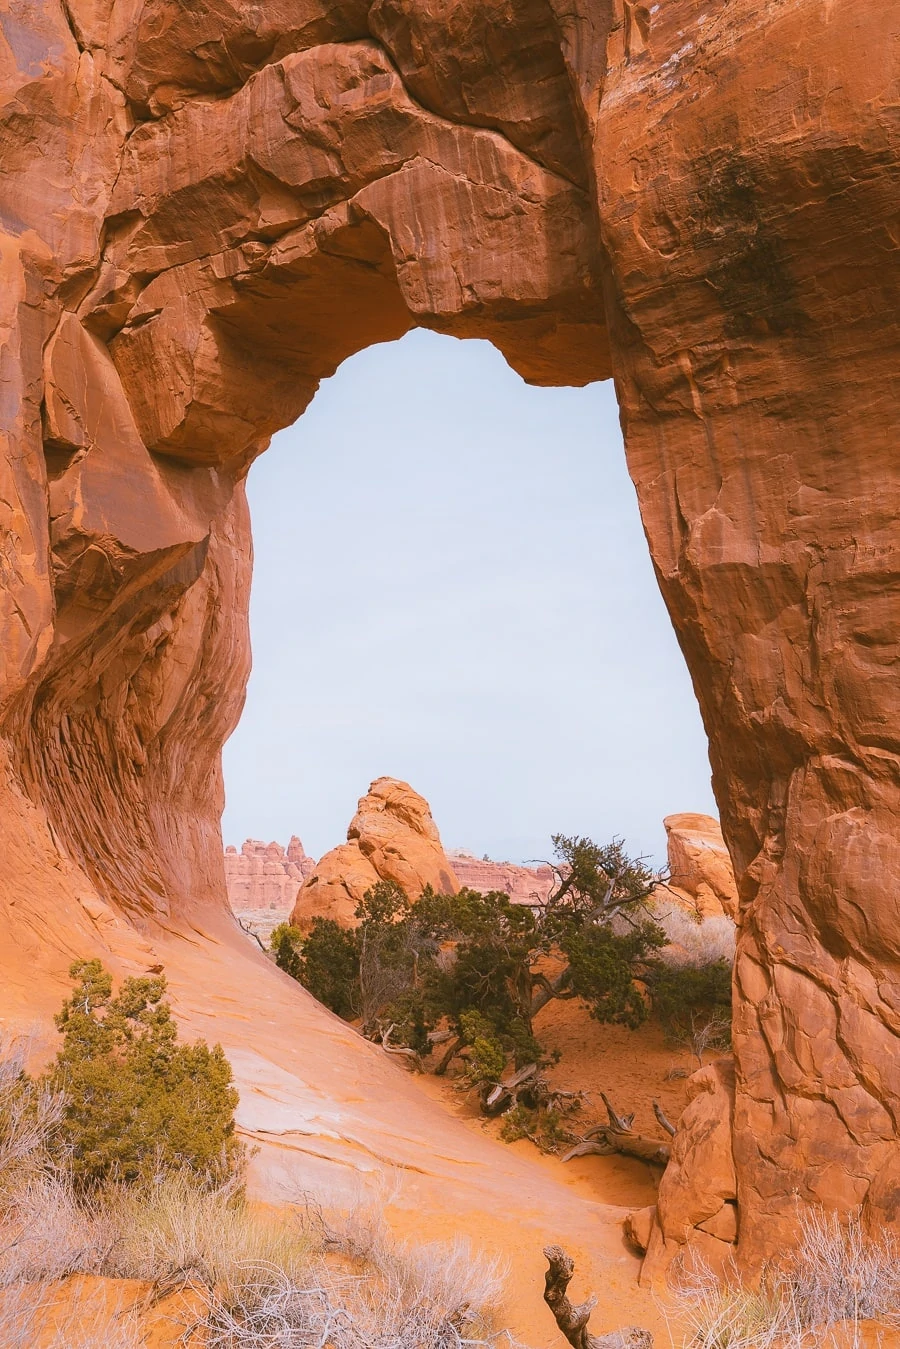
I wasn’t too impressed with Tunnel Arch or Pine Tree Arch, so if you want to make the hike shorter, you can cut both those viewpoints out. I was, however, very impressed with Landscape Arch. It is absolutely breathtaking and worth the hike.
The Double O Arch Trail
- Distance: 4.1 miles, round trip
- Elevation Gain: 672 ft.
- Route Type: Out and Back
- Difficulty: Moderate
- Trail Guide: Link

I really enjoyed doing this part of the trail. This hike is for more moderate hikers. You will have to scramble up some rock, so you need some good hiking shoes or boots. It might be doable with tennis shoes, but go extra slow and be careful.
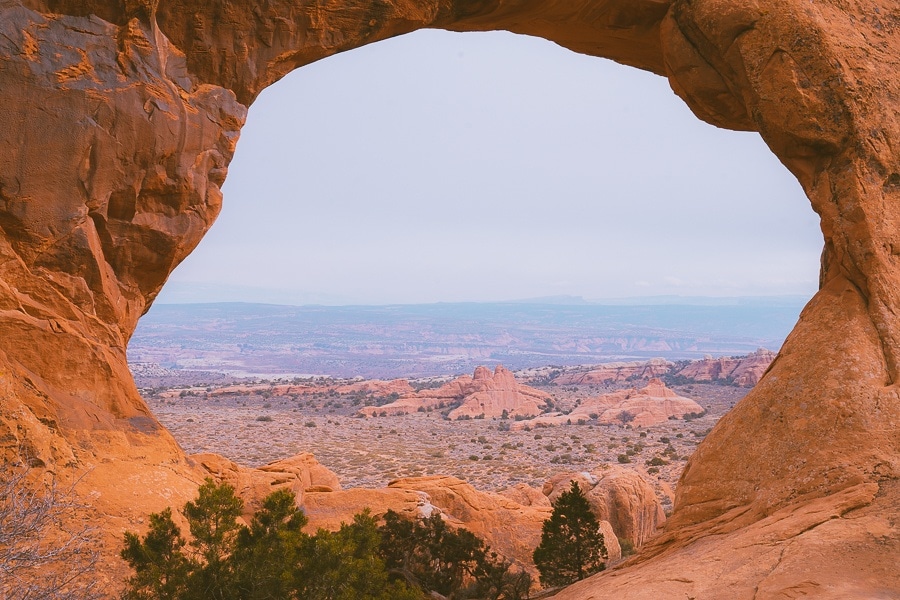
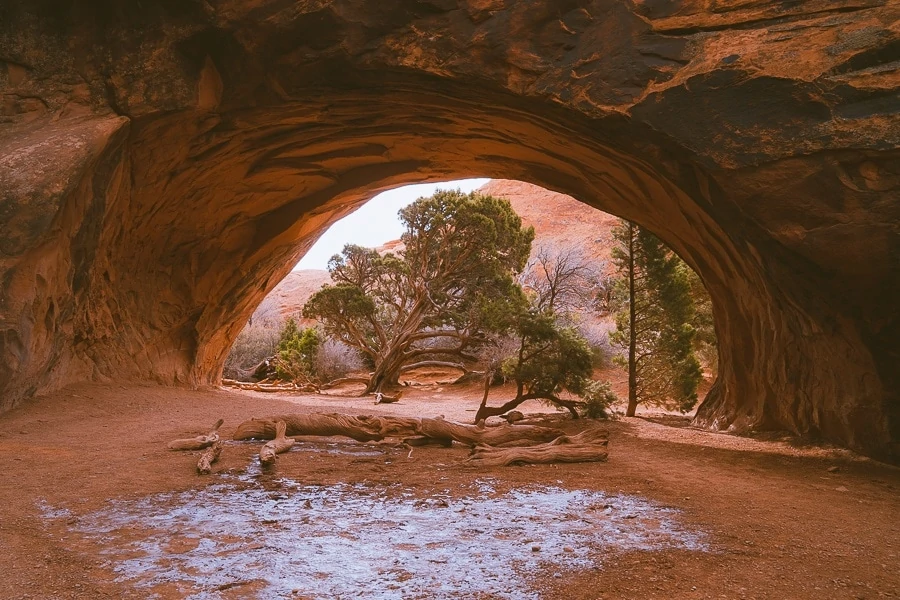
Like with the Landscape Trail, you can add two more arches to the hike. We decided to add the Partition Arch and the Navajo Arch, and I was delighted with the Navajo Arch. It looked lovely with the tree right in the middle. Partition Arch, I felt like it was just ok. But I am still glad we added it to the mix.
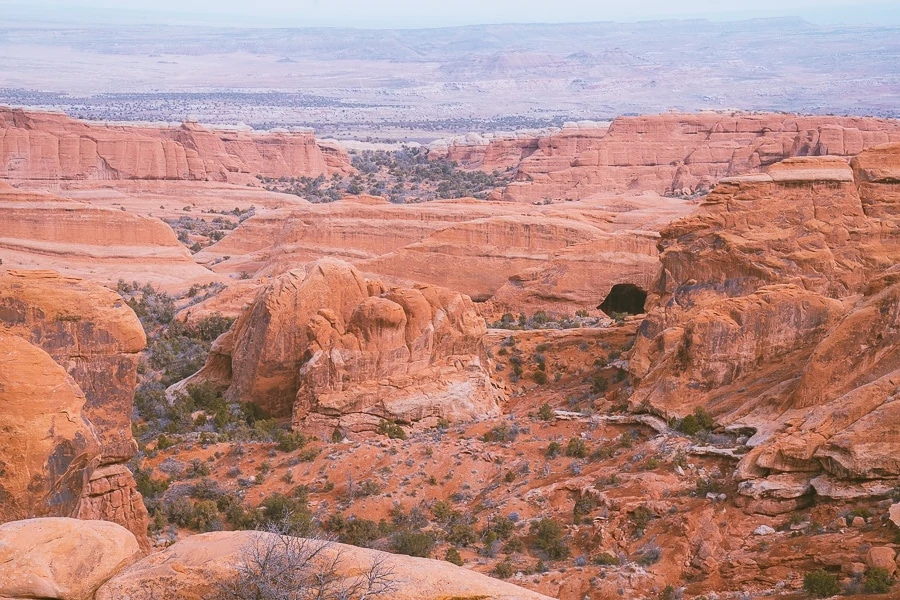
Eventually, you will see the Black Cave Arch in the distance. The Black Cave is located close to the Primitive Trail, which I will talk about below. The area when you see the Black Cave Arch is pretty outstanding. You will walk on top of red rock with grand views of the red and orange swirls of canyons and boulders. I loved this part of the trail!
The Double O Arch is a great place to sit back and eat lunch. Afterward, you can explore around here and head back the same way you came or try out the Primitive Trail!
The Primitive Trail
The first section of the Primitive Trail is the Dark Angel. Getting to Dark Angel isn’t difficult as it was easy to follow, and no scrambling was needed. So if you don’t want to do all of the sketchy, difficult Primitive Trail, you can at least do the Dark Angel Trail. Not many people were at the Dark Angel.
When you head back to Double O Arch after viewing the Dark Angel, you can head to the most difficult part of the trail… The Primitive Trail. There are signs letting you know that this trail is for more advanced hikers. After completing it, I can agree with this.
It can be easier for people to get lost on this trail, especially beginner hikers. We passed a guy that told us he had to turn around because he felt like he couldn’t find the trail. I disagreed with him, as I felt like the stacked rocks were pretty apparent throughout the trail, but it might be difficult to spot for someone relatively new to hiking.
Grab Your Free Car Camping Checklist! 🚗🌲
Ready to elevate your car camping game? Snag our essential checklist to ensure you’ve got everything you need for a stress-free, fun-filled adventure! Perfect for beginners and seasoned campers alike. Download now and hit the road prepared! 🌟🎒
I also think that good hiking boots or shoes are definitely needed. There are some pretty sketchy parts where you need them. My husband’s hiking shoes were pretty old with a bad grip, so he was having trouble in these sections. If anyone were to fall in these areas (which is possible with bad shoes), you would be seriously injured, so only hike if you trust your shoes.
I also want to say that this hike feels like it would not be doable when it is icy or snowy. I did go in the winter, but since it was sunny all week, the sun melted all the snow and ice. It is still possible to do in the winter, but there has to be relatively no ice.
I know it seems like I only listed negative points above, but I had so much fun doing the Primitive Trail. I always love a good challenging hike that involves scrambling. Also, it was nice to get away from the crowds. We only saw a few people on the trail.
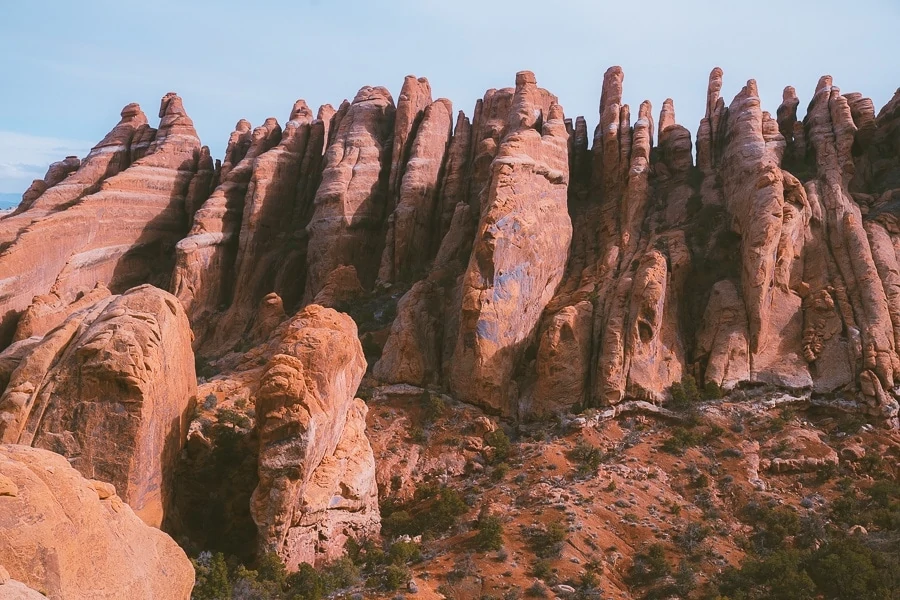
We did go see Private Arch, but we weren’t too impressed with it. We were, however, impressed with the needle-like formations near the arch. So stunning!
Overall I feel like doing the whole Garden Trail Loop is worth it! It is challenging and long, so I would block a whole day to do it. We were pretty tired after doing this hike and went back to the hotel after completing it.
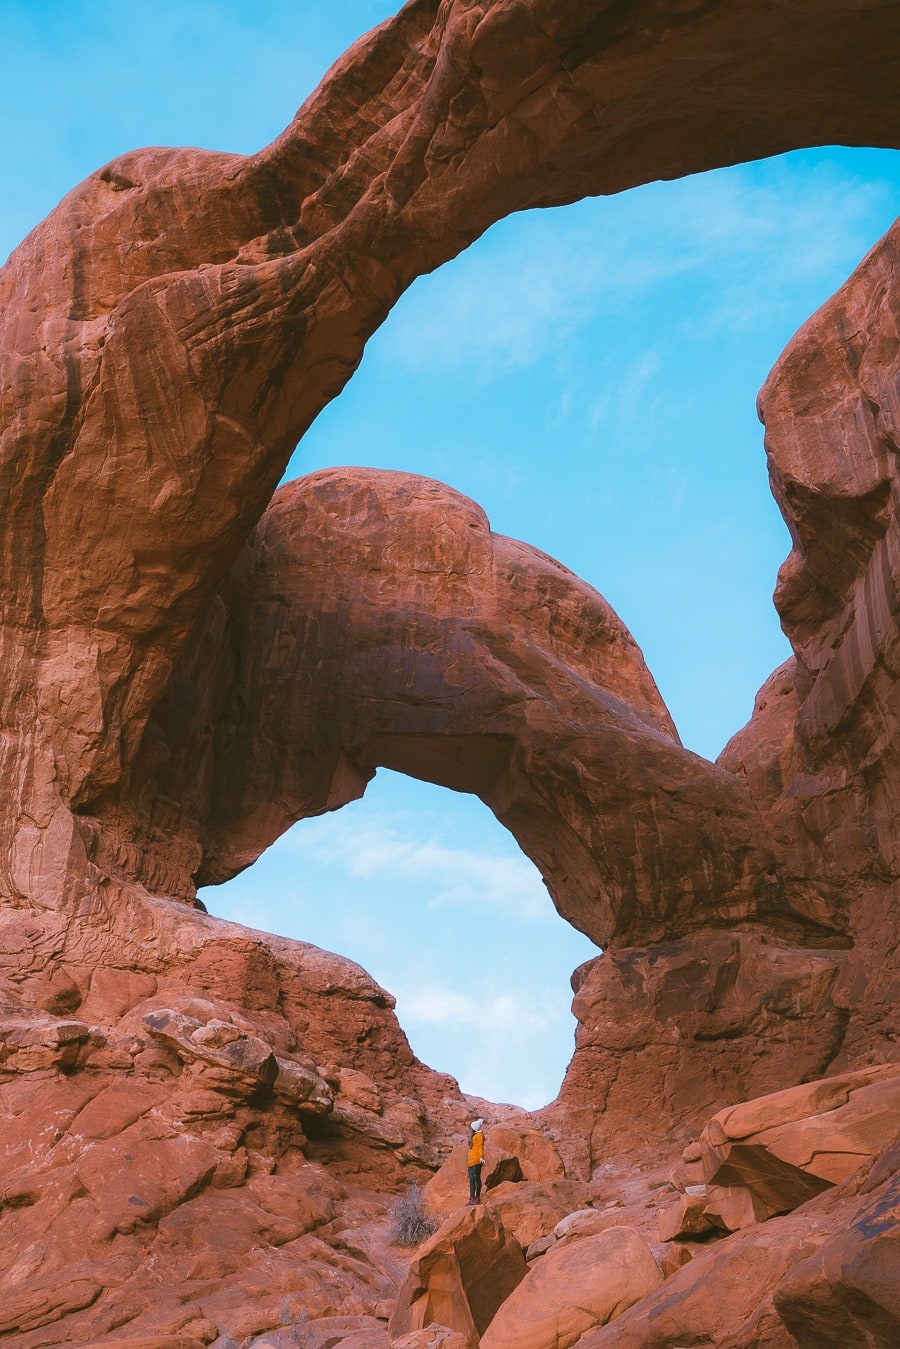
Double Arch Trail
- Distance: 0.6 miles, round trip
- Elevation Gain: 95 ft.
- Route Type: Out and Back
- Difficulty: Easy
- Trail Guide: Link
This short but easy hike is pretty awesome! I felt so tiny standing right next to the arches. They are a great place to take photos and explore around. I did arrive pretty early to get them all to myself :-). After the Delicate Arch, these are probably my second favorite Arches, so don’t miss this trail!
Balanced Rock Trail
- Distance: 0.3 miles, round trip
- Elevation Gain: 55 ft.
- Route Type: Loop
- Difficulty: Easy
- Trail Guide: Link
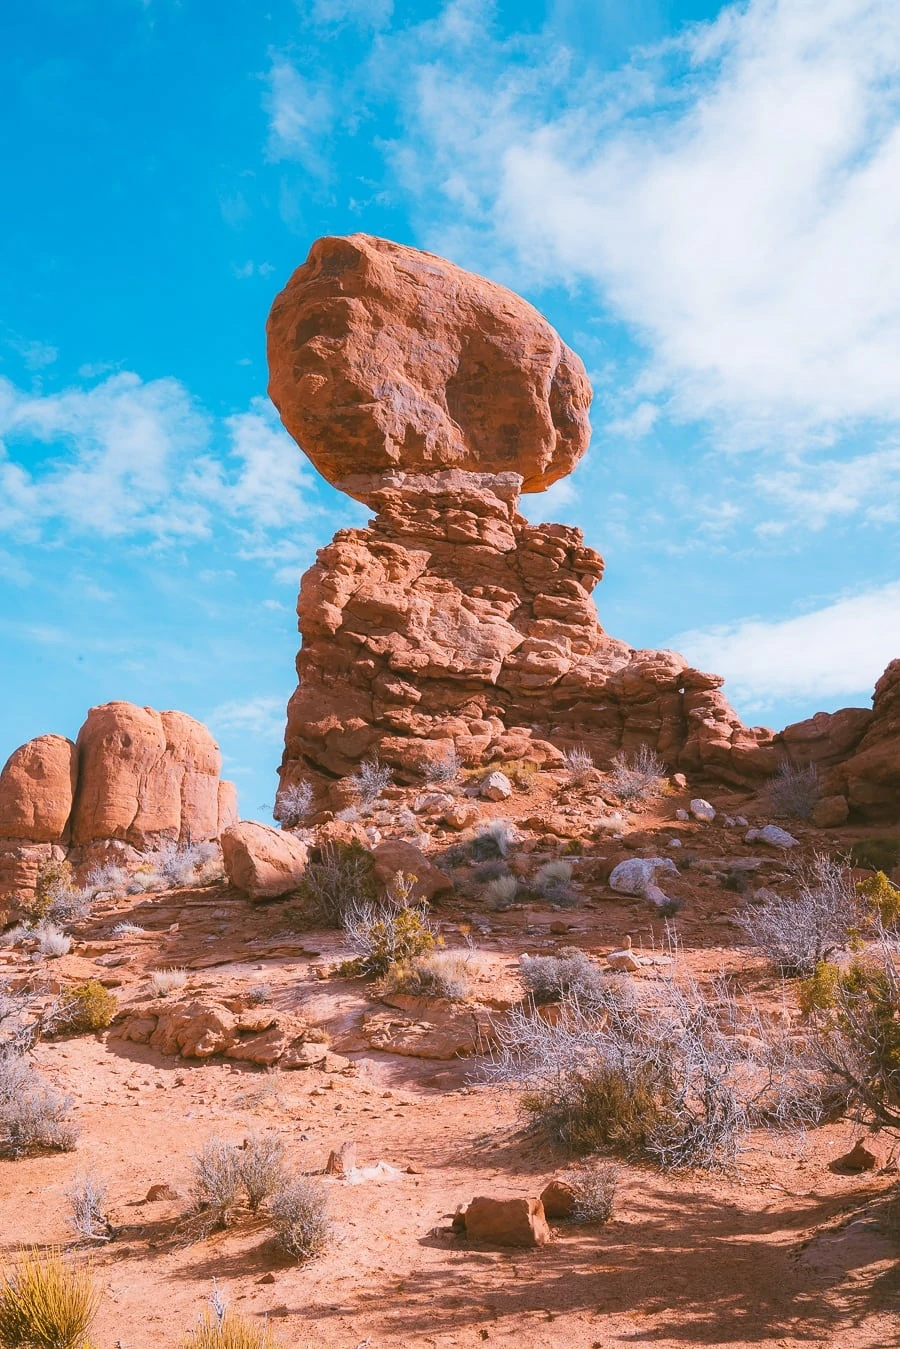
Another straightforward and quick trail to do is the Balanced rock trail. I honestly wouldn’t count this as a trail, it is more of a viewpoint, but it is too iconic not to include in this list.
Read More: Best Things to Do in Arches National Park, Utah | 17+ Attractions
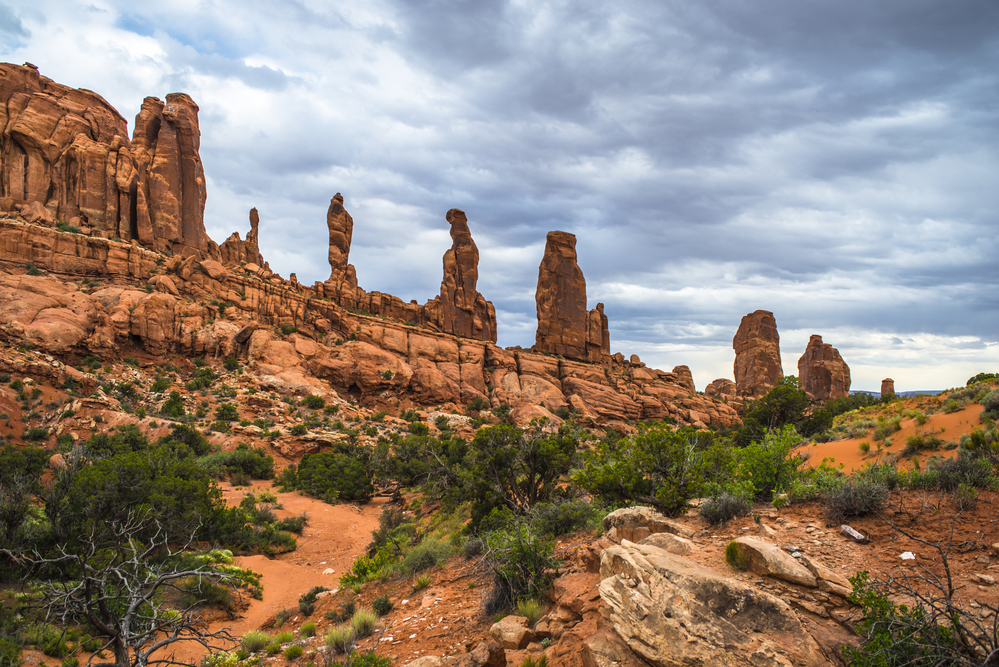
Park Avenue Trail
- Distance: 1.8 miles, round trip
- Elevation Gain: 298 ft.
- Route Type: Out and Back
- Difficulty: Easy
- Trail Guide: Link
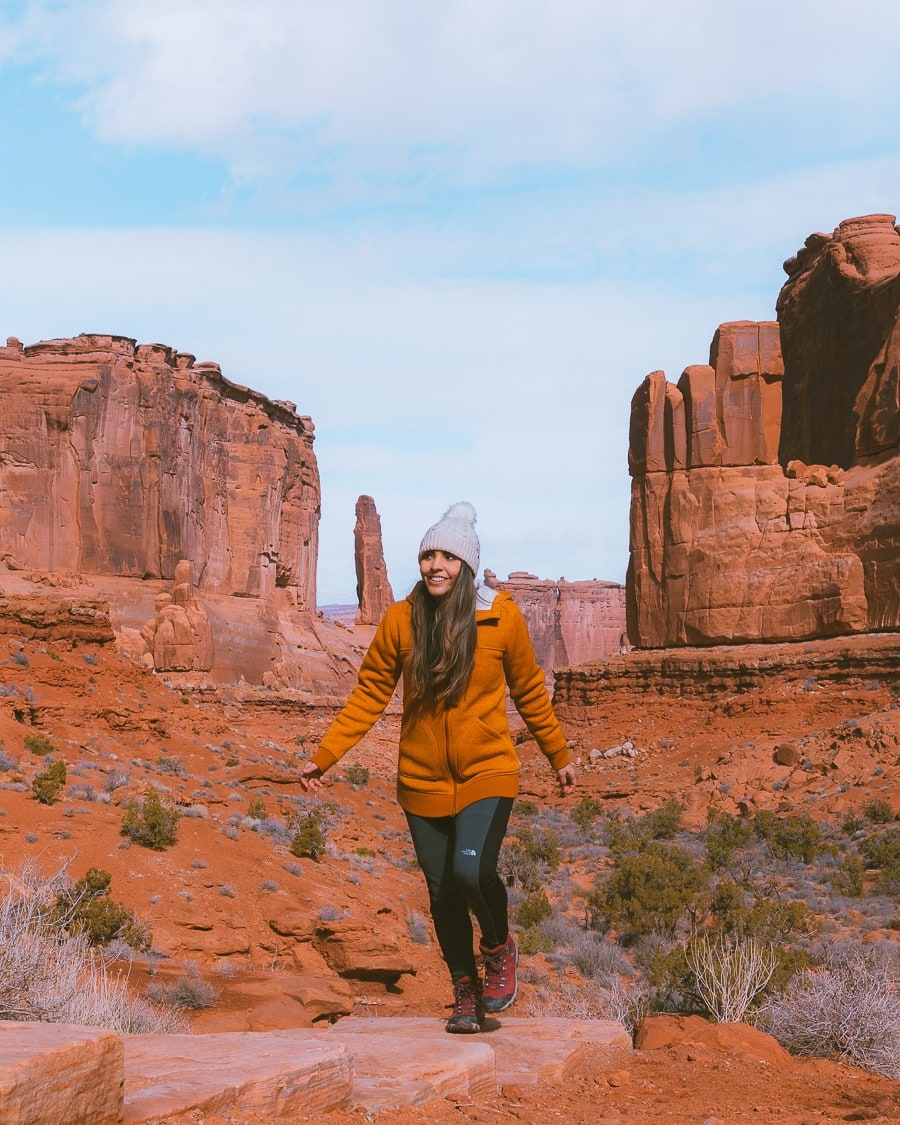
The Park Avenue Trail is located near the Arches National Park entrance and is a must-stop location. I loved how the buttes and canyons surround you throughout the whole hike. It feels like you are on another planet. The end viewpoint is the Courthouse Towers which are stunning. I am surprised I never heard about this area until I looked at the Arches National Park map. There are no arches here, but I didn’t mind! The buttes and towers are grandiose and awe-inspiring. Highly recommend.
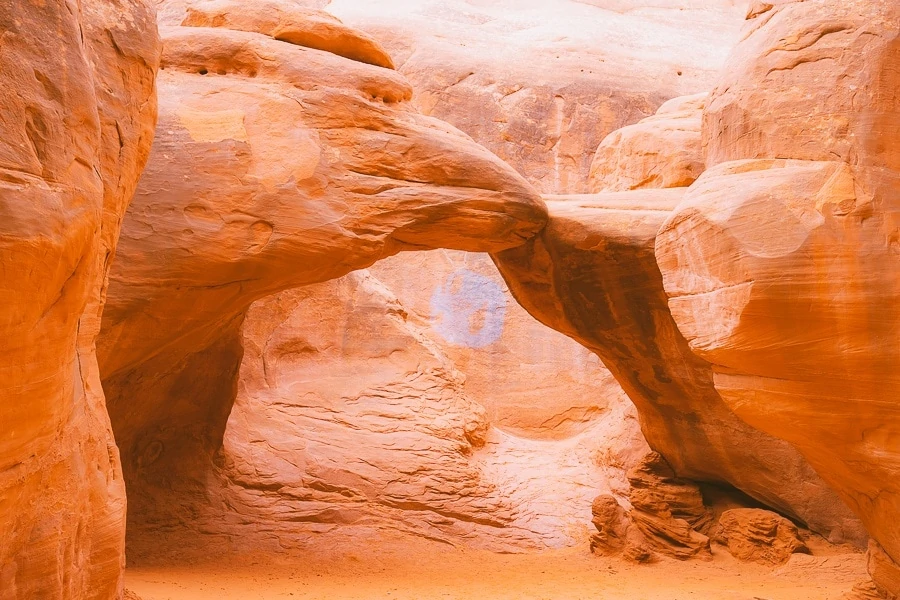
Sand Dune Arch to Broken Arch Loop
- Distance: 2.8 miles, round trip
- Elevation Gain: 321 ft.
- Route Type: Loop
- Difficulty: Moderate
- Trail Guide: Link
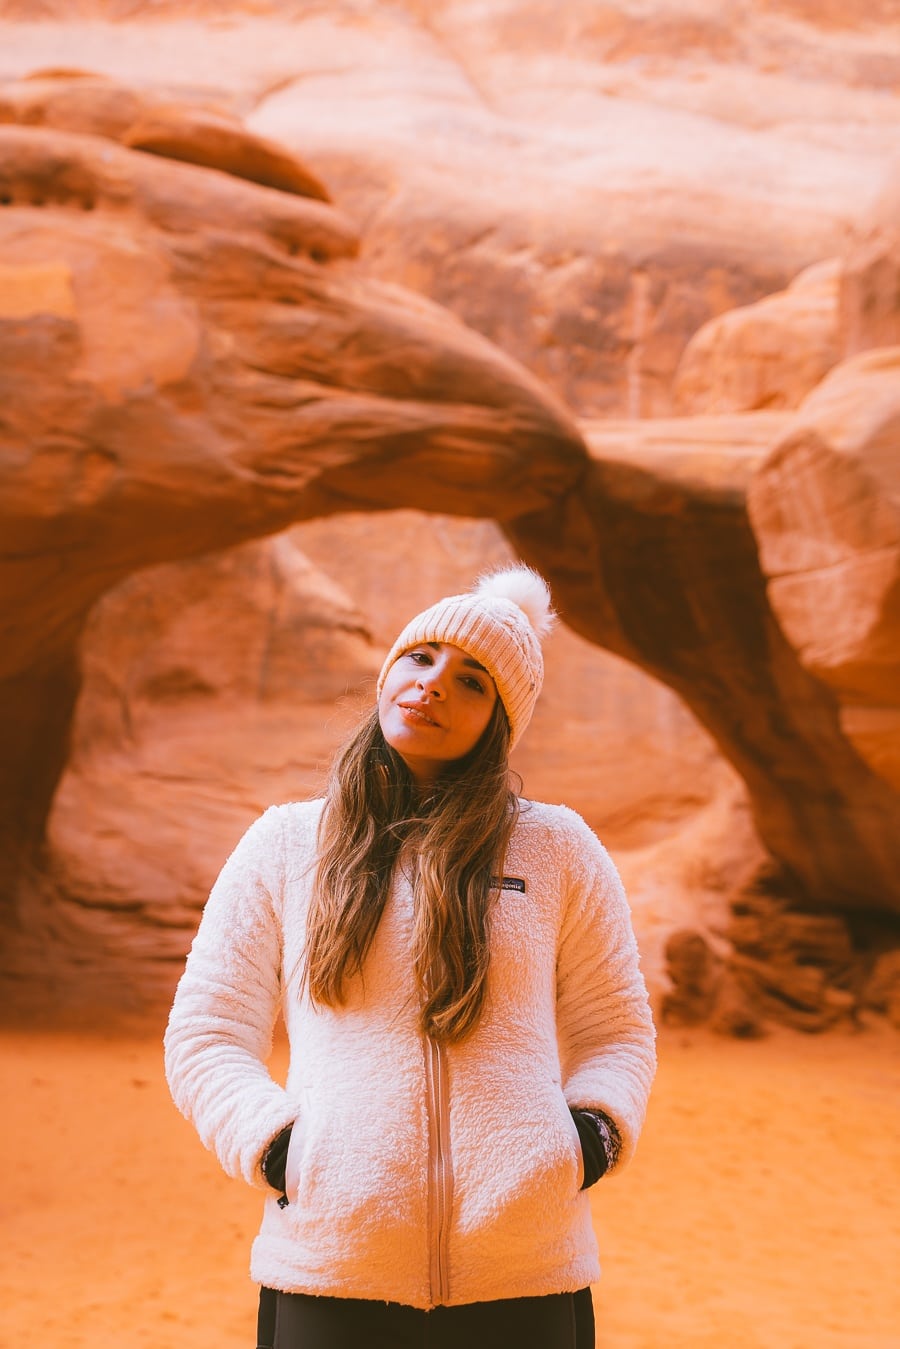
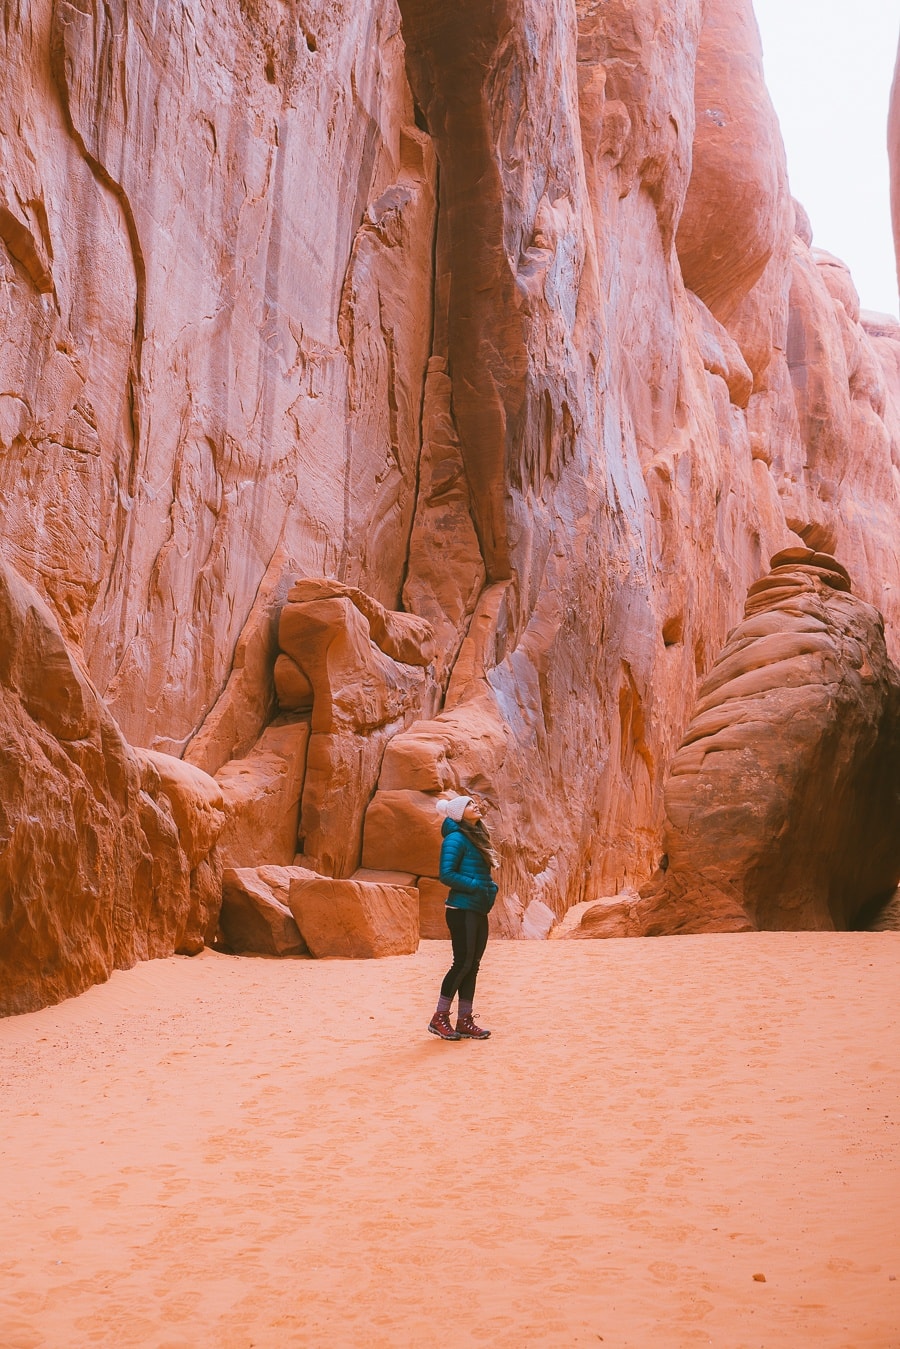
What a beautiful slice of heaven! The Sand Dune Arch Trail is so fun, and short and it is a fantastic place for photography. You can even add in the Tapestry Arch and the Broken Arch to make the hike longer.
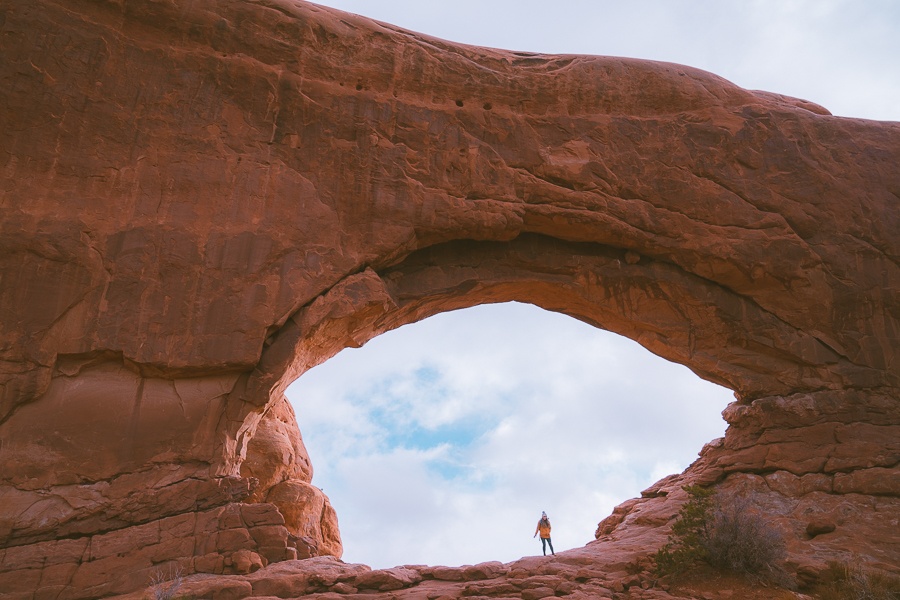
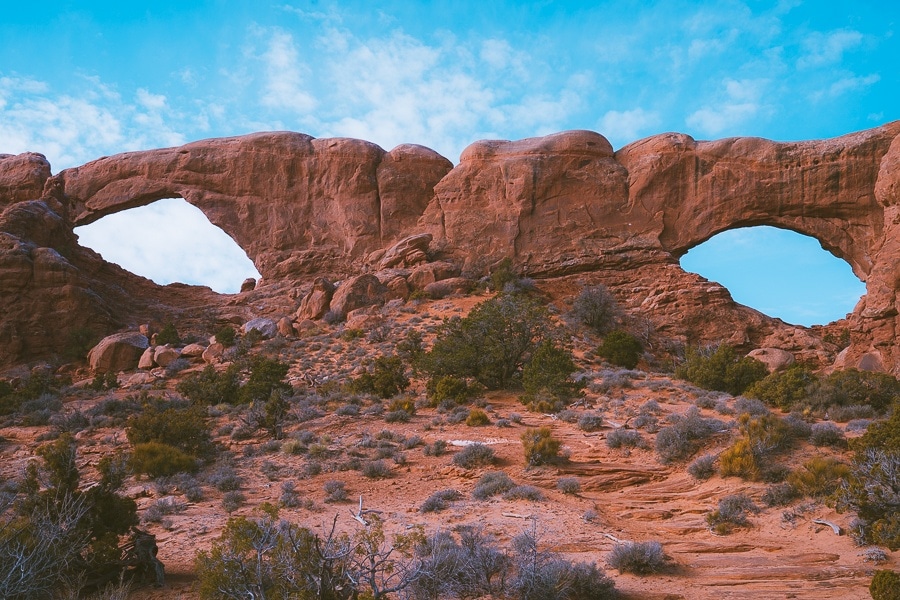
The Windows Loop And Turret Arch Trail
- Distance: 1.2 miles, round trip
- Elevation Gain: 154 ft.
- Route Type: Loop
- Difficulty: Easy
- Trail Guide: Link
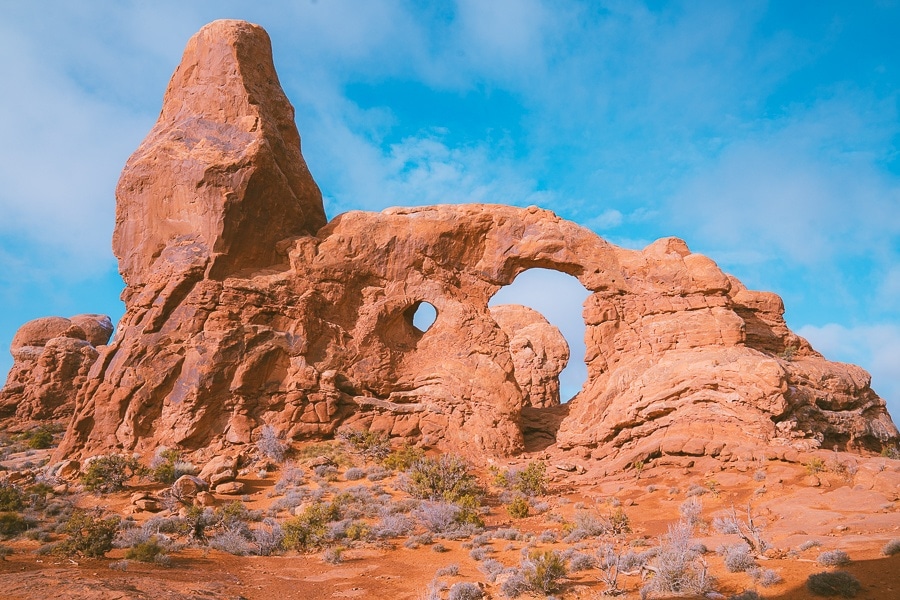
Right after the Double Arch trail, we walked on over to the Window Trail. We did the whole loop, and the trail was fantastic. I especially loved the North Window shown below. The loop eventually becomes a primitive trail that is a little rougher than the nice trail set up initially, but it is still pretty easy to do. This is a fantastic trail for the whole family and beginner hikers.
Skyline Arch
- Distance: 0.5 miles, round trip
- Elevation Gain: 42 ft.
- Route Type: Out and Back
- Difficulty: Easy
- Trail Guide: Link
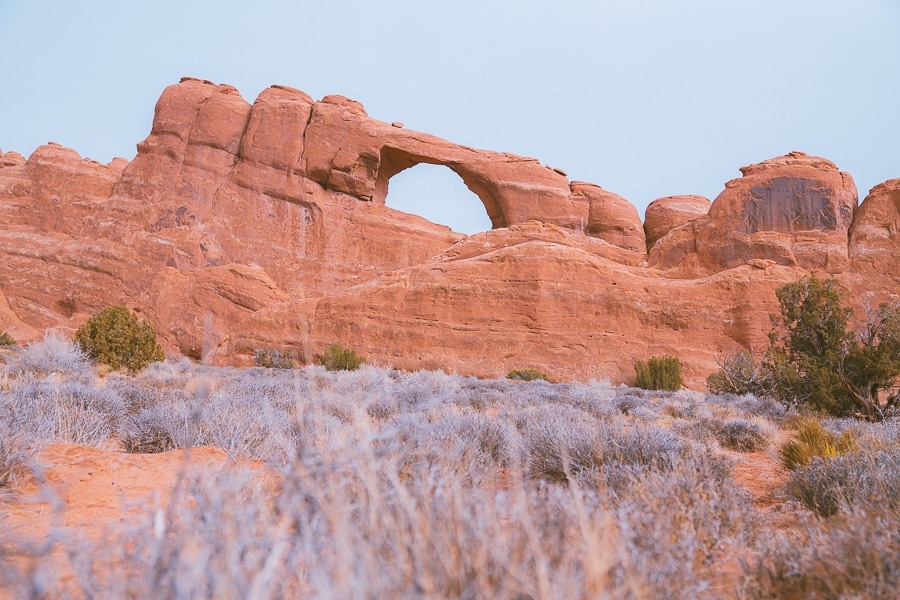
What I love about Arches National Park is how many easy trails there are. This is another extremely easy hike, and it wasn’t one of my favorite Arches, so I am glad it was effortless to get here. Any longer than 0.5 miles, and I don’t think the arch would be worth it.
Fiery Furnace Trail
- Distance: 2.1 miles, round trip
- Elevation Gain: 492 ft.
- Route Type: Loop
- Difficulty: Moderate
- Trail Guide: Link
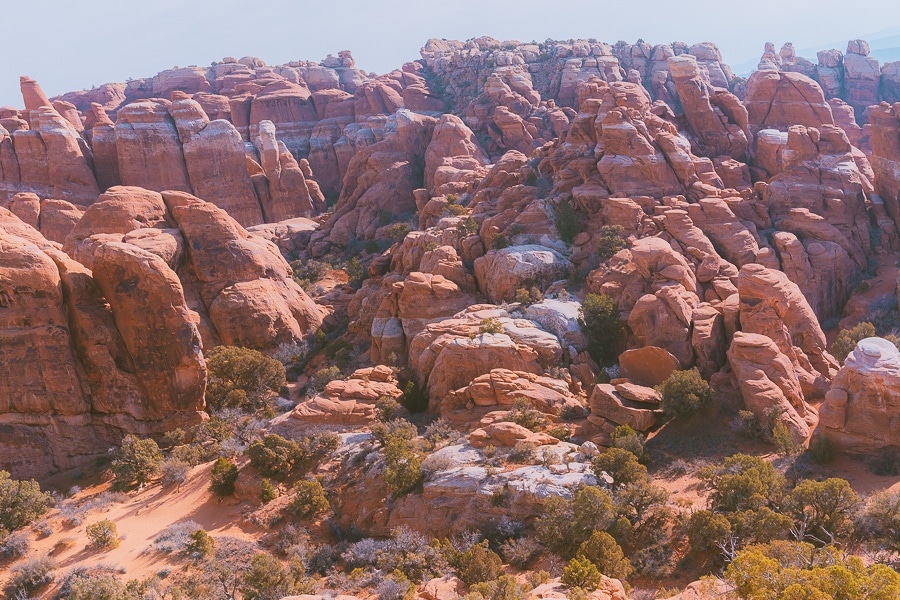
Sadly this trail was closed when we went to Arches National Park. But if it is open, I recommend booking a ranger-led ticket to see this ASAP. The only way to explore this trail is by getting a permit for yourself, which you can only book in person at the visitors center, or by obtaining a ranger-led permit which can be reserved up to 6 months in advance.
It would help if you had good hiking shoes for this trail because you will have to walk and climb on sandstone, narrow ledges, loose sand, and steep drop-offs. Also, bring plenty of water. Even if you can’t hike this trail, you can still stop at the lookout to take pictures from afar. That is what we did!
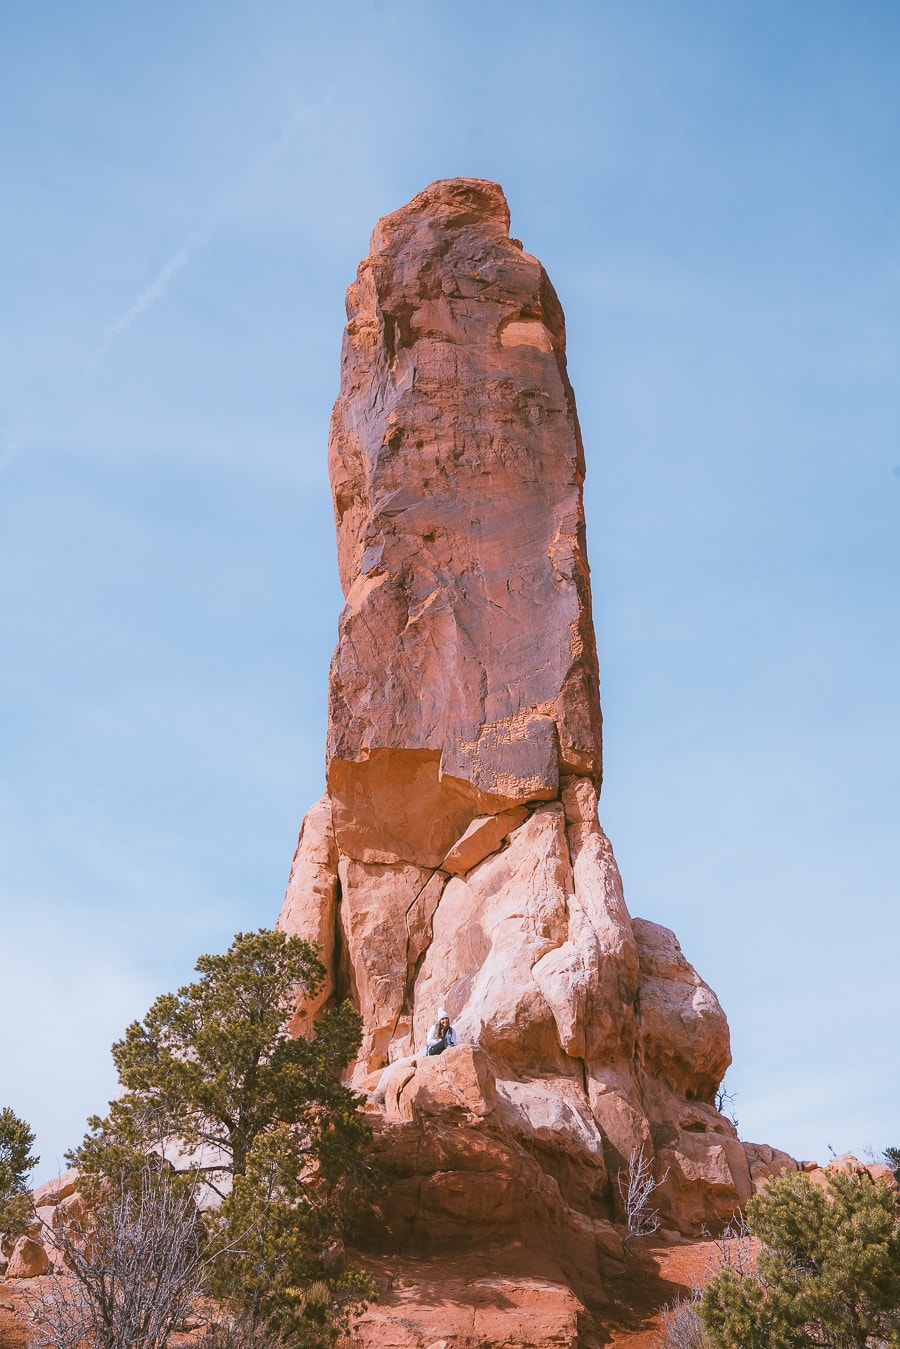
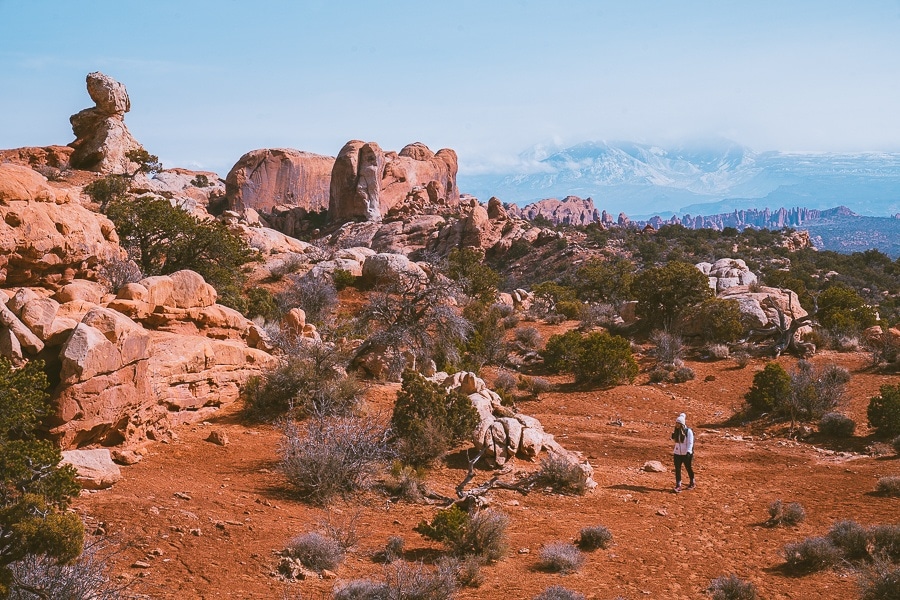
Tower Arch Trail
- Distance: 2.4 miles, round trip
- Elevation Gain: 600 ft.
- Route Type: Out And Back
- Difficulty: Moderate
- Trail Guide: Link
Other Things To Do
Garden Of Eden Viewpoint
After checking out the Window Trail and the Double Arch, make sure to stop by the Garden Of Eden Viewpoint. You don’t have to stop at the viewpoint, though; you can definitely explore around this area and discover other cool stuff like Ribbon Arch, Cove Arch, and Elephant Butte.
Many people do summit Elephant Butte, but it requires canyoneering and climbing knowledge. You can watch a view of the ascent here.
Panorama Point
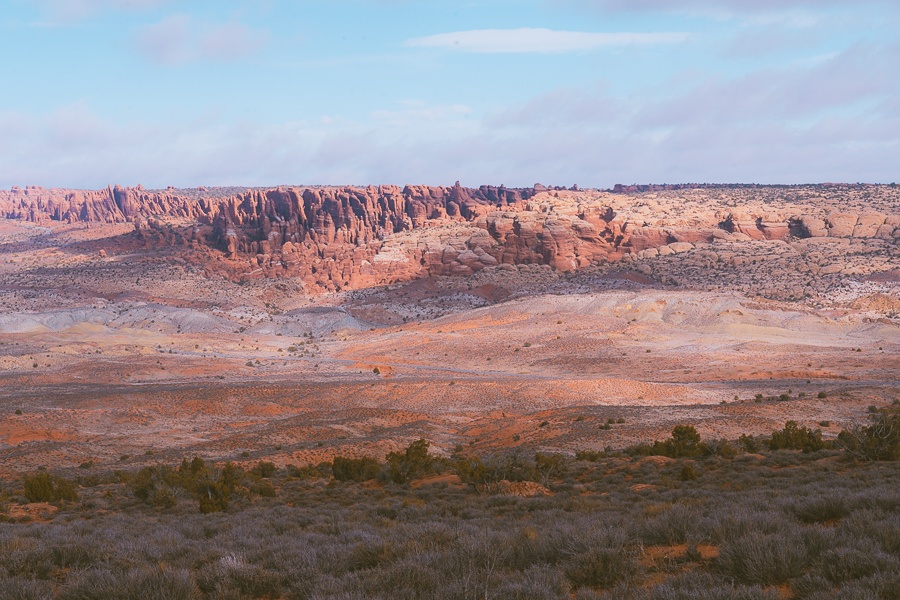
A fantastic viewpoint where you can see a large section of the national park. I especially loved seeing Fiery Furnace from afar.
Final Thoughts On Best Hiking In Arches National Park
Thanks for reading all about the best hikes at Arches National Park! I have some other great blog posts on Utah below you can check out:
- Utah National Parks Road Trip
- The Ultimate Needles Canyonlands Backpacking Guide
- The Best Things To Do In Capitol Reef National Park
- Best Hikes In Canyonlands National Park
- The Best Hikes In Utah
- The Perfect Arches To Canyonlands One Day Itinerary
- Visiting Arches National Park in Winter | Snowy Weather Guide

Get my free National Park Checklist
When you join the newsletter!
Pin For Later: Best Hikes Arches National Park