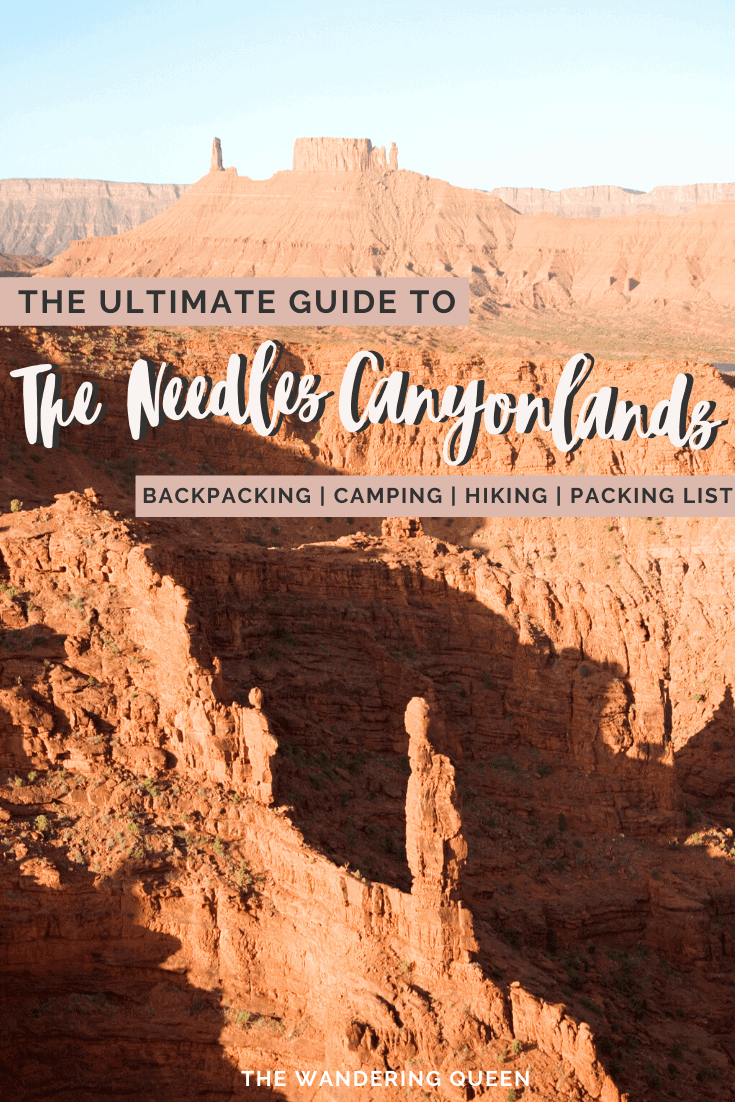
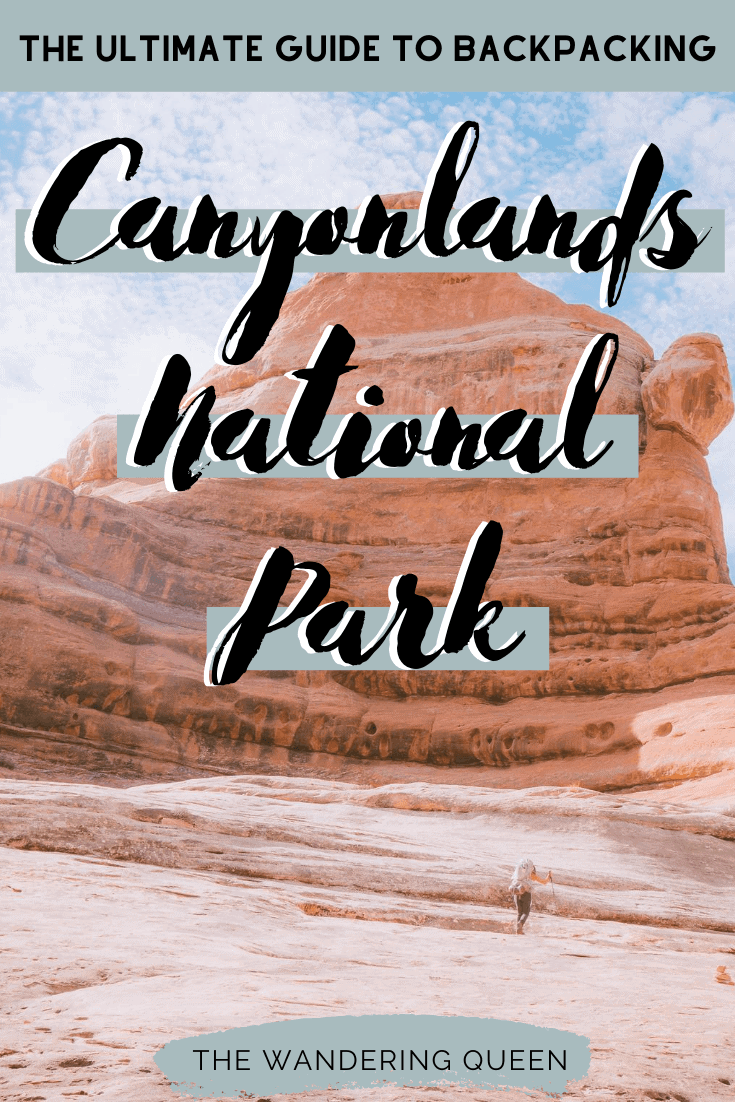
The Ultimate Needles Canyonlands Backpacking Guide
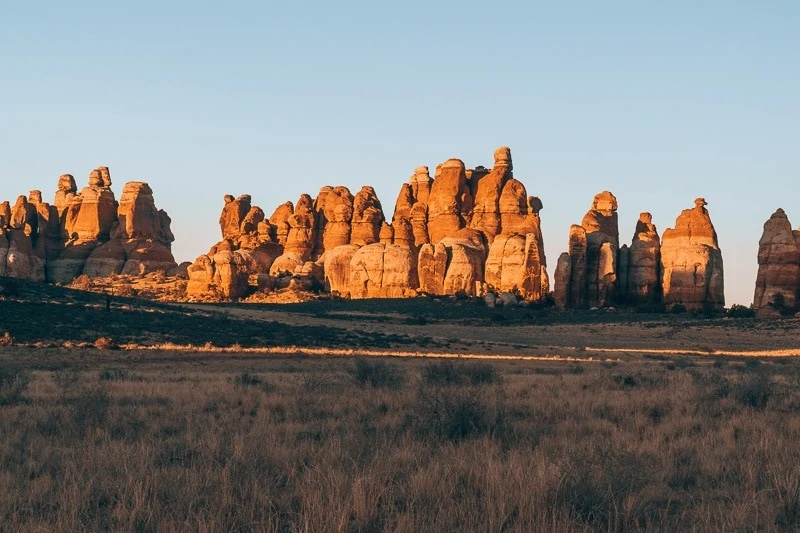
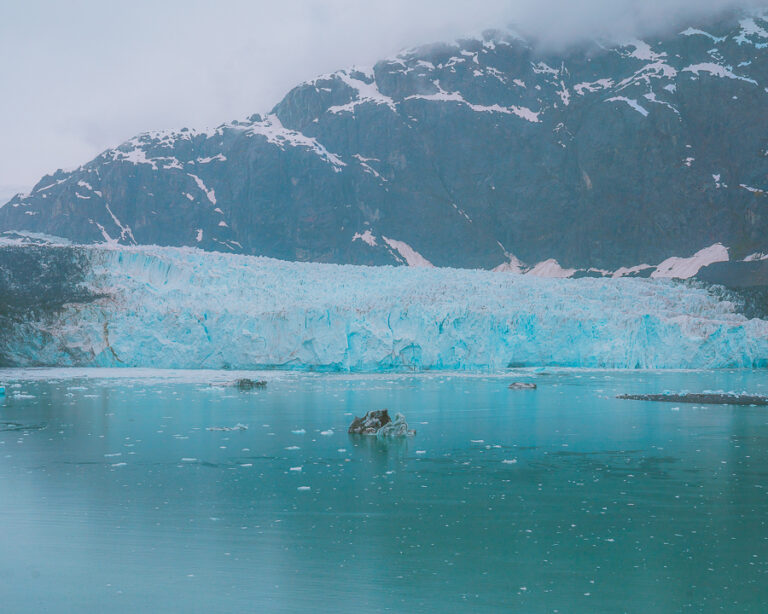
After hiking through Capitol Reef National Park and exploring Goblin Valley State Park, we headed toward Moab to discover The Needles Canyonlands. When most people think of Canyonlands National Park, the first thought that comes into people’s minds is the most well-known district, Islands In The Sky. In actuality, Canyonlands consists of the four following districts: Islands in the Sky, The Maze Canyonlands, The Rivers, and The Needles. Since Island In The Sky is the easiest district to access and is very close to Arches National Park, most people tend to visit this district the most. Island In The Sky is made up of day hikes that are easily accessible. On the other hand, the Needles district is about an hour and a half away from Moab; and we found out that the best thing to do in Needles Canyonlands is to backpack through this district. This piqued our interest because we have never backpacked through a desert. Since we had decided to car camp at Capitol Reef for a few days, we thought backpacking would be a great change. During this adventure, we got lost at night, went in the wrong direction, and ran out of water. It was a tremendous and sometimes scary adventure, but the Needles was completely worth our struggles. Below is a guide to backpacking for four days through this unique and sometimes difficult district.
Disclosure: This post contains affiliate links. If you click one of them, I may receive a small commission (for which I am very grateful for) at no extra cost to you.
Download my free Outdoor Photography Guide
Canyonlands National Park
Related Posts
Needles Canyonlands Weather
I do not recommend visiting in the summer. We went during the winter and it was still pretty hot during the day. Spring and Fall are probably the best time to visit. The average temperatures during the days are usually between 60°F and 80°F.

Read More: Best Time to Visit Canyonlands National Park
Hotels Near Moab
I recommend staying in Moab for about a night or two and explore Arches National Park or the Island in the Sky District. Here are some good hotel options:
- Red Cliffs Lodge has the impressive sunset views of the Colorado River, especially with your private patio. The area includes a winery, a western film museum, a horse corral, and an outdoor pool and gym. Yeah, this place has it all. >Check For Prices
- SpringHill Suites by Marriott Moab has more of a modern feel, has a hot tub, free wifi, a fitness center, mountain views, and an outdoor pool. >Check For Prices
- Expedition Lodge is a budget-friendly hotel with a swimming pool with a waterslide, and a hot tub. There is also an option for private rooms for up to 6 people. A perfect choice for a family vacation. >Check For Prices
Read More: Where to Stay in Moab, Utah – 12 Best Hotels, Lodges & Rentals
Camping Near Needles Canyonlands and Hiking Trails
If backpacking isn’t your cup of tea, I recommend staying at The Squaw Flat Campground and doing one of the best Needles Canyonlands hikes: Chesler Park Loop Trail. Some of the campsites can be reserved during certain times of the year. The campsites have fire pits and picnic tables. For more information on the hiking trails click here.
How To Get to Canyonlands National Park Needles District
Below you can see the map of the three options to getting to The Needles District.
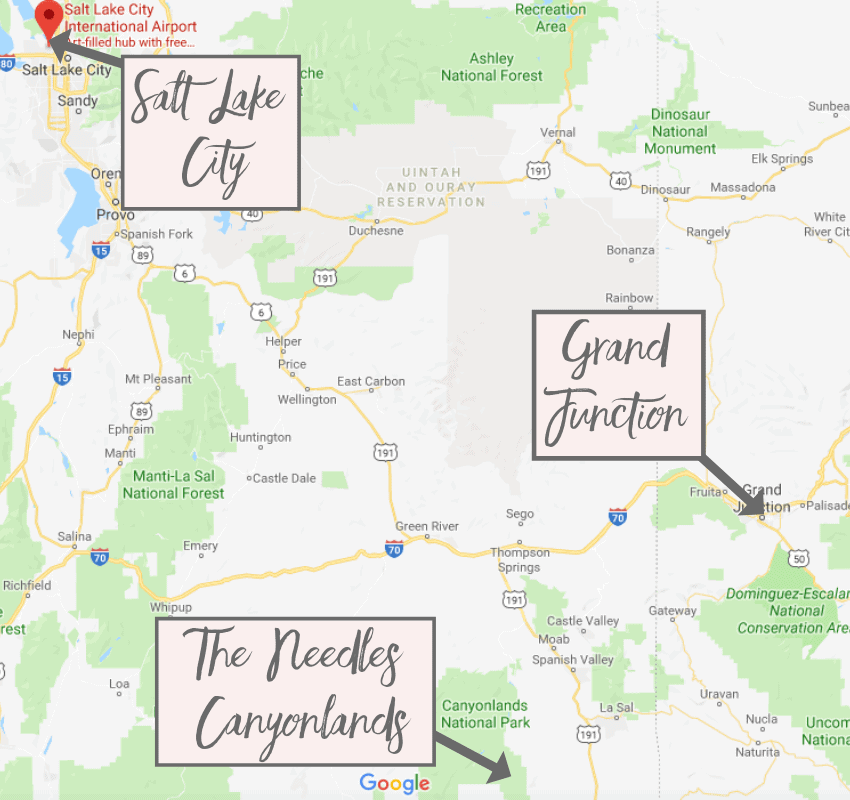
- Salt Lake City: This will probably be your cheapest option but there is a lot more driving involved about 5 hours and 15 minutes. The distance is 313 miles.
- Grand Junction Airport: is the next best option budget wise. The drive from Grand Junction is about 3 hours and 15 minutes. The distance is 188 miles.
- Canyonlands Field Airport: is the nearest airport to the Needles (about 2 hours). But, it might cost you a pretty penny since it is a small airport. The distance is 92.2 miles.
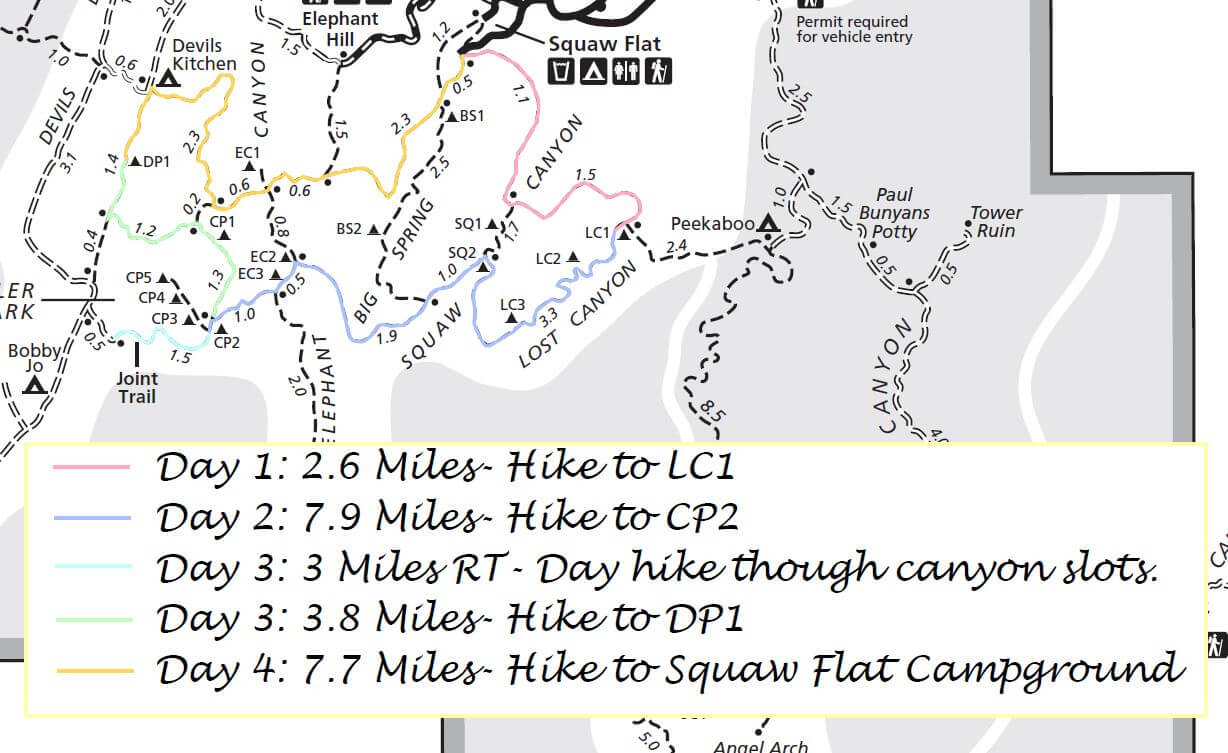
The Canyonlands Needles Map
This Needles Canyonlands map is a backpacking itinerary for a four-day loop around the Needles. For an original map from NPS please click here.
How to Obtain a Permit
Obtaining a permit in the spring, summer, and fall is a very simple process, just visit the NPS reservation system to see which campsites are available on the dates of the trip. In the winter (November-March), the permit is obtained at the self-registration station located on the front porch of the Needles Visitor Center.
What to Pack for the Needles District Canyonlands
Below is the list of equipment we brought on the trail with us. I have linked all equipment to the equipment we own and 100% recommend.
- Sunscreen: This is a no brainer. There are areas on the trail where there is no shade. Slather some on right before the trek. >Buy Sunscreen
- Bug Repellent: When I go backpacking anywhere I always bring a small spray just in case. I have linked a perfect one for outdoor travel. >Buy Mosquito Spray
- Hiking Shoes: If you use tennis shoes you can easily hurt your toes hitting a rock by accident (Trust me I have done it so many times before). I do NOT recommend backpacking in Canyonlands in regular shoes. There are so many instances you have to climb over rocks. >Check Out My Hiking Shoes
- Refillable water bottle: I love this water bottle because I know for a fact it will not break. Also bring some water reservoirs. >Check Prices Now
- Water Reservoir: I love this one! >Check It Out Here
- Sunglasses: It can get pretty sunny. >Check Out These Sunglasses
- Snacks: The best snacks are jerky, nuts, energy bars. >Clif Bars are great for hiking.
- Trekking Poles: This is an optional product, but they really help with the knees. The poles I have listed are known to be one of the best in the market. >Buy The Trekking Poles Here
- Camera: I have linked the camera I used to take pictures with. The Sony A6000 is a great camera for people that want to start getting better at travel photography. >Buy Sony Camera Here
- Tripod: This is an optional item but it is great for getting great sunset pictures. >Check out this tripod
- First Aid Kit: This is one of the first things I bought when I first started backpacking and camping. It is super portable. >Buy This Awesome First Aid Kit Here
- Backpack (50 – 65 Liters): I feel like the backpack is the most important equipment for this trip. If you have a low-quality backpacking pack, it can really hurt your back. One of my first backpacks didn’t give me any support and I was always in pain during my backpacking trips. The Osprey (which I have linked) is known to be one of the best makers of backpacks out there. >Buy my Awesome Backpack
- Tent: The tent can be one of the heaviest items you will be carrying. I just bought this new Nemo 2 Person tent and it is so small and light! >Buy The Nemo Backpacking Tent
- Jet Boiler: This is a portable mini stove that will boil water for you. This is great if you are bringing dry food >Buy My Jet Boiler
- Propane for Jet Boiler: You can usually buy this at the Walmart.
- Sleeping Pad: A sleeping pad is pretty much a small, packable inflatable mattress. The pad you take with you on this trip should be lightweight. I have tried many types of sleeping pads (cheap ones, light ones, comfortable ones), and the one I have linked is probably the best one in the market for backpacking. It is my husband’s sleeping pad and it can be used all year long. >Check Out My All-Time Favorite Sleeping Pad
- Sealed food that does not require water
- Dry Food: Dry food is the perfect food for when you are backpacking. All you have to do is add boiling water. Let me warn you that most dry food doesn’t taste amazing, but it is good enough after a long day of hiking. Now keep in mind that dry food does need water so I recommend only bringing a few packs of dry food. >Check Out Some Of My Favorite Dry Food
- Spork: A spoon and fork in one. >Buy A Spork Now
- Headlamp: A headlamp is an absolute must! It is a lot more portable and easier to use than a flashlight. We got stuck backpacking at night so this was essential. >Buy A Headlamp Now
- Pillows: Pillows can take a lot of room, so I recommend buying an inflatable one. The one I have linked, I have had for five years now, and it is STILL going strong. >Buy The EXTREMELY Packable Inflatable Pillows
- Sleeping Bag: One of the most critical aspects of getting a good nights sleep! Bringing a sleeping bag is a must. It does get chilly at night so make sure to bring a warm sleeping bag. >Look At Prices
- Compression Pack: This just compresses your sleeping bag, so it is easier to pack! >Buy a Compression Pack
- Sandals: I hate wearing my hiking shoes when I am hanging around the campsite, so bringing some sandals for leisure is a must for me. >Check Out These Sandals
- Hiking Pants: Here are some excellent hiking pants that are super durable. I love these pants! >Click For My Favorite Hiking Pants
- Breathable sweat-wicking shirts
- Hiking socks: Having the correct socks helps you prevent getting blisters. Smart Wool is probably my favorite brand out there. I also love how they now have pink socks too 🙂 >Buy Hiking Socks
- Sports Bra: For women.
- Jacket: Only in the fall, winter, and spring >Buy My Favorite Jacket
- Trash Bags: Everything you pack in, you must pack out. So bring a few bags with you. >Buy Some Trash Bags
- Printed Permit: Bring multiple copies just in case.
- A detailed map of the needles campsites and distances: If there is one item you NEED to buy on this list, it is this one. We got lost a few times so a map really helped. Do not go backpacking though Canyonlands without a map. Canyonlands is still a hot desert even in the winter. I honestly don’t know what we would have done without our detailed trail map. >Buy This Important Map Now
- Base Layers: This is only needed in the winter. If you get chilly like me this is necessary! I have been using Smartwool for years now and they are my go to base layers. >Buy the bottoms here, >Buy the top here
- Toothbrush, Toothpaste, Medicine & Toiletries
- Knife
- Toilet paper
- Waste bag per park rules
- Water*

Note: The amount of water varies per person, season, and type of food brought to the park. There is next to no rivers or creeks in the backcountry, so plan to bring all the water needed for the stay. A lot of dry foods also require water to eat, so plan accordingly. Sealed tuna packages are a good option.
Join my Newsletter to receive my free Backpacking Checklist!
Subscribe to have posts delivered straight to your inbox!! PLUS, get my FREE backpacking checklist!
Canyonlands Island in the Sky
If you want more information on the Island in the Sky district, check out this post.
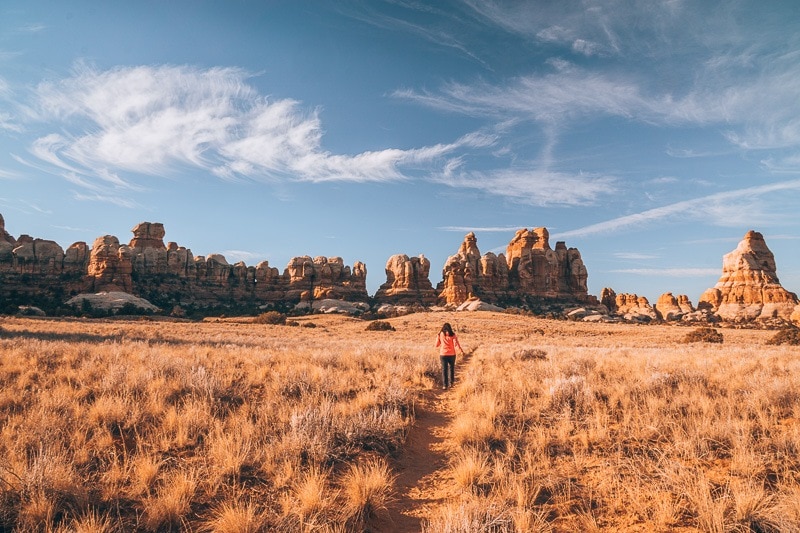
Backpacking The Needles Canyonlands Day 1 – Camping at LC1
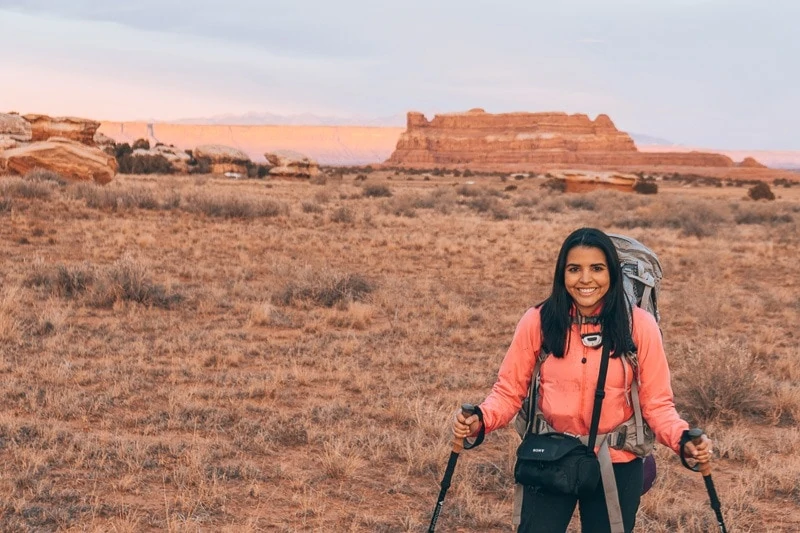
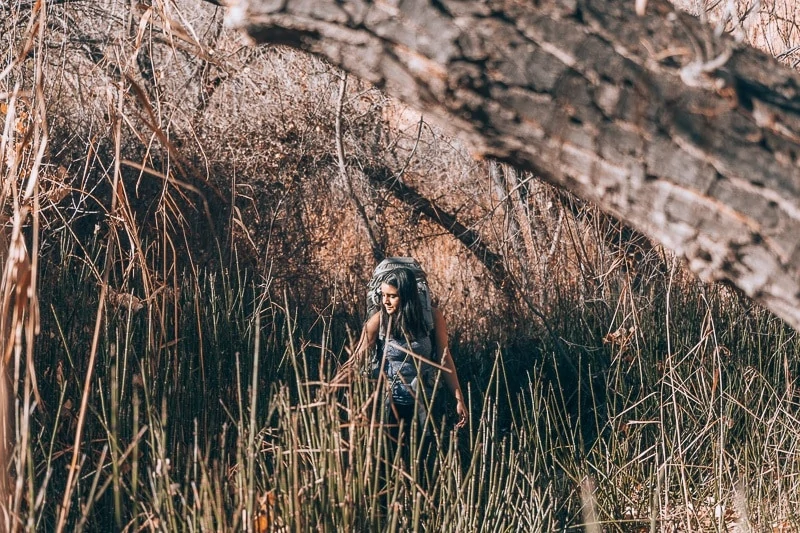
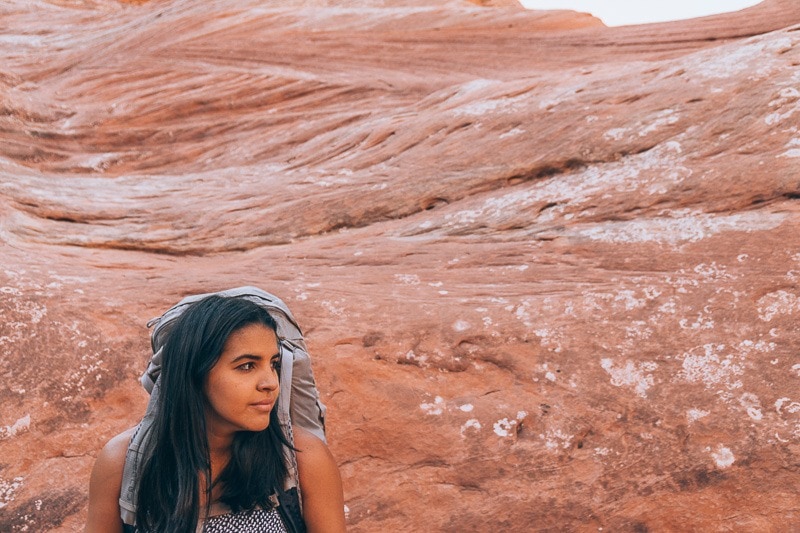
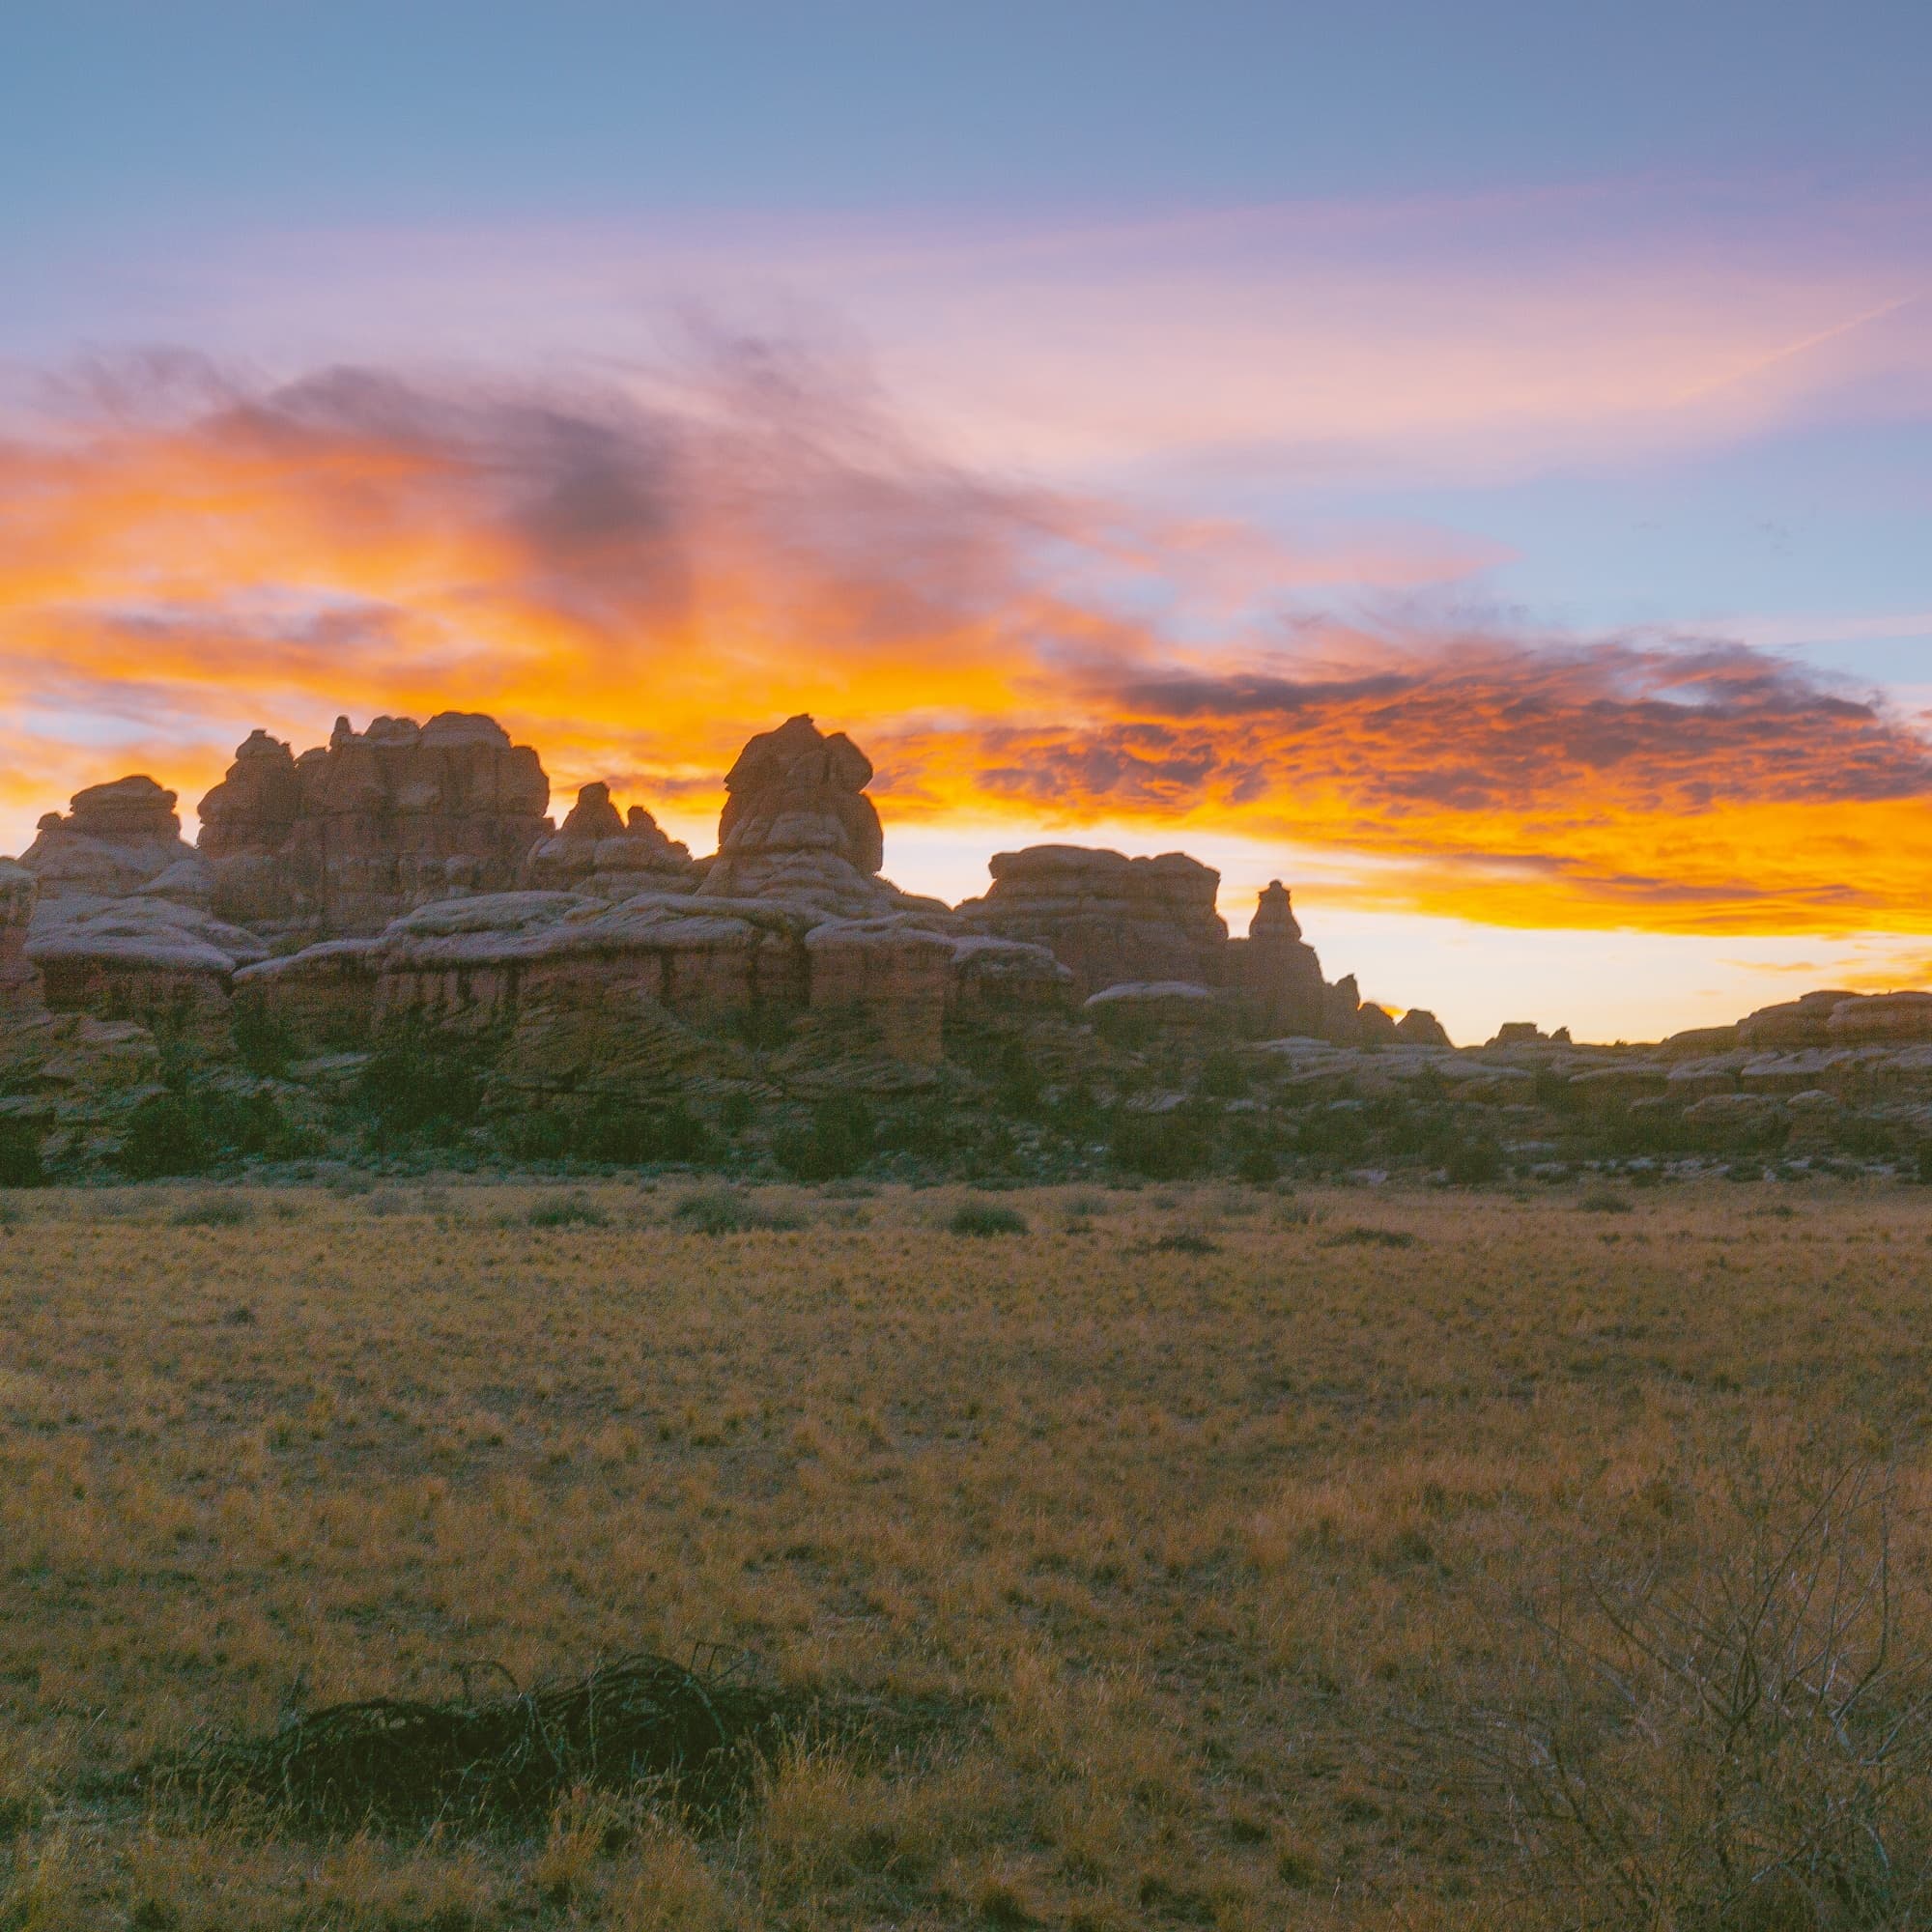
We arrived at Squaw Flat Campground right when the sun was going down on the partly sunny, chilly day. Now, most people in their right mind would have advised us against getting to the park a bit late, but we got a little too distracted at Goblin Valley State Park. Well, when we got to the campsite we packed our gear, put our permit on the dashboard and filled our hydration packs and any bottles we could find with as much water as we could. We packed 14 liters in total, so approximately 31 pounds was added to our bags, plus the storage space. Our backpacks were heavy! Then, we headed out to the wilderness with our heavy backpacks and trekking poles while the sun was starting to set.
The first part of the hike was pretty easy and had spectacular views of the sunset. A pretty pink, citrus sky along with the orange, brown canyons really made the day feel warm. But the sunset didn’t last forever. Right, when we started to use our headlamps, was when we noticed that we went to the wrong campground. SQ1 instead of LC1. Luckily it wasn’t too far to get back on track, but having to hike with only a headlamp really worried us.
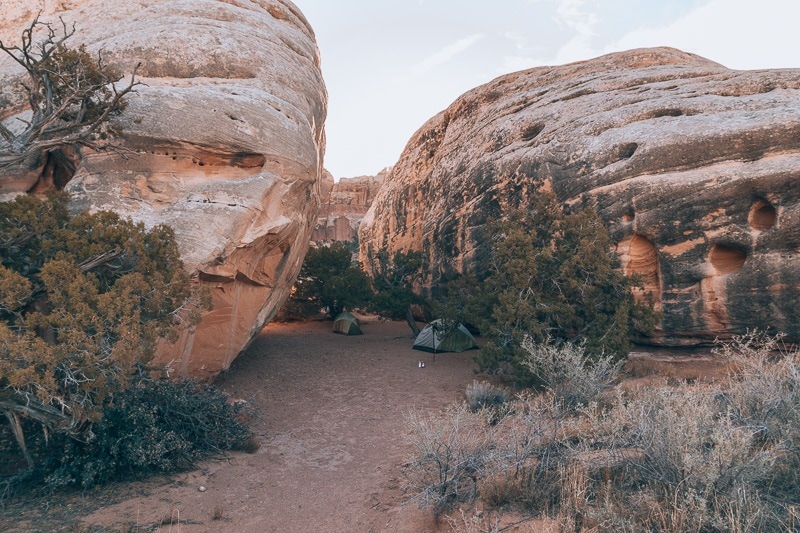
The inevitable happened, we got lost again. We couldn’t find a marker for about an hour but luckily Jameson was determined to hunt out this marker, so we could get some sleep in this vast, cold darkness. After finding the marker and leading our group to our campground, we finally set up camp and ate our first meal out in the wilderness. Of the three campgrounds, LC1 was my least favorite. It had no views and a lot of trees. It was also colder than the other campsites, likely due to the campground being at a lower elevation.
Backpacking The Needles Canyonlands Day 2 – Camping at CP2
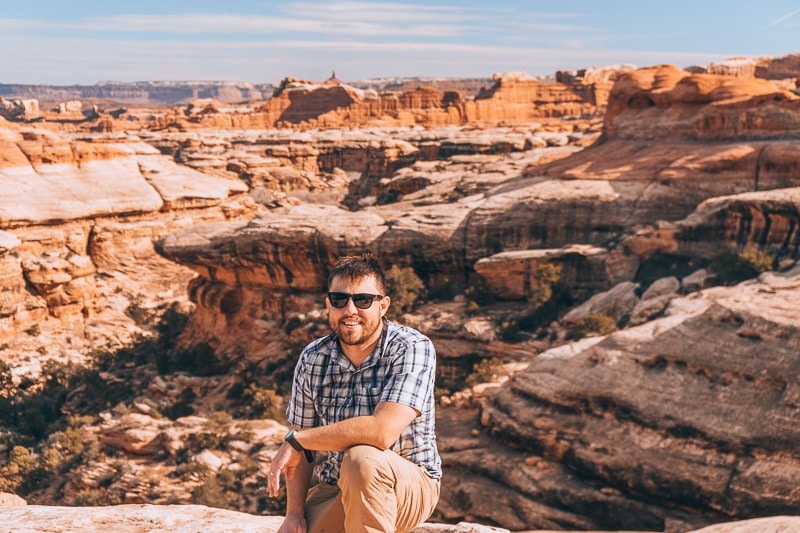
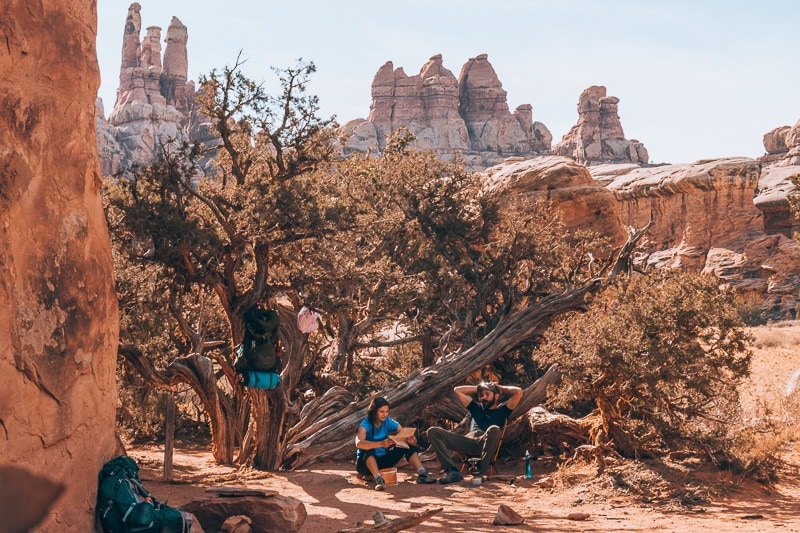
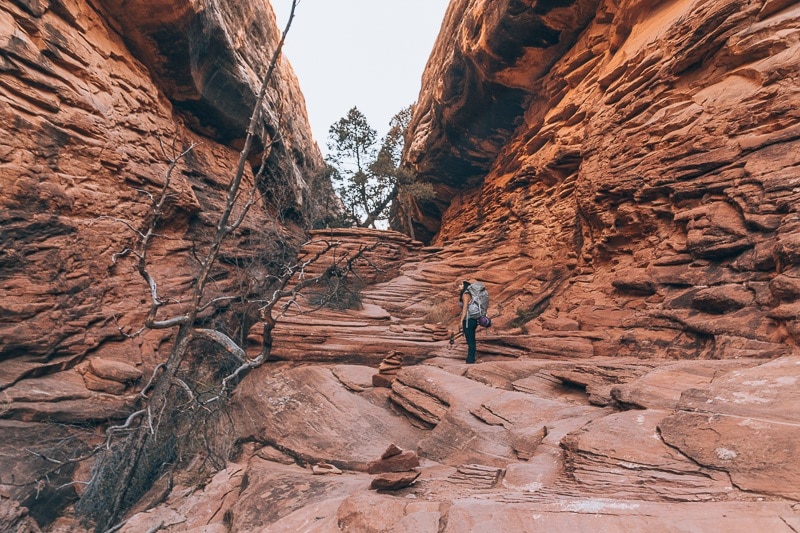
Day 2 was probably everyone’s favorite day of our Utah extravaganza, Friendsgiving trip. It was filled with adventure, sunsets, climbing, ladders, caves, lovely grass fields, and a pretty impressive campsite. We set out early in the morning ready to take on the hike ahead of us.

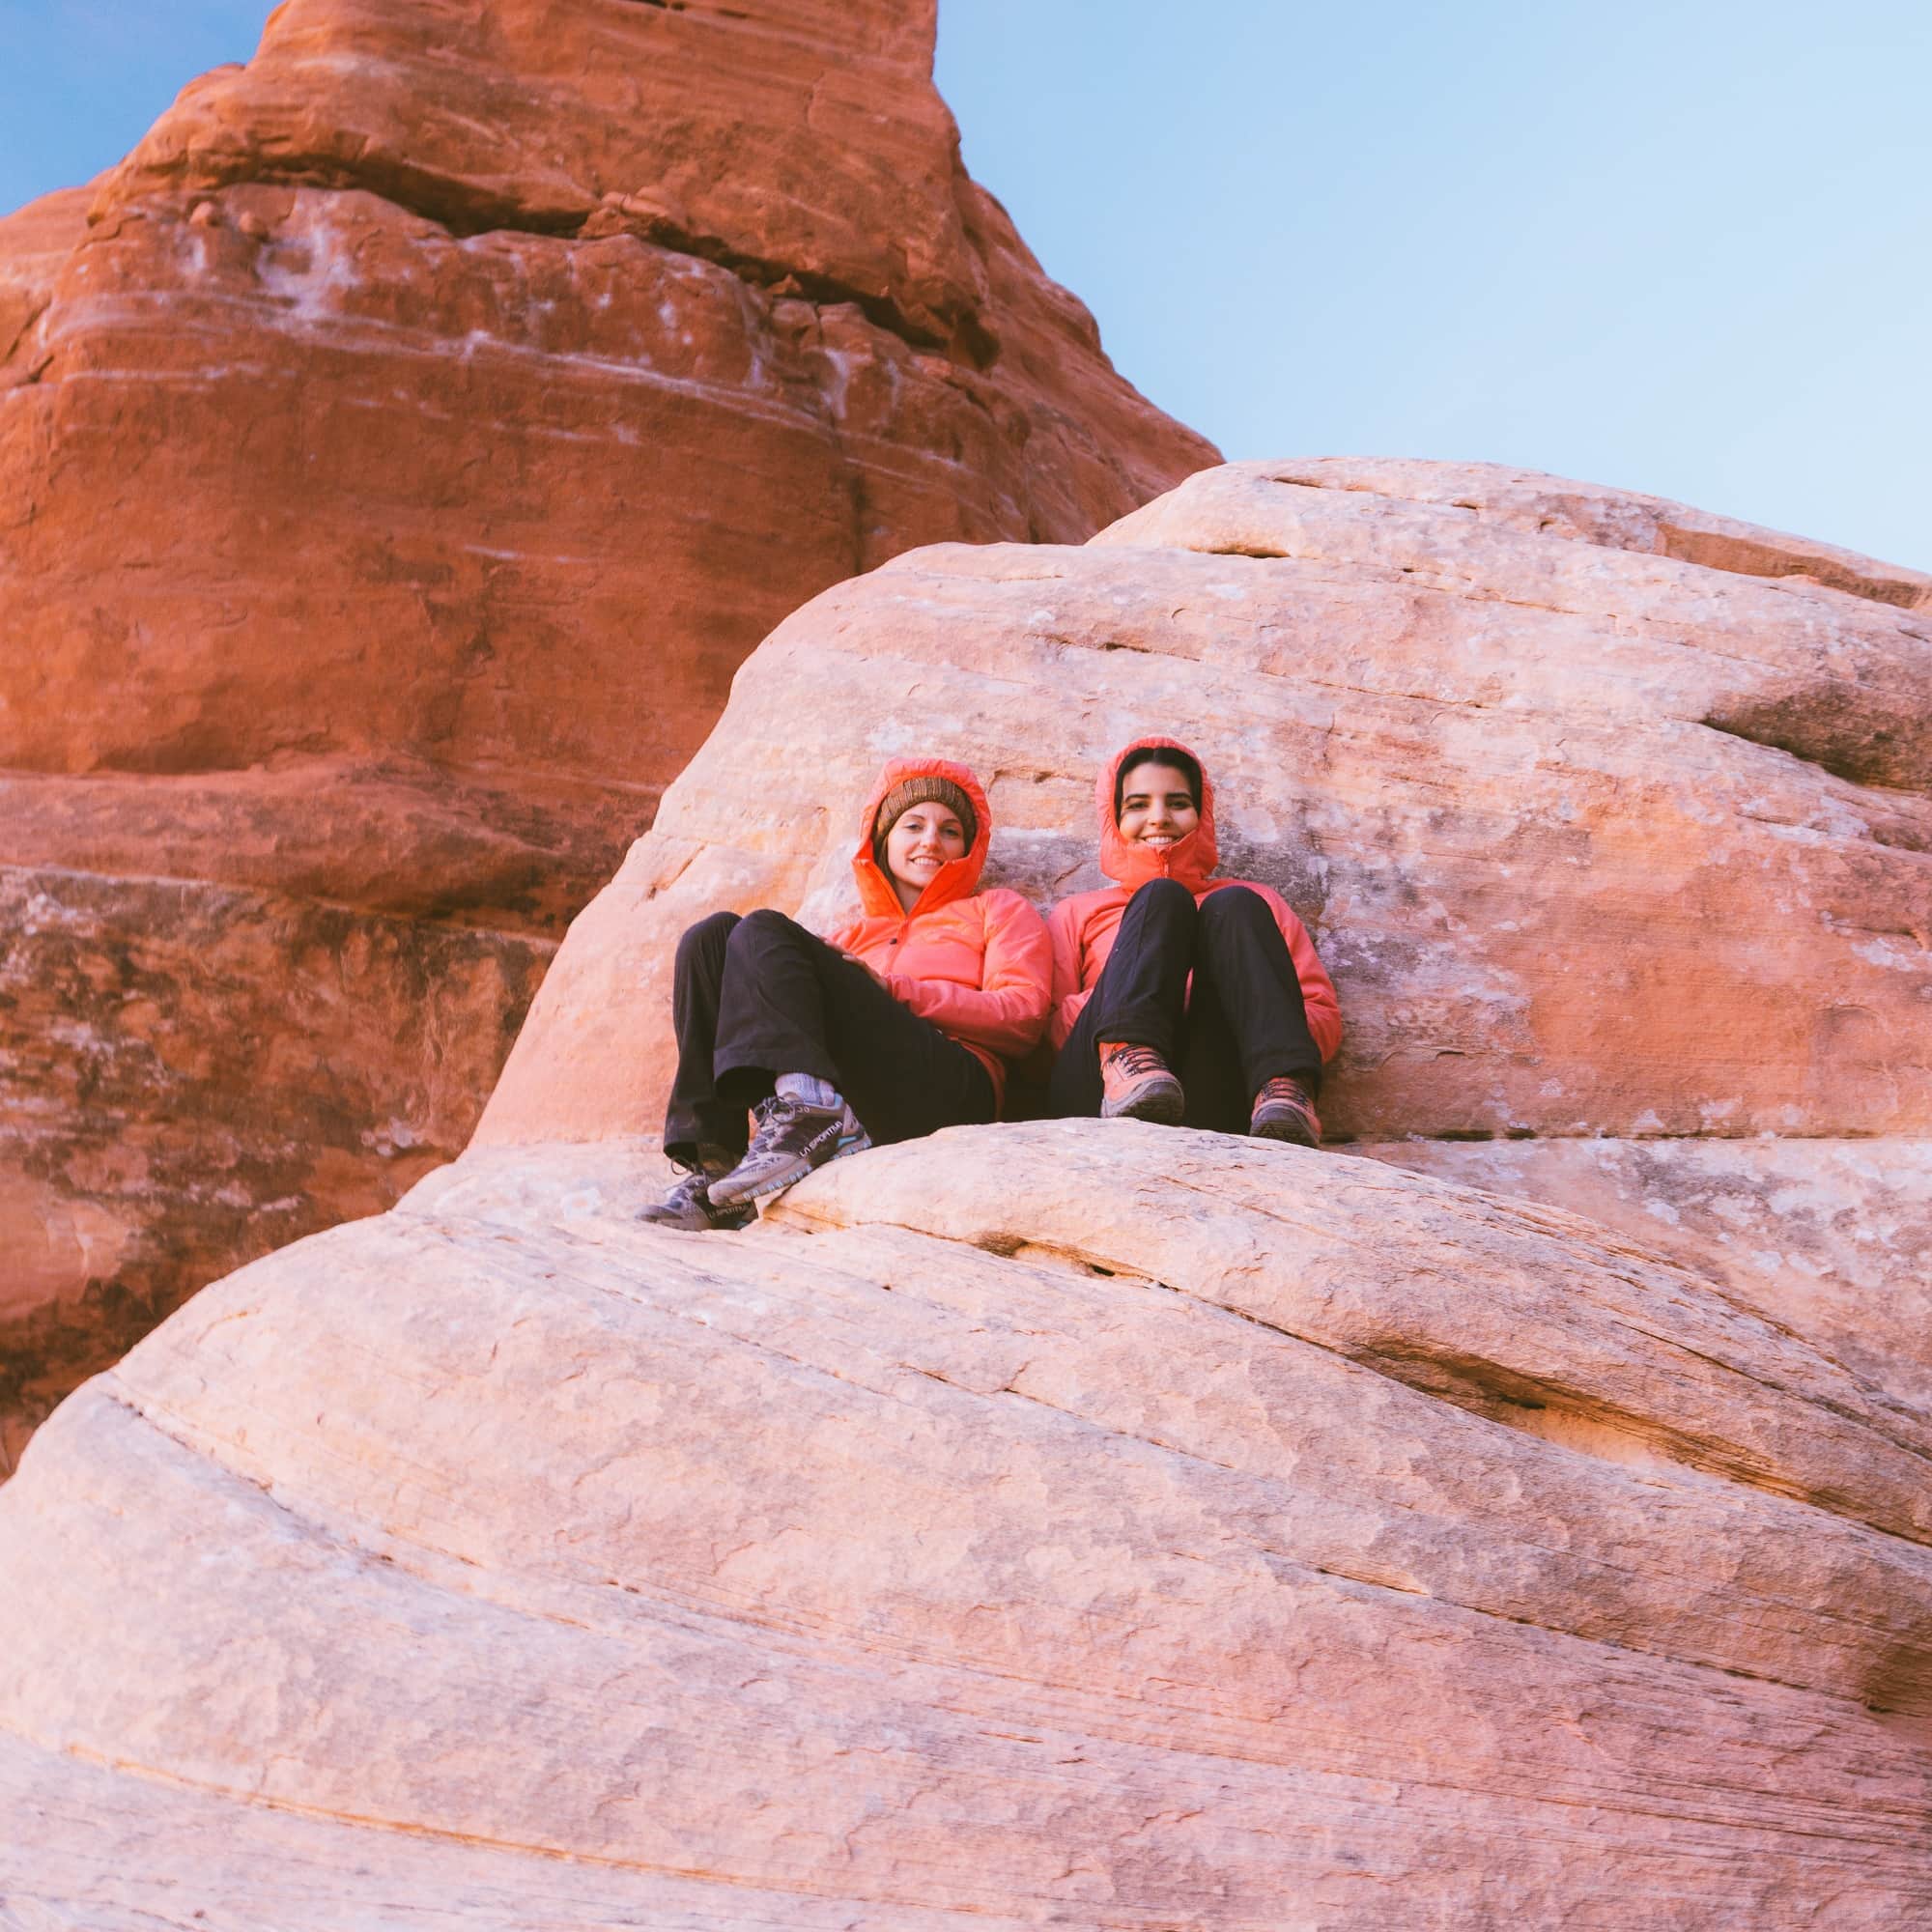
In the picture above you can see us taking off layers. As I mentioned, the first campsite was really cold but once we started hiking in the sun, we got hot pretty quick.
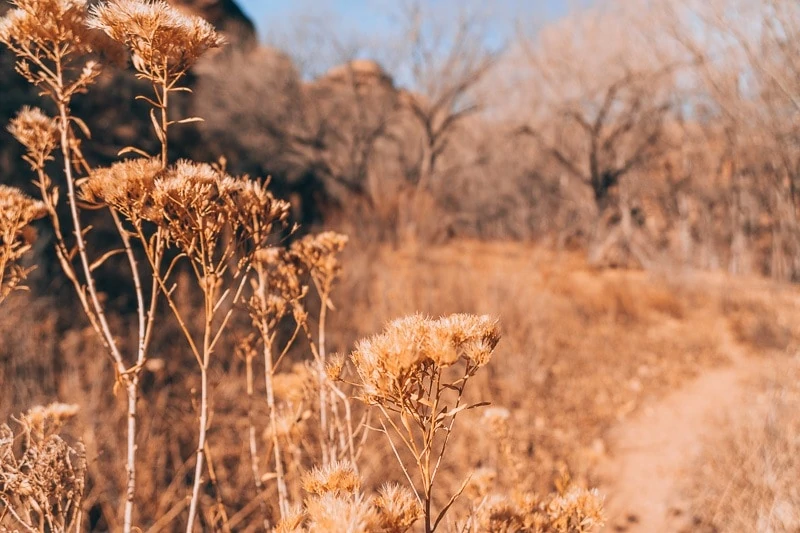
We hiked through vegetation called “Horsetails”. They resemble small skinny bamboo trees.
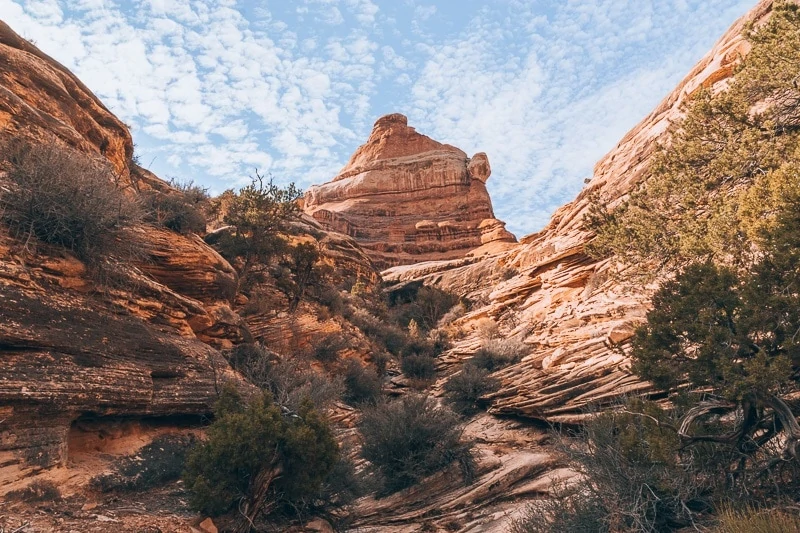
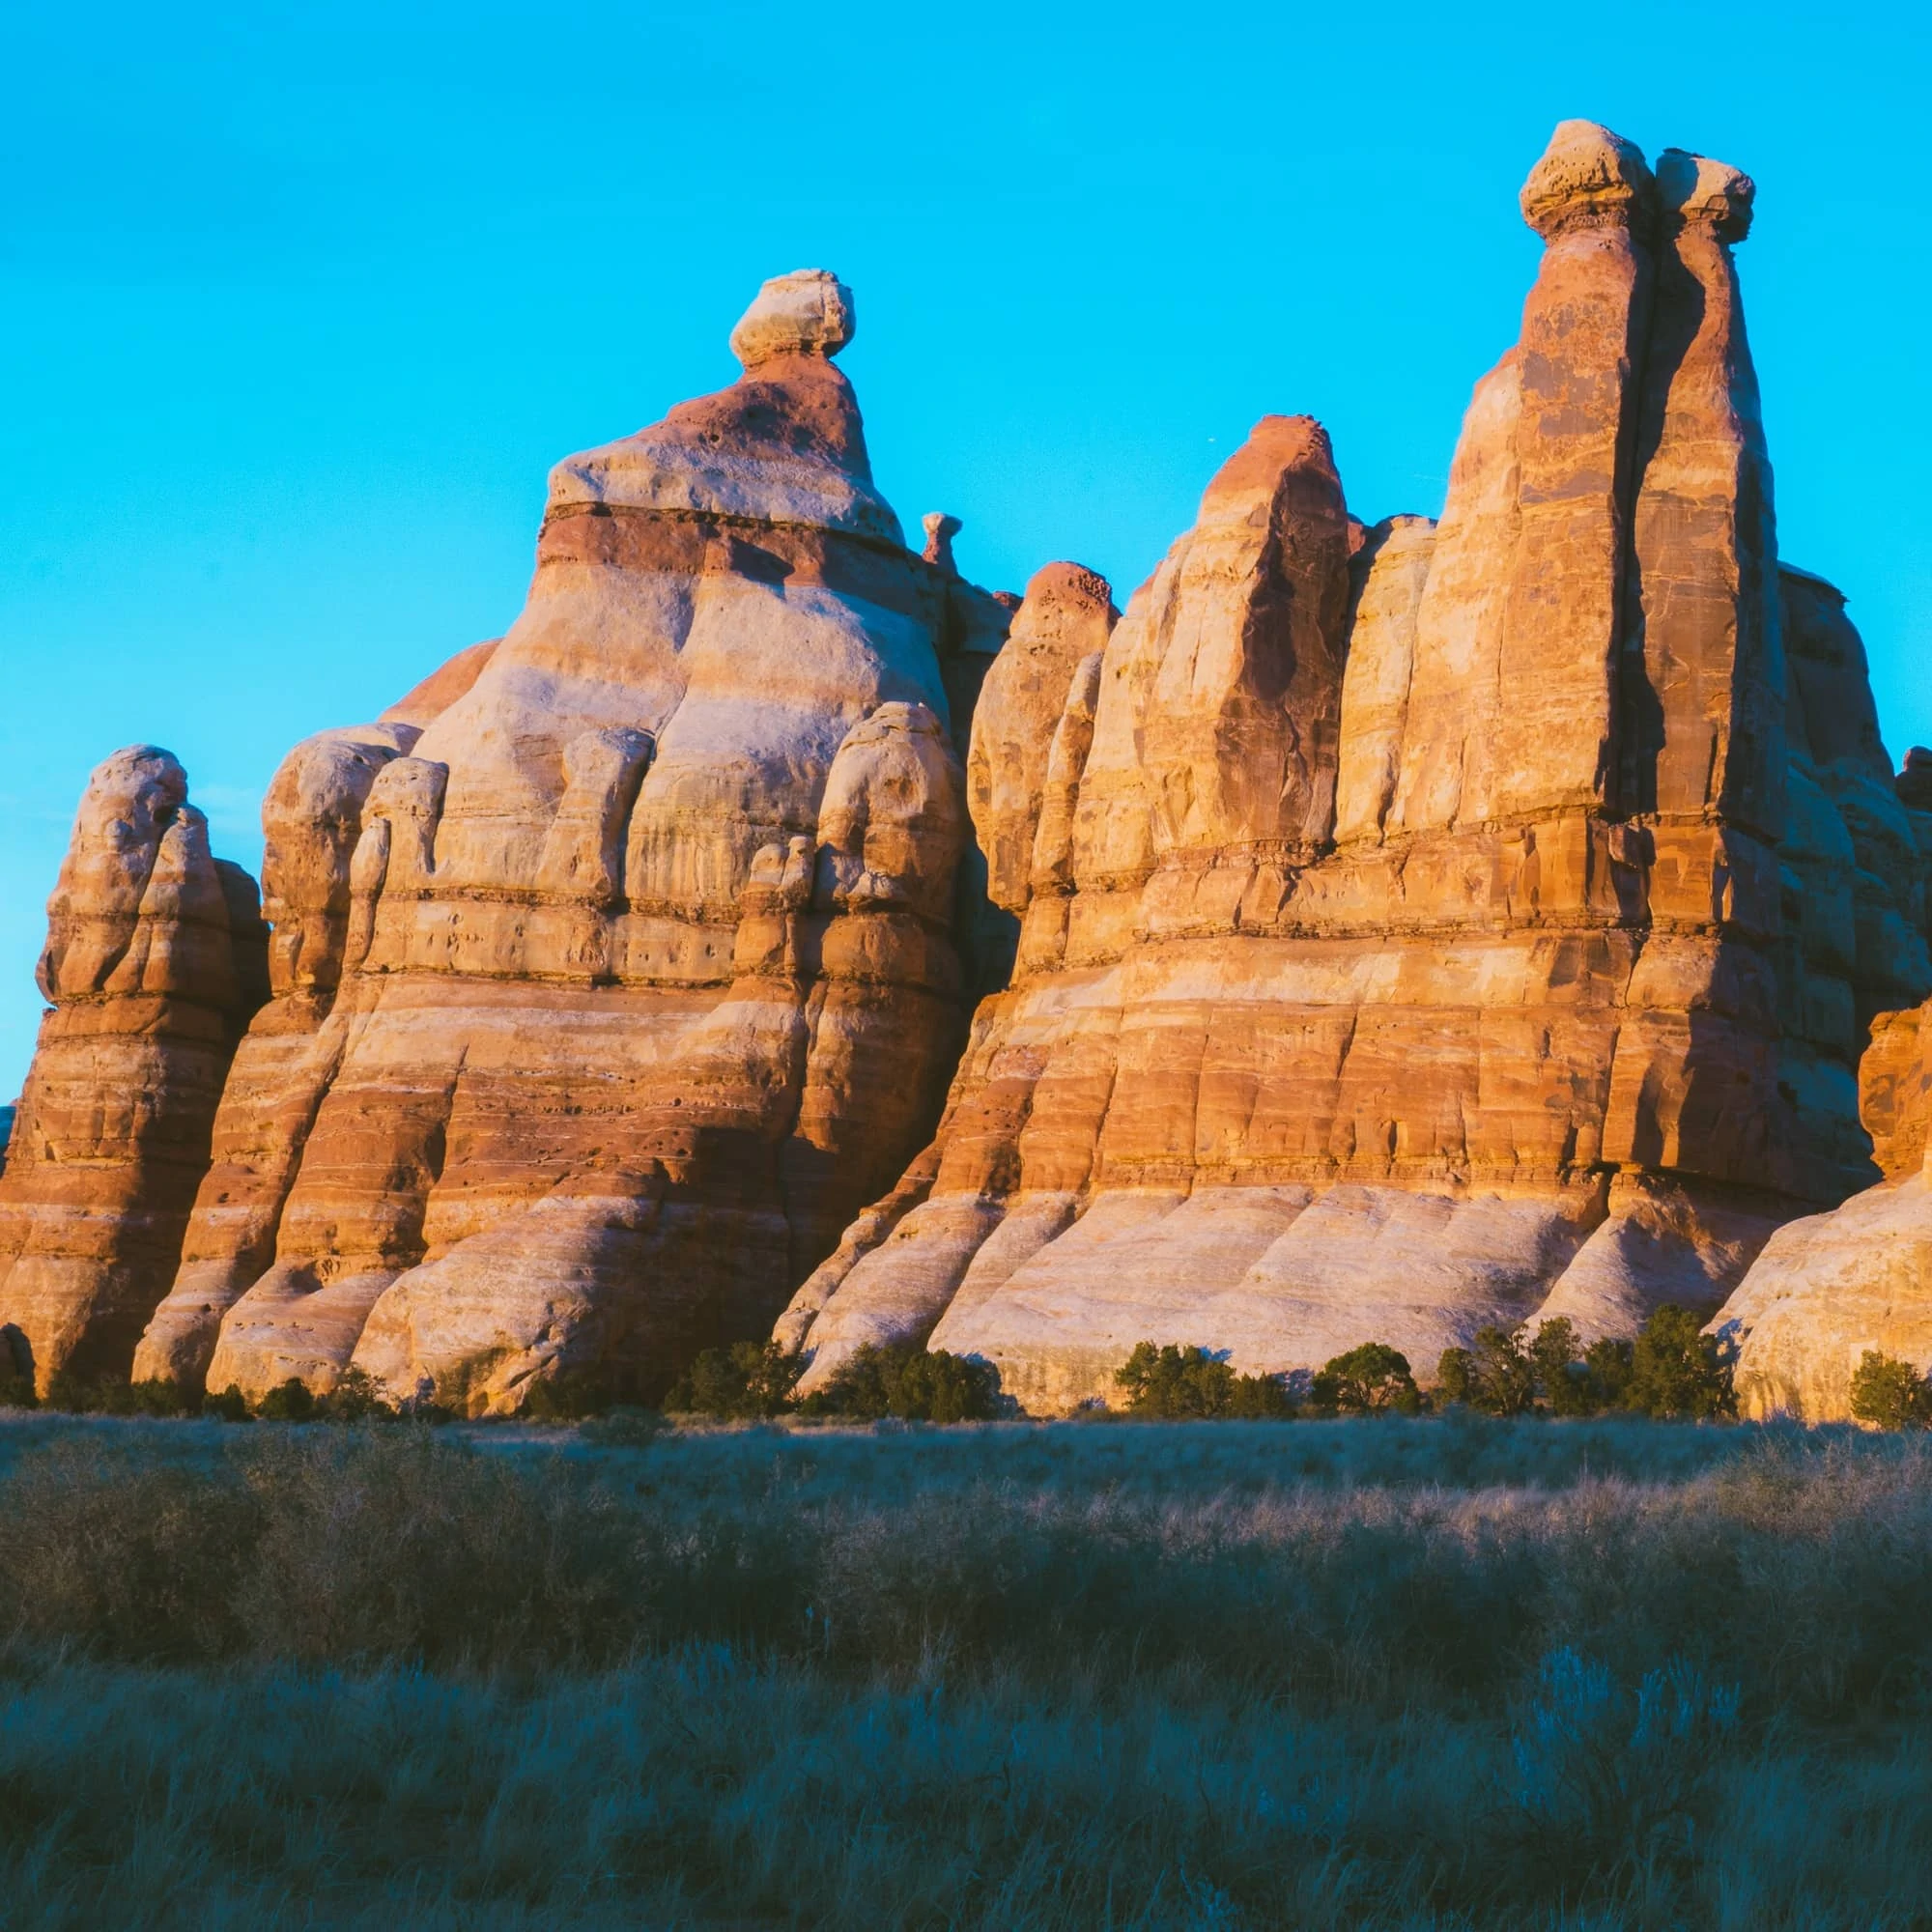
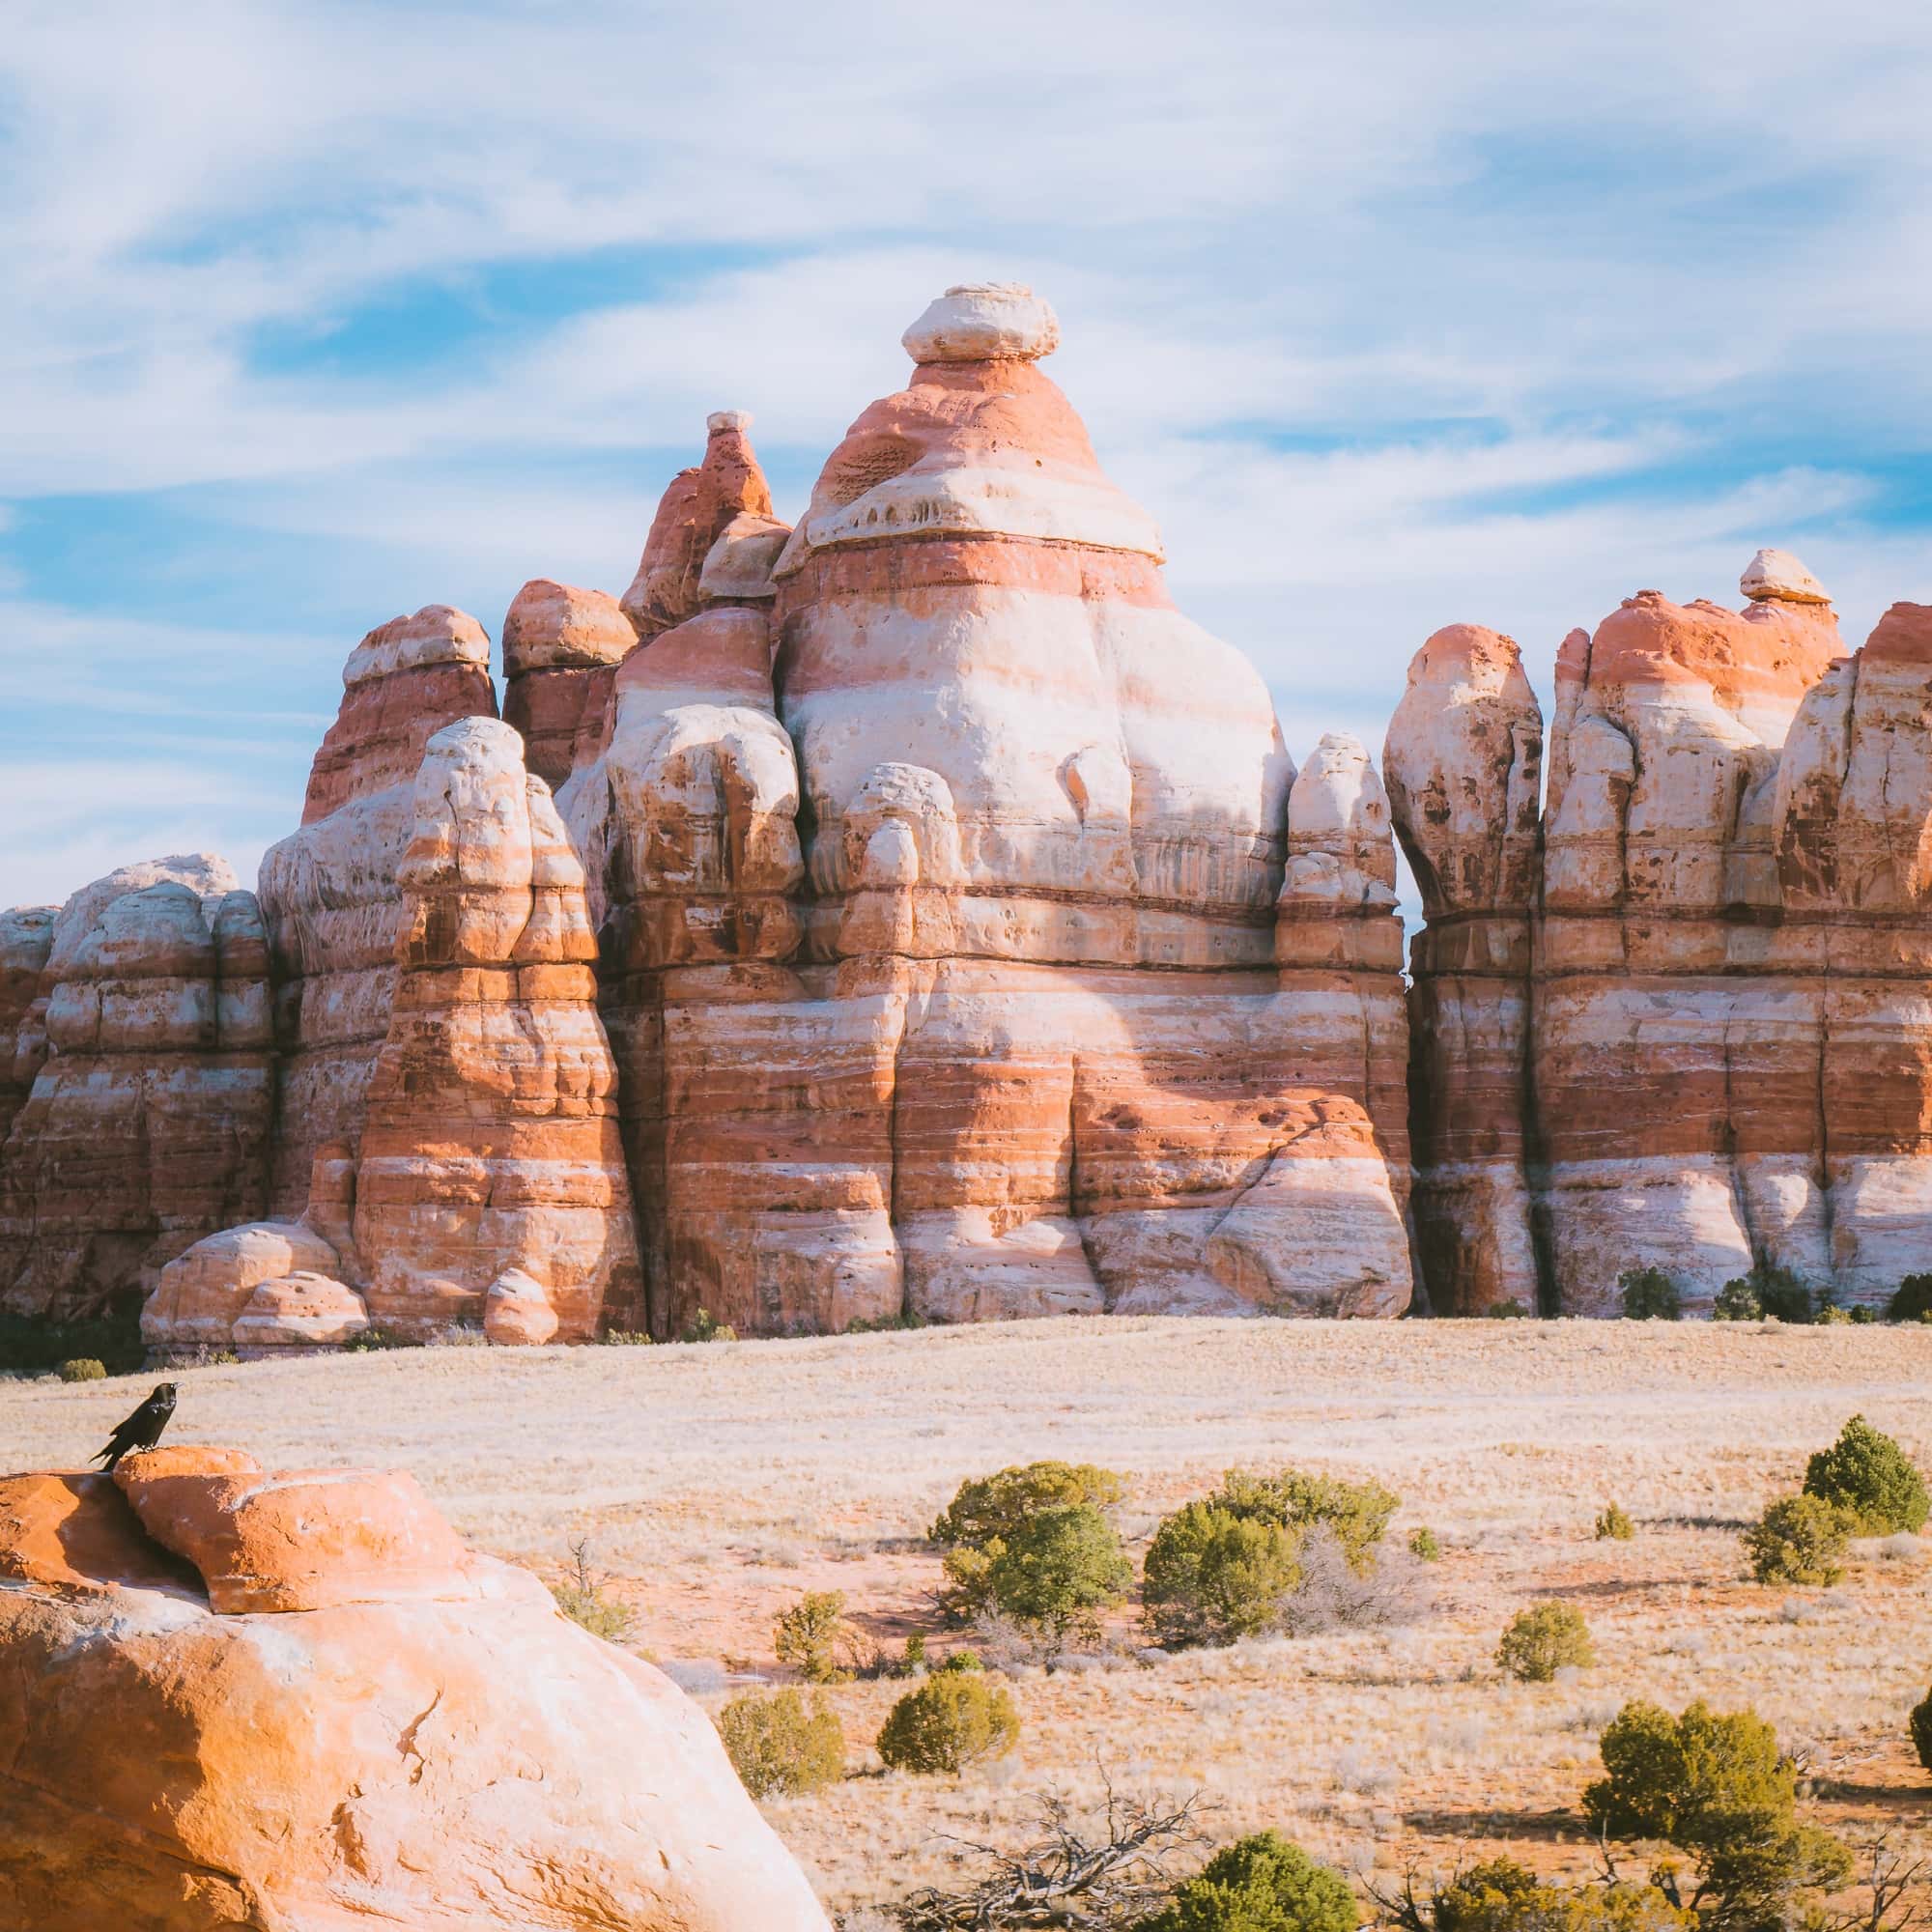
One of the best views of the day. I really loved this rock formation. When taking the above picture, little did we know we were about to scramble up closer to the formation.
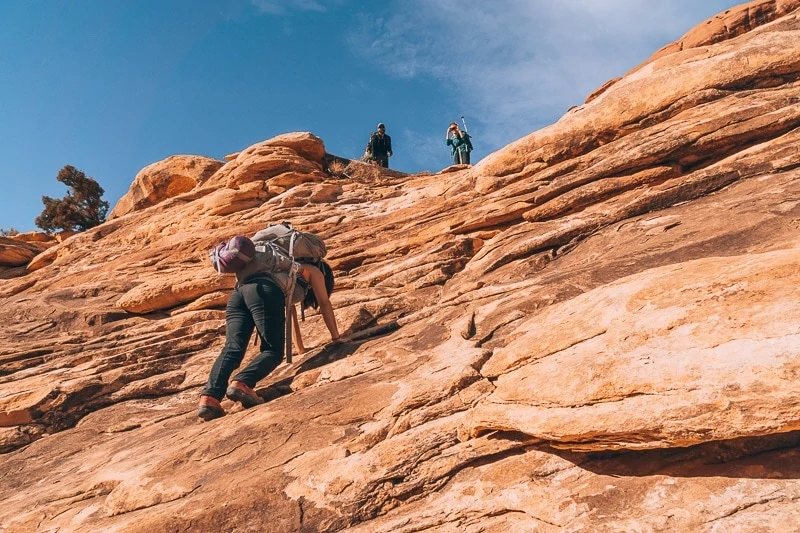
Throughout the backpacking trip, we had to scramble up and down rocks several times. It’s more difficult than it looks especially with a heavy backpack on. As difficult as it was, I really enjoyed scrambling/climbing, because I had never experienced a hike like this before. Most hikes I have done involve a lot of walking downhill or uphill. It was a nice change-up!
Once we were at the top, we decided to stop and have some lunch. The sun and the views made it a perfect place to munch and take in the scenery.
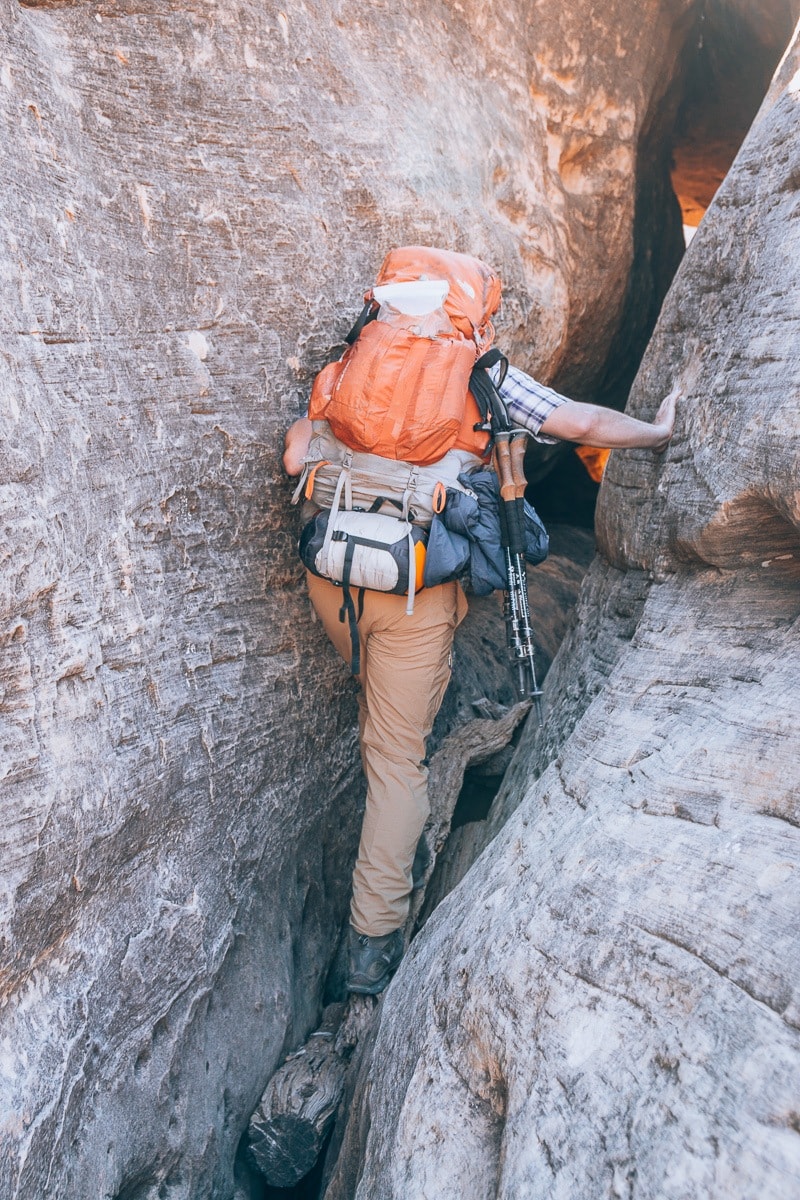
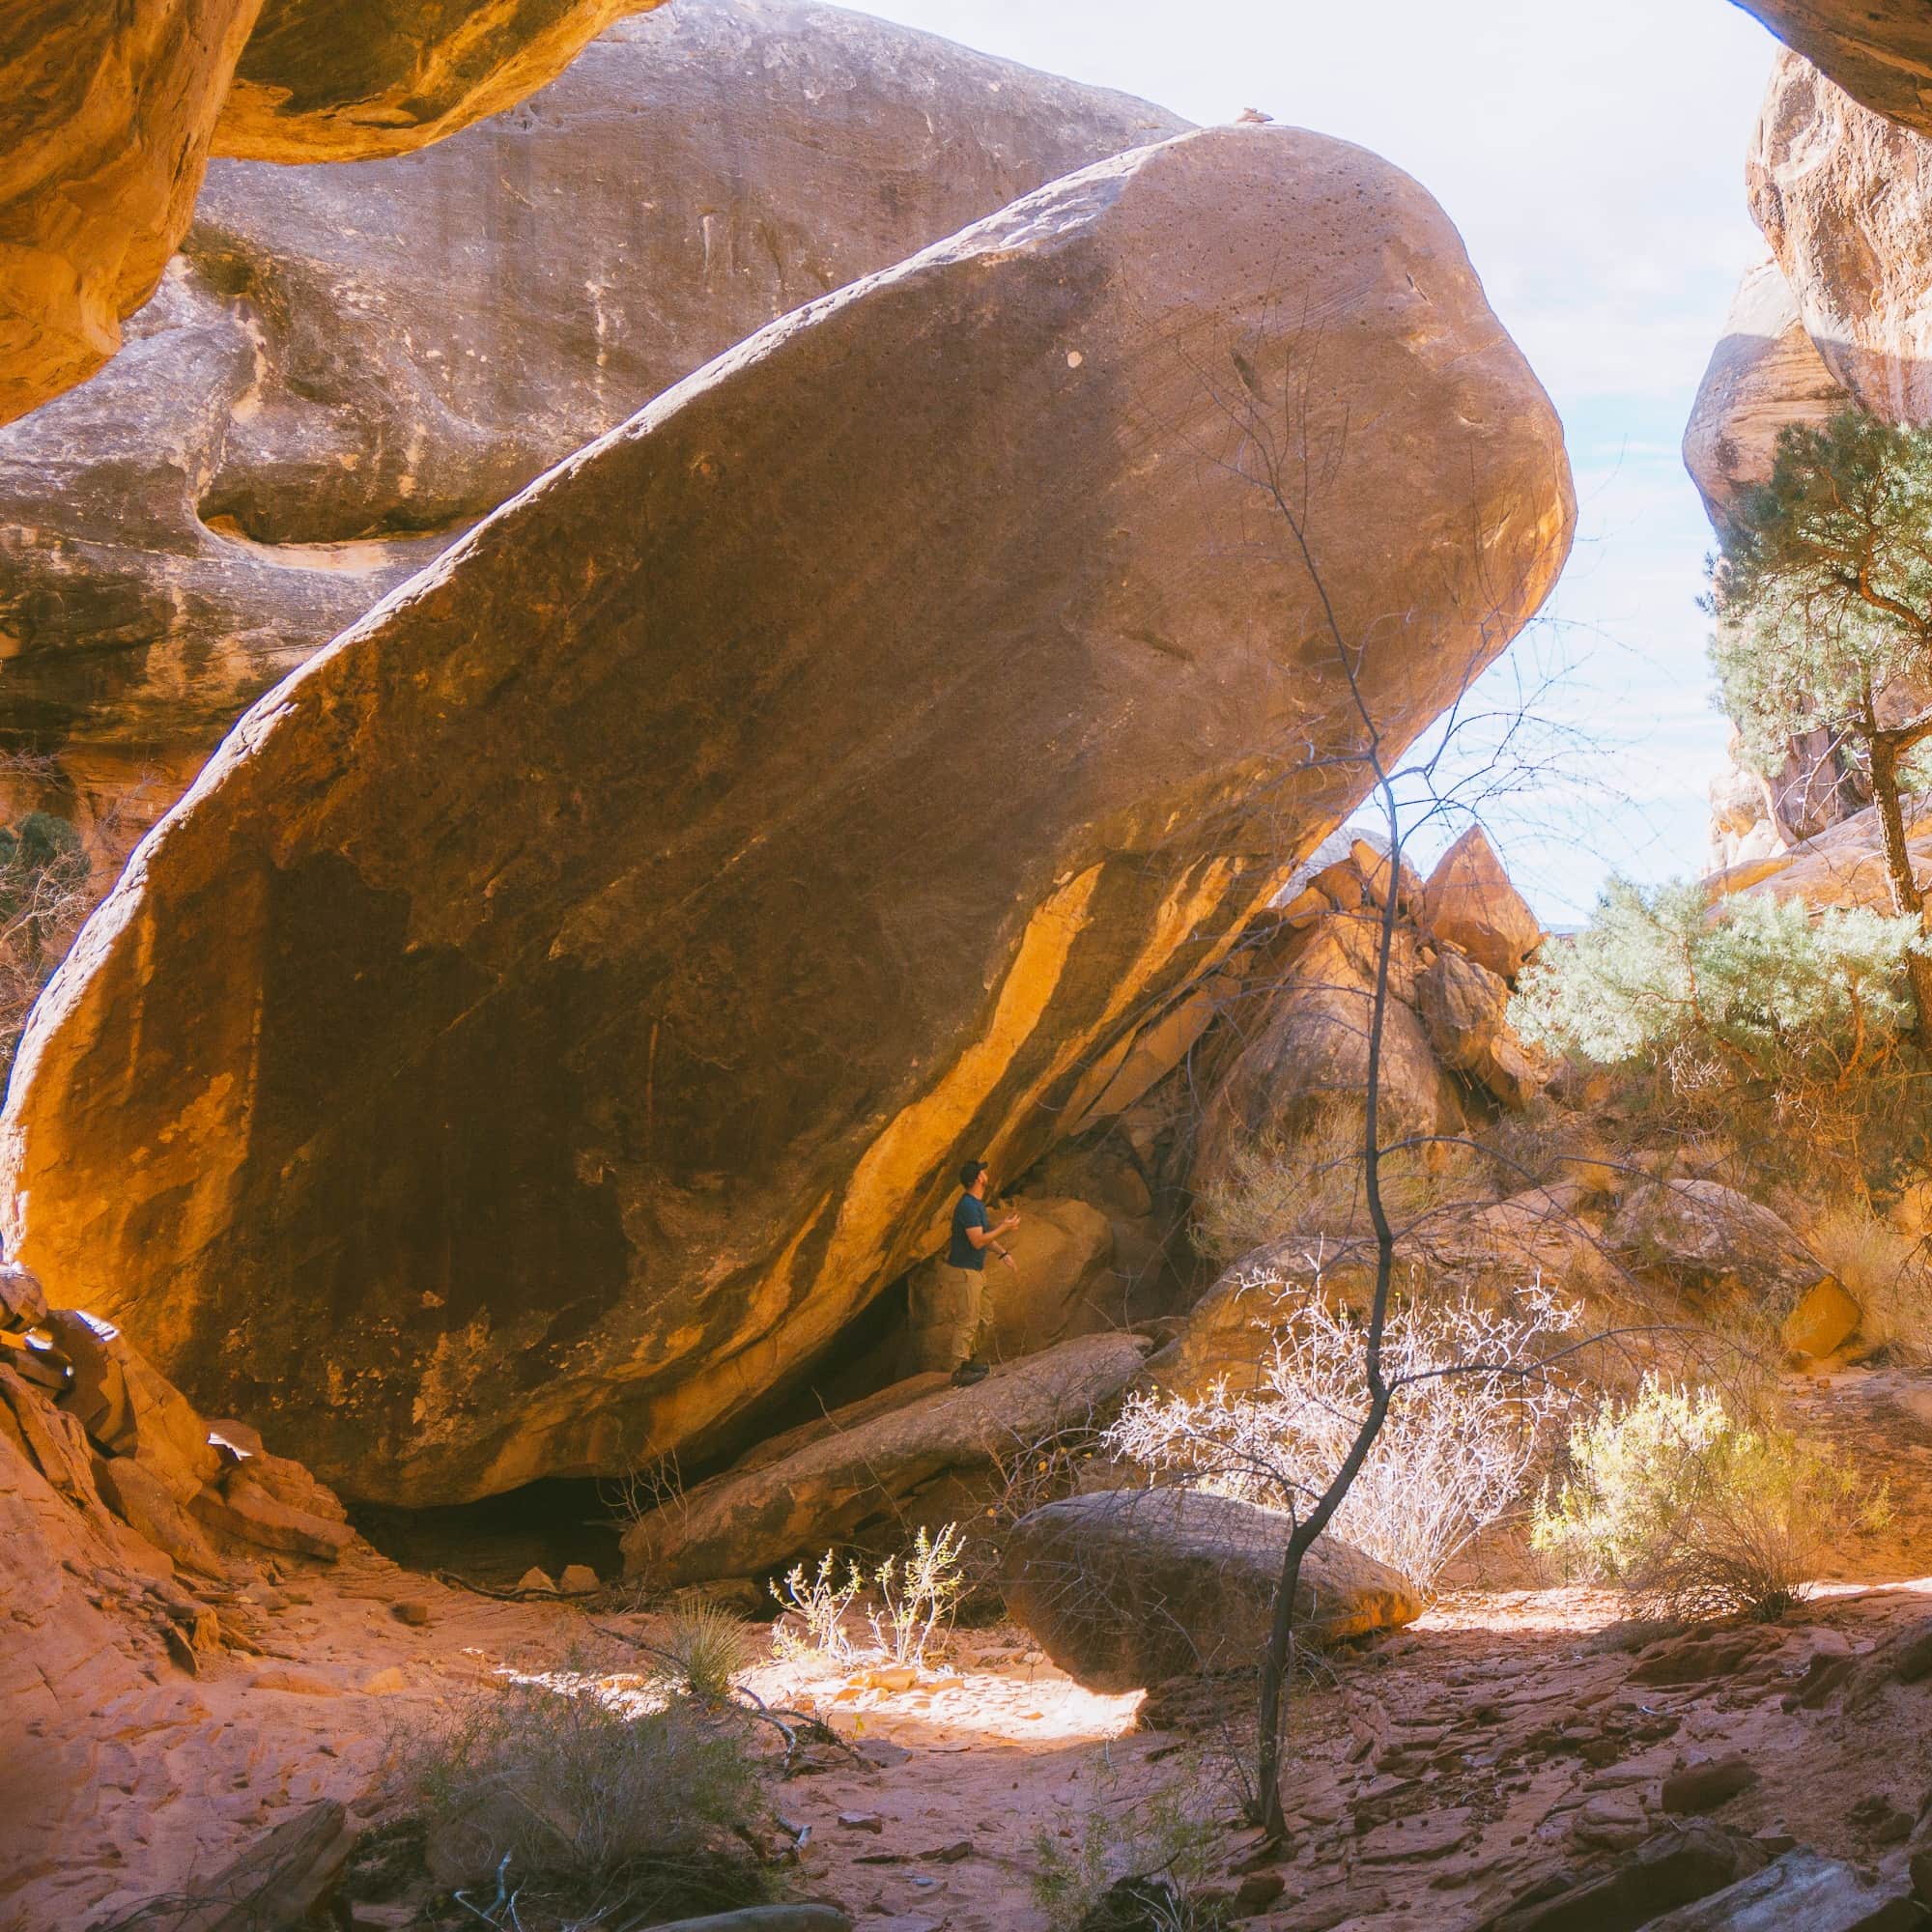
Another pretty fascinating part of the hike was trekking through a cave. At the entrance, a big log was placed at the entrance, so you wouldn’t fall to your death below (You just got to trust it).
At the exit, a wooden ladder was installed to help us climb down. The cave was small but we still really enjoyed the experience.

After hiking for a bit, we ran into another ladder guiding us to an area I call “The Muscle Area”. The pinky, red swirl of colors on the rock really reminded me of muscles. The red colored rocks were my favorite rocks at the Needles; largely because they resembled pink :-P).
In the picture below, we had to climb down without the help of a ladder, but there are some steps carved out which definitely helped.
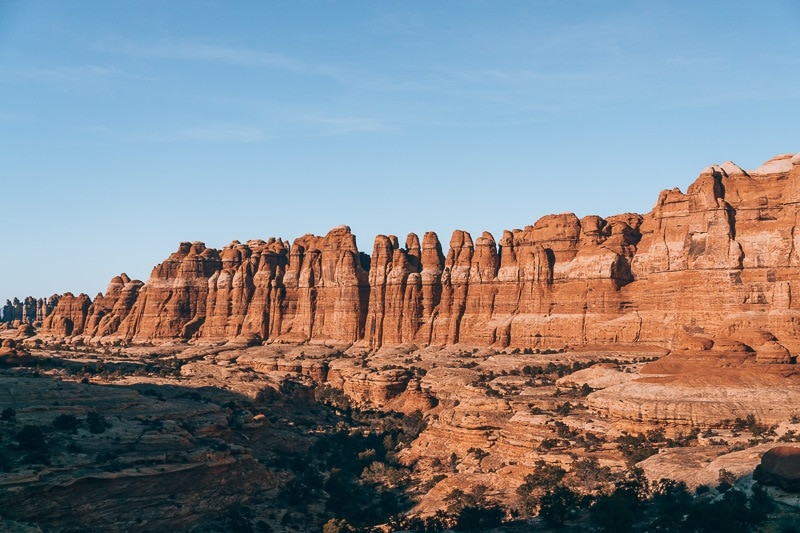
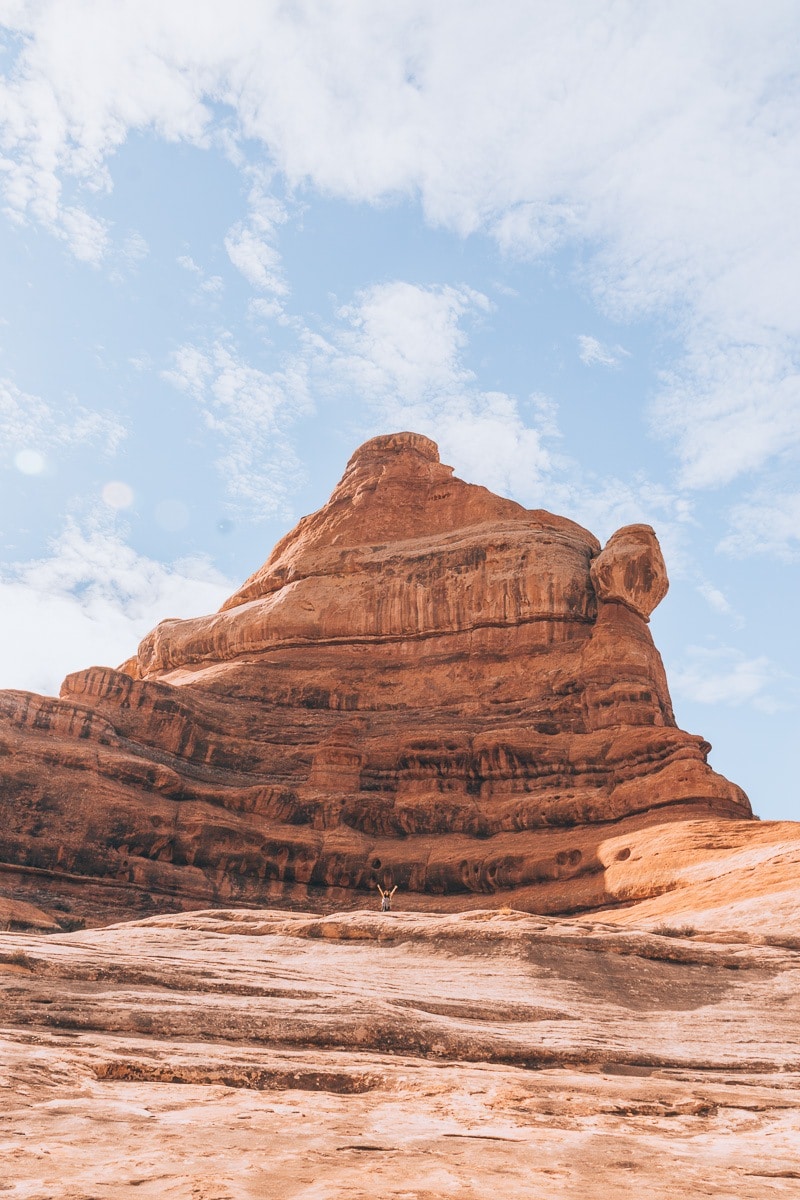
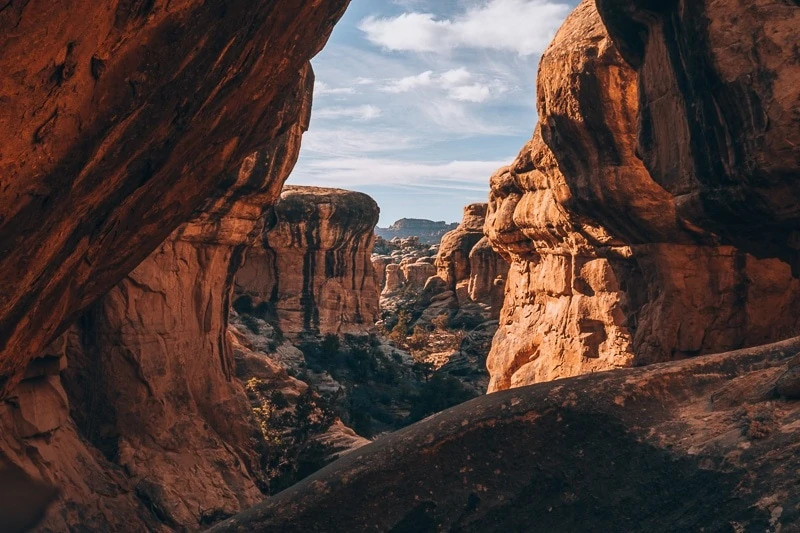
When we got to the “muscle area”, we also got to experience our first look at the Needle formations. At this point, we thought we were close to our campsite; unfortunately, we were far from it.
After hiking through the flat land for a couple miles, we had to do some small scrambles to get to the top. The above picture was taken before we started the climb. At this point of the trek, we were beginning to feel our energy start to fade; but at the same time, we had to make sure we got to the campsite before nightfall. It is always essential to keep track of one’s pace and remaining distance to camp.
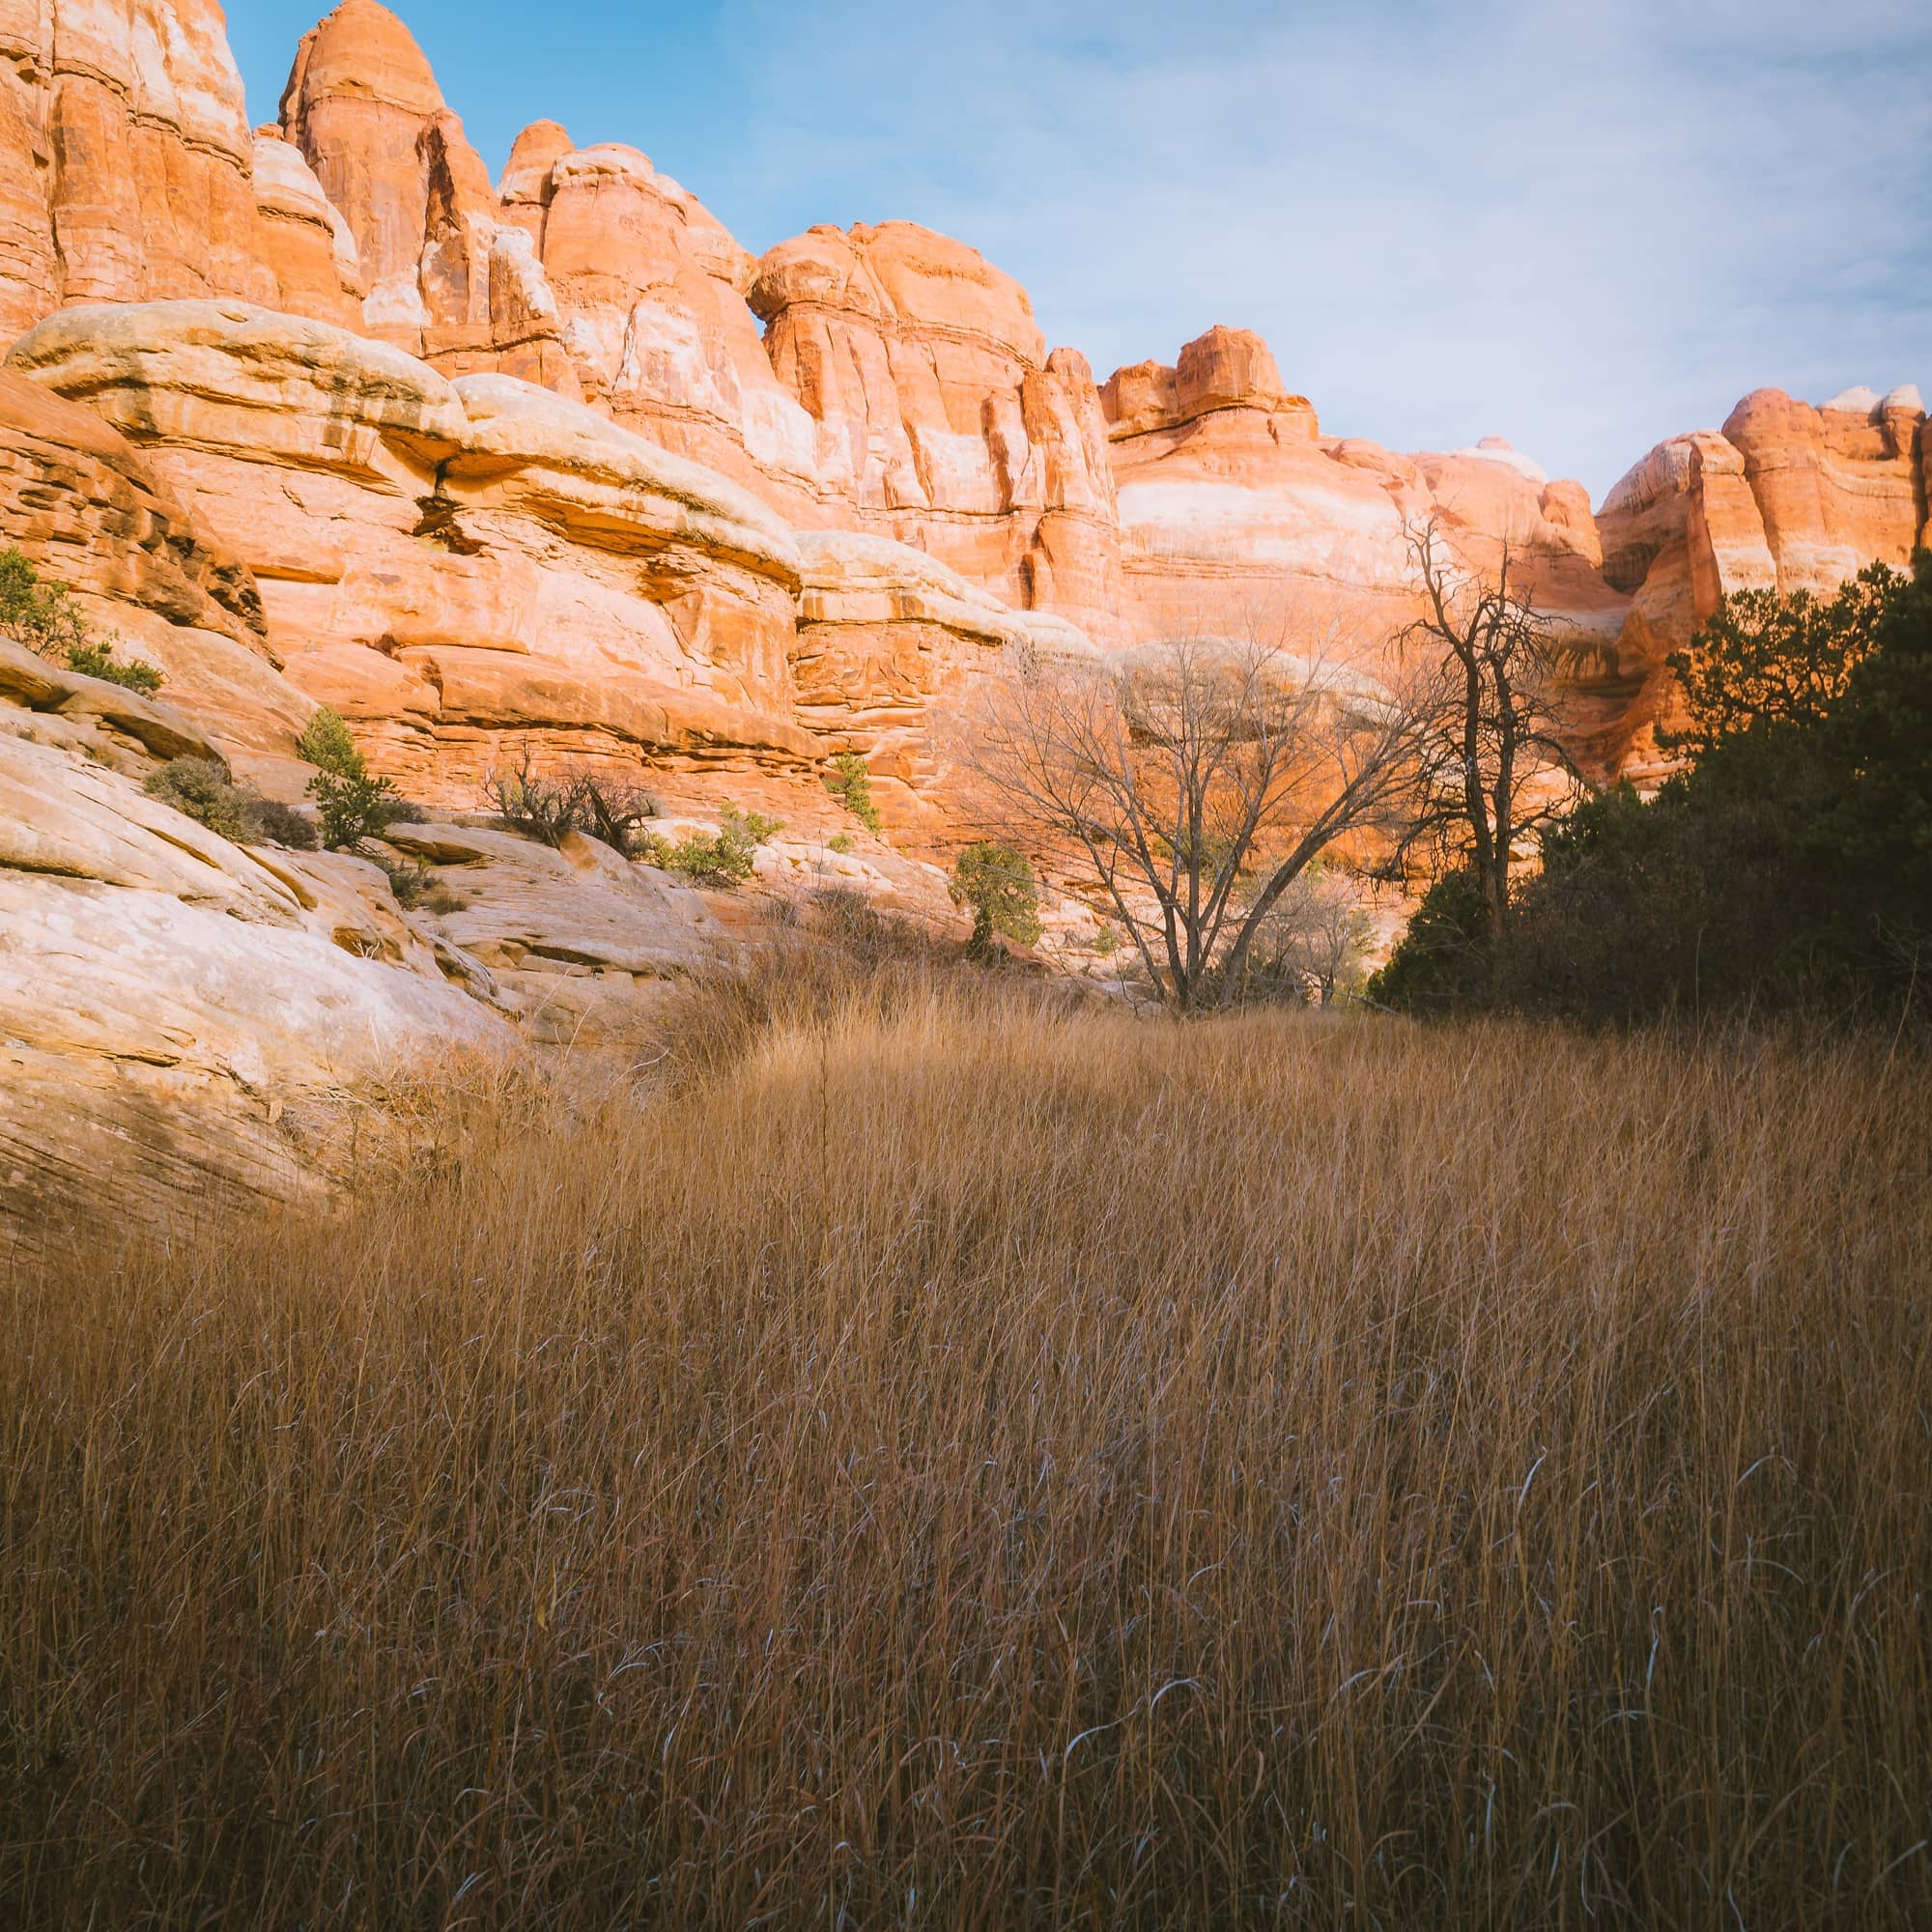
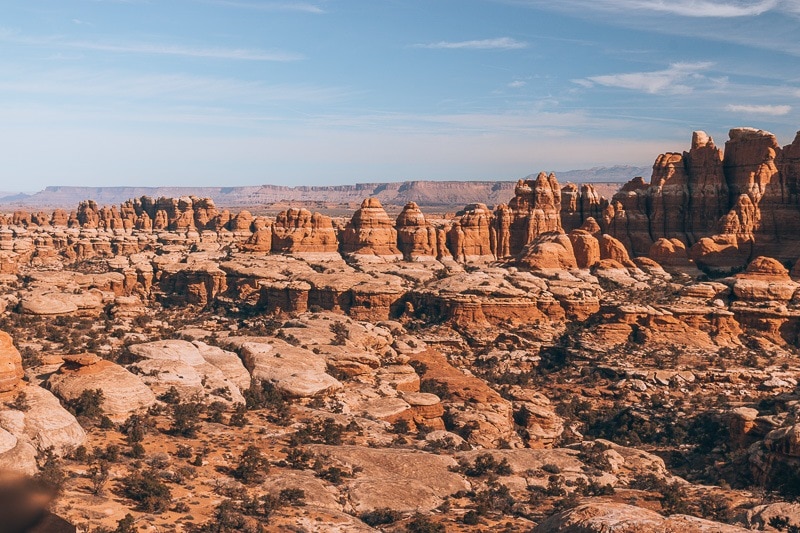
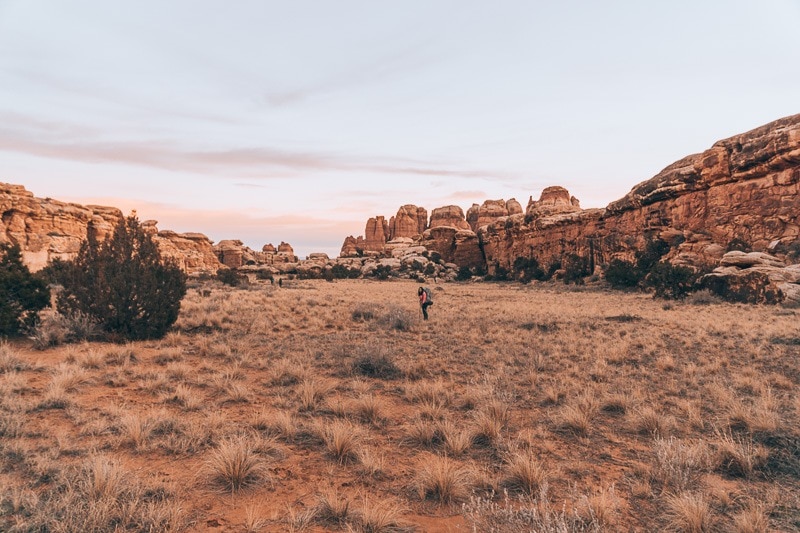
After scrambling up a lot of rocks for an hour or so, we were utterly exhausted. But what came after was a dazzling field of Needles pictured above and a flat trail! Yes, beautiful, flat, straight, easy to hike trail! At this point in the hike, we were ecstatic to walk across a field and not have to climb, crawl or even jump. We just had to walk!
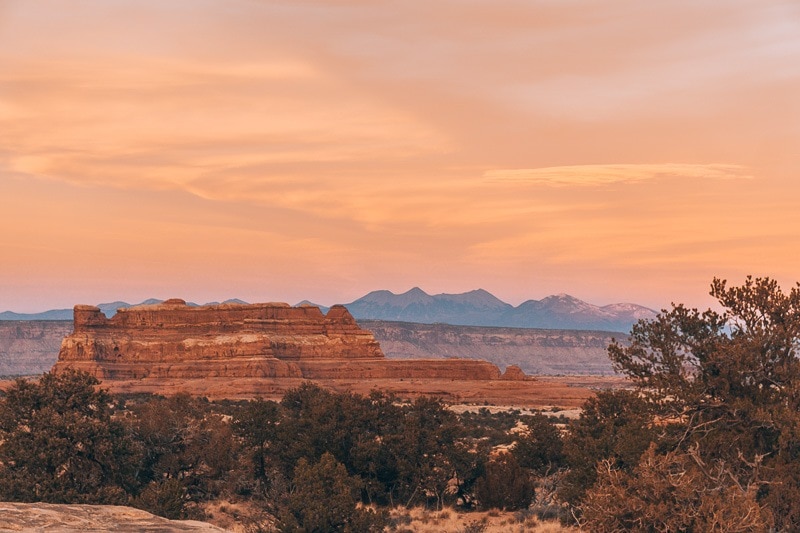
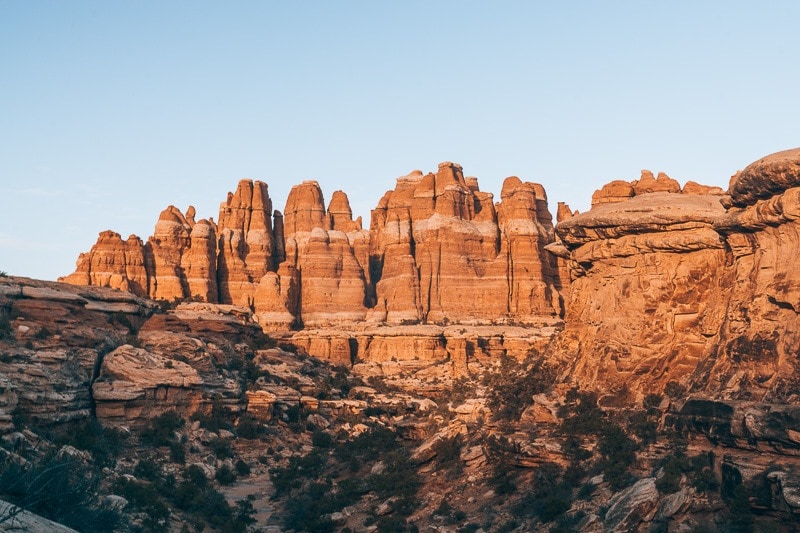
Once at our campsite, we excitedly set down our backpacks and we were able to catch the sunset just in time. The bright warm, orange, tangy color on the rock formation, made this strenuous whole day worth it.
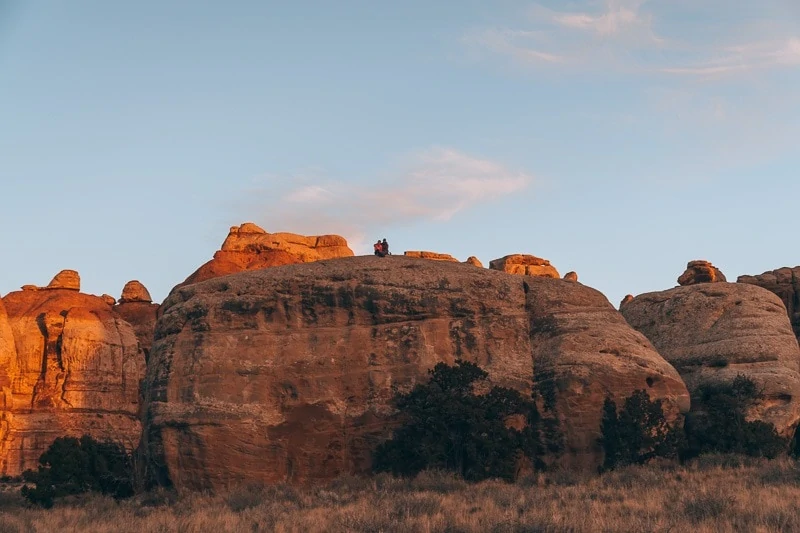
CP2 was probably my favorite campsite. It had tremendous views of the Needles and we were even able to climb up the boulders for a better view. The views and campsite are examples of why this was our favorite day of our week-long trip.
Read More: The Perfect Arches To Canyonlands One Day Itinerary
Grab Your Free Car Camping Checklist! 🚗🌲
Ready to elevate your car camping game? Snag our essential checklist to ensure you’ve got everything you need for a stress-free, fun-filled adventure! Perfect for beginners and seasoned campers alike. Download now and hit the road prepared! 🌟🎒
Backpacking The Needles Canyonlands Day 3 – Camping at DP1
On this day, we got up early to watch the sunrise on top of the boulder. We then set out to explore nearby slot canyons. On day 2, we ran into a nice backpacker who informed us about slot canyons near CP2. I was thrilled about the thought of experiencing slot canyons, as I have never experienced it before. So, we all agreed to visit this area in the morning before we head out to our next campsite DP1 (You can view the location of the slot canyons in the map above).
Since the canyons were pretty close to the campsite and in the opposite direction of DP1, we decided to leave our tents and backpacks at CP2.
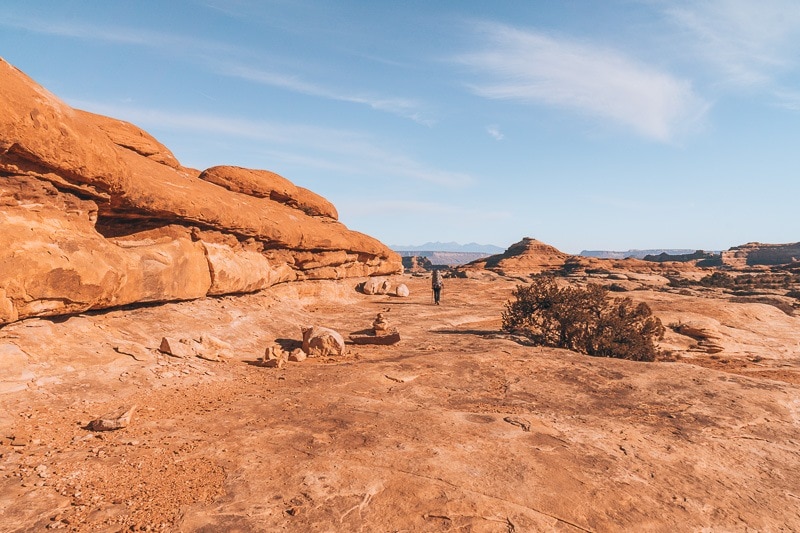
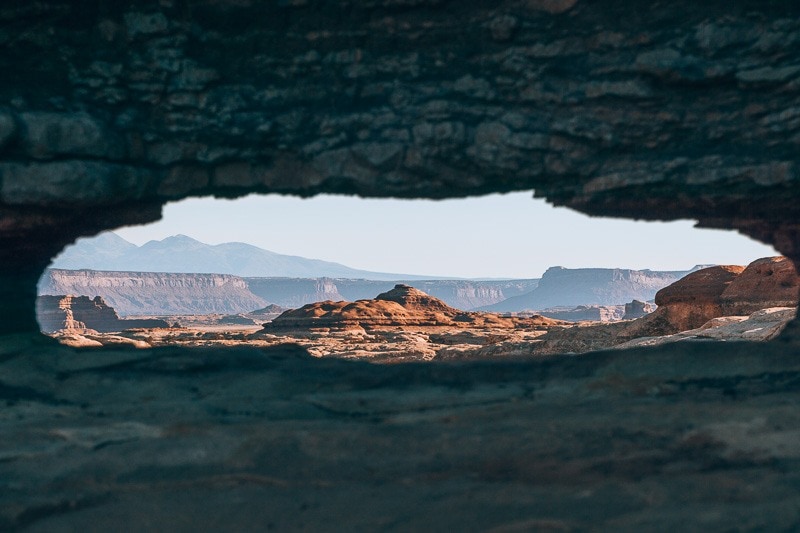
Before arriving at the slot canyons, we climbed up to higher ground to take a better shot of the needles, which is pictured below.
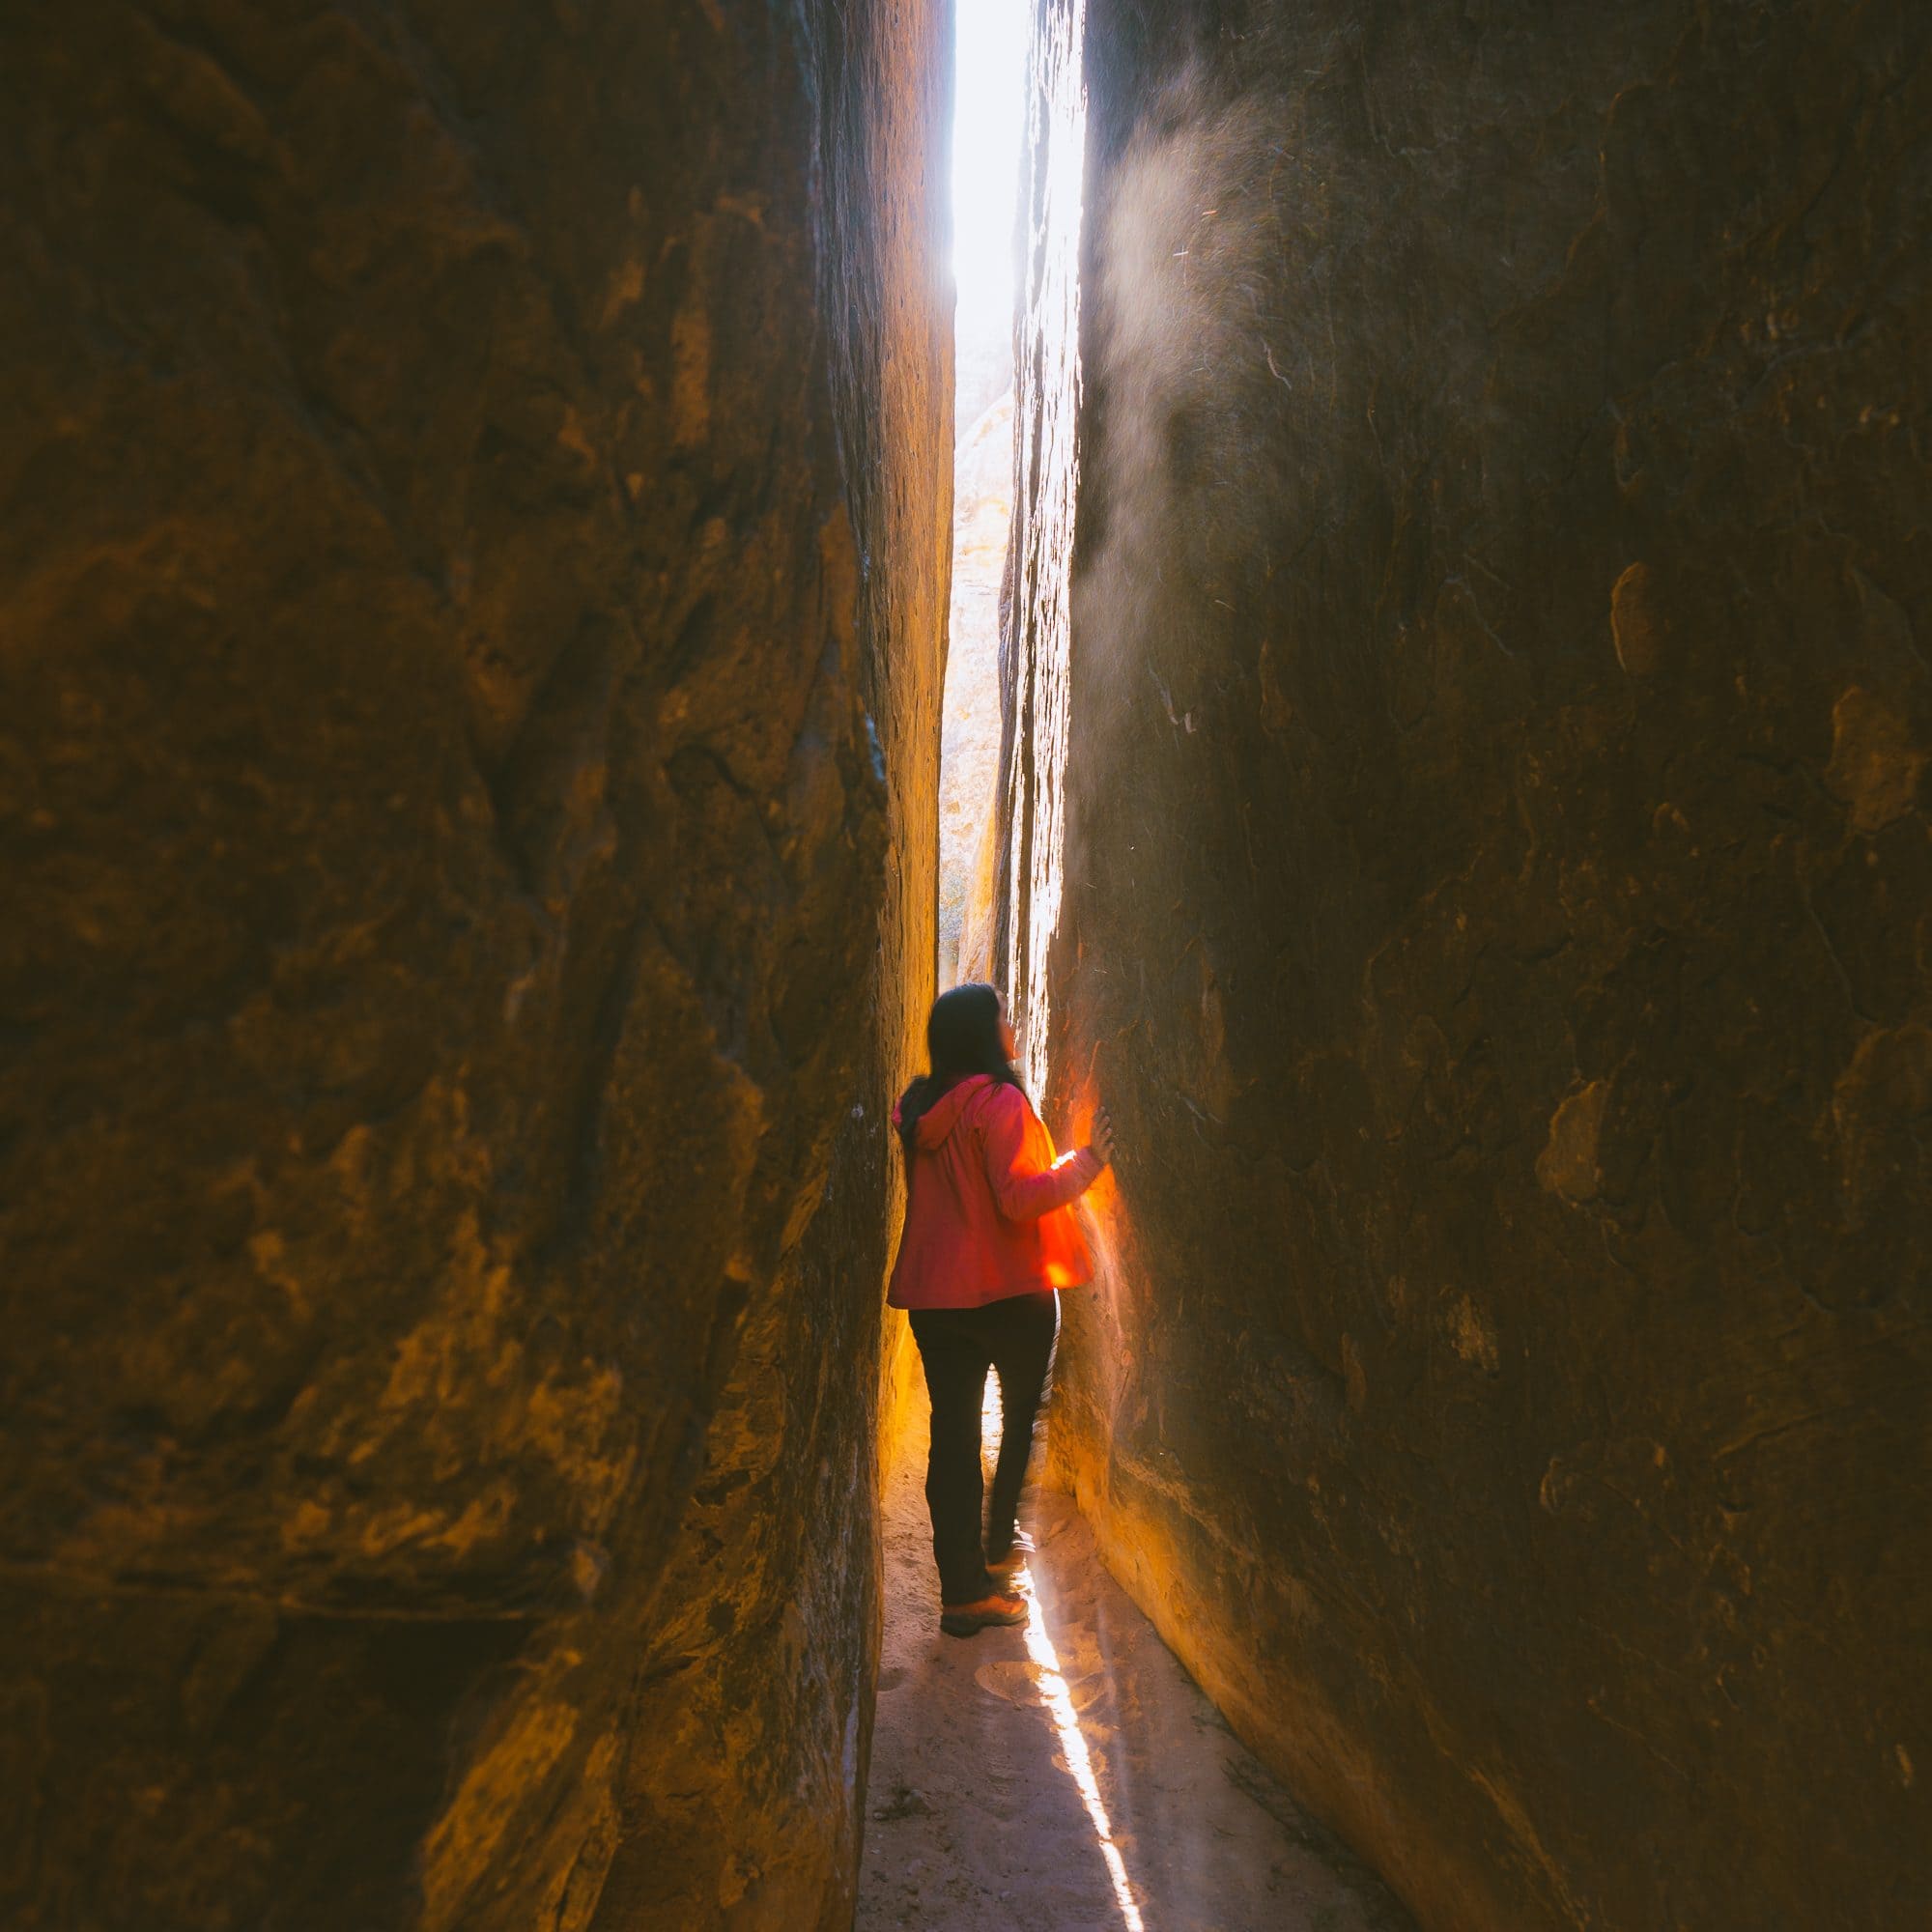
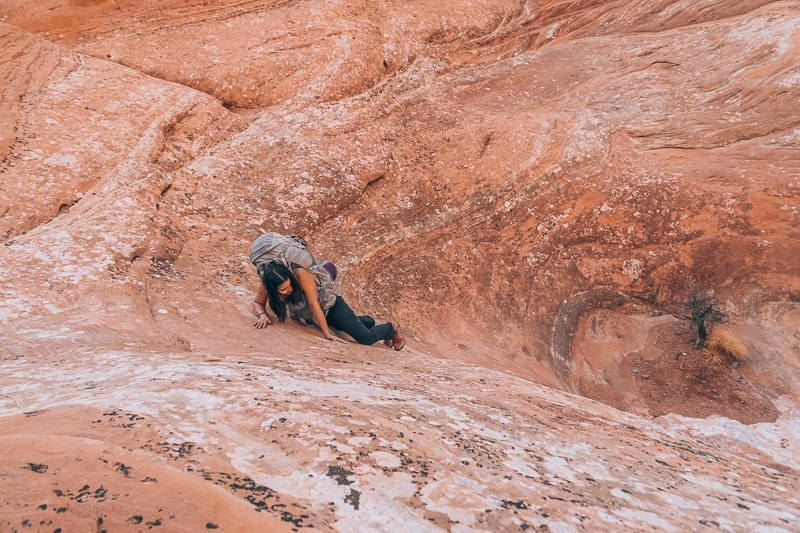
Walking through the slot canyons was a great experience! The slots were dark and mysterious and gave me the tiniest bit of claustrophobic sensation. A few small caves were available to explore, but Jameson and I didn’t get the chance since we forgot to bring our headlamps.
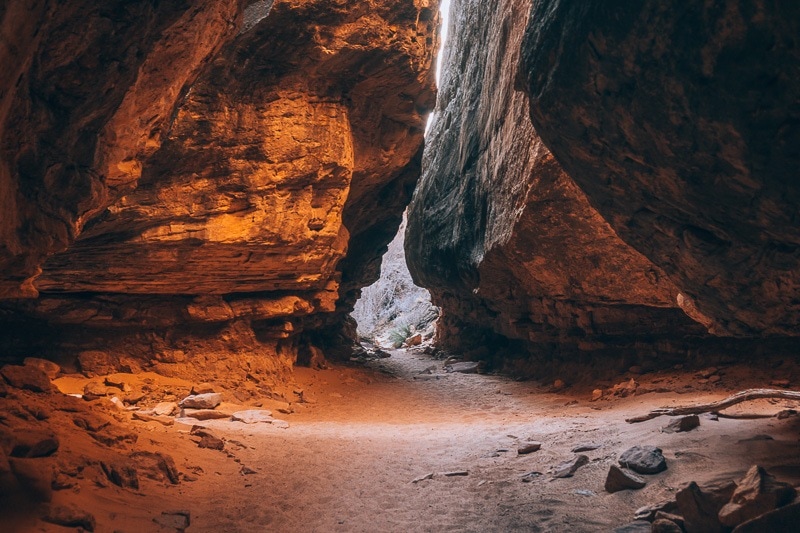
I really loved the dark, large boulder we found near the end. It looked like it could tip right over any second. Right behind the dark boulder was what I liked to call the “Mario Cart Mushroom Gorge”. The black, brown, and orange formations reminded me of mushrooms in the game I used to play as a child (maybe even a young adult :-P), Mario Kart.
After exploring the slot canyons, we headed back to our campsite, packed up, and headed to our next campsite, DP1. At this point, our backpacks were noticeably lighter. A good portion of our water was gone, which began to worry us. It was going to be a hot day. We still had to hike, cook lunch and dinner with water AND still have enough remaining for the next day’s hike. We had about three liters of water for Jameson and me, so we made sure to start rationing.
The hike to DP1 was hot and miserable. The views were fantastic, but all I could think about was water. I wanted to douse myself with all the water we had left, but don’t worry, I didn’t. This was our first backpacking experience with no water in sight. Backpacking in Canada and Patagonia, water was ubiquitous so this situation was unique for us. Luckily, the hike was fairly short. Once camp was set up, we made sure to stay in the shade as much as possible and avoided any sort of strenuous activity. This approach helped reduce the amount of caloric intake and hydration needed to replenish the body.
Read More: 12 Best Things To Do in Canyonlands National Park, Utah
The sunset was nothing short of breathtaking. The orange, red swirl of the clouds made it seem as though the sky was on fire. When the sun finally set, we rested for our last and final day in the desert.
Backpacking The Needles Canyonlands Day 4 – Our Exit
We agreed it was best to get going before the sun came up, largely driven by only having a liter of water left. It was best for us to be out of the sun’s draining rays as much as possible. The group woke up at 6 am, packed, and began the last leg of our journey.
My favorite part of this day’s hike was when we stepped into a wonderful red rock area. We had to climb up the red formations as if they were stairs.
All day we had been rationing small sips of our dwindling water. When we were about a mile away from Squaw Flat campground, we ran out of water. It was an awful feeling but we knew how much water was at the end of the hike.
Once we arrived at Squaw Flat Campground, we ran to the water spout and drenched ourselves in it. Never in our lives have we been so happy to see a water spout. We were exhausted, tired and dehydrated but we came back feeling accomplished.
Conclusion
Backpacking through the Needles Canyonlands was such a unique experience. The scrambling, climbing, slot canyons, and caves truly made the hike unforgettable. The only negative to the backpacking trip was the limited access to water. If we had easier access to water, we would have been able to explore the Needles more thoroughly. But, the constant worrying of excess sweating, kept us from seeing other parts of this desert (For example the Druid Arch). Don’t let this stop you from visiting such a wonderful place. The brown, orange and red needles and rocks really make up for it. In the end, I felt proud we were able to get over such a challenge. I came out feeling stronger and tougher. If you liked this post make sure to read some of my other popular posts:
- The Ultimate Guide To Delicate Arch Hike
- The 10 Best Hikes In Arches National Park
- Best Hikes In Canyonlands National Park
- The Best Hikes In Utah
- One Day in Canyonlands National Park

Get my free National Park Checklist
When you join the newsletter!
Pin For Later

Your photos are just UNBELIEVABLE Michelle. So, so gorgeous. You make me want to go everywhere you photograph.
Thank you Natalie for commenting! And I am so happy you like my pictures 🙂
What a great guide. We have never gone backpacking, so this is something I need to keep handy whenever we decide to do such a trip. And your pictures are gorgeous. I especially love the ones of you in the slot canyons lolll omg it gave me claustrophobia just looking at the pictures. Hahaha. And I can only imagine how hot is must have been! You did good in not dousing yourself with the water!!!
Thanks girl! Yes you need to try backpacking the struggle just gives you more pleasure in the end! I suggest not doing it in the desert for the first time! LOL I think Canada was the perfect place for us first time backpackers. Spring water was everywhere!
I agree with Natalie, your photos are amazing! Those sunset photos deserve to be on Instagram! I also like your detailed descriptions as they’ll help people who want to hike there for sure!
Thanks Helene! I think this was the hardest post I have written to date. So much information on backpacking here for a few days. But it was worth it!
This looks like such a great experience.
Jodie,
It really was! A little scary running out of water but the experience was priceless 🙂
Oh my goodness Michelle! These photos are gorgeous! I wonder who named them needles…to me they look a little more like fingers! The rock formations are all really beautoful though!
p.s. I love that you almost match the rocks with your pinky-orange outfit!
Wow!!!! Such a great photos and post. I am going this October and this post will be a great reference point for me.
Awesome! Good luck and bring a lot of water! 🙂
Good stuff here. Thanks.
How hard was it to climb the boulder at CP2?
Not hard at all. We are climbers but anyone could have done it. Just find a way through the back.
Hi, just a quick note to say “thanks!”. Your blog was very helpful in planning a trip we just completed (yes, in July, ugh!). We took the same route via LC to EC1 and EC2. Very funny that I ended up with some of the same pix (e.g. pic #14, climbing down sans ladder). How ’bout them ladders and jumping over crevasses? Pretty wild backpacking trail.
Anyhow, thanks again for the blog. Great descriptions and pix…very helpful!
P.S. for anyone else silly enough to go in July/August, plan on doing a water shuttle back to Squaw Flat (preferably at night).
I am very happy I helped out! Getting information on the Needles was so difficult for me, so I decided to write about it. There isn’t much information out there. We actually went in November and we ran out of water so I can not even imagine going in the summer! Haha, but I am sure you still enjoyed it 🙂 Thank you for coming back and commenting!
Excellent guide. I’m looking into doing this trip solo – something you would recommend?
1. Before you go, decide how much water you want to consume every day. We went in the winter and still ran out of water. I think it is because we were not keeping track of it.
2. Try to bring food that doesn’t need water like tuna packets.
3. Always keep track of time. It can be easy to get lost because the markers are just stones so it can be easy to miss. Especially at night.
4. Do not spend energy if it is not necessary.
5. Buy a well-detailed hiking map at the visitor center.
Hope this helps. I know I stated some of this above but I feel like these are extremely important especially if you are going solo.
Thank you so much for writing this long and thoughtful post! I’m going on a very similar trip in May and this is extremely helpful as I prepare.
I have been thinking recently about how much water to bring, especially after hearing your experience. When you mentioned that you brought 14L of water, was that per person? Or for all four of you?
That is Per person. Keep in mind that we used a lot of it on our dry food (which we regret). Try to bring food that does not need water. I know tuna doesn’t appetizing for a few days but your back will love you.
Excellent guide and great photos! My husband and I are going this fall for a 4-5 day trek, but we’re taking a route that passes natural springs and the river so that we can purify and refill our water.
Yes anything with water will greatly help! Ask the rangers beforehand. I remember we passes by a few “water sources” and they were ALL dried up.
I am planning to do a similar route next month (Oct). Do you think this is doable in 2-3 days solo? I am a moderately experienced hiker. Thanks. Amy
I think 3 days solo is good. Our 3rd day felt a little easy. If you are in shape 3 days is good. Just make sure to bring a ton of water and a map and compass. Canyonlands is very harsh (even in the winter) and the trail markings aren’t always apparent. You for sure need a map.
This is a helpful post for me. Heading out there next spring (April). Do you think a tent is essential? I hiked in Zion without one a couple of years ago, but haven’t dared since (usually I go to rainy places).
I mean, it might not rain but I would personally feel more comfortable with a tent. That is just me though.