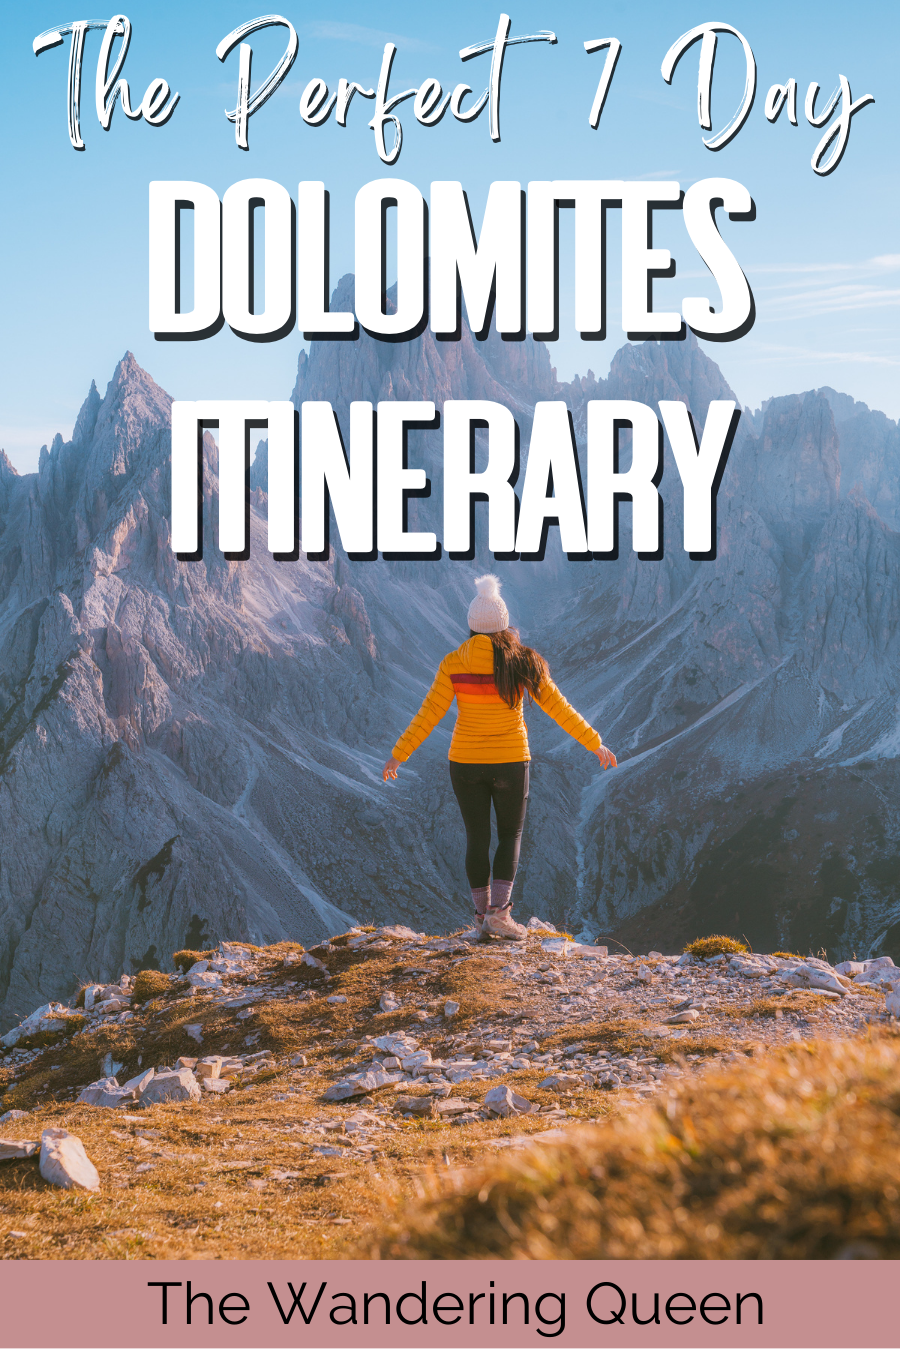
The Perfect Dolomites Itinerary: 7 Day Dolomites Road Trip Itinerary
It took me around three years to finally get to the Dolomites in Italy. It had been on my list of top destinations, but unfortunately, I had to reschedule it many times. When I finally got to the Dolomites, I realized very quickly that it was so worth the long wait! The minute you get there, you are blown away by its beauty! Just driving around the long winding roads through the mountains is worth it.
But when I started researching, I realized just how difficult it could be to plan a trip here. There are an overwhelming amount of hikes, viewpoints that can be tricky to get to, and there are many different towns. It can be tough to plan. Luckily, I have done all the research for you and have made the perfect 7-day Italian Dolomites Itinerary. It is filled with places to stay, hikes, viewpoints, gondola rides, and much more! Happy planning and exploring!
Disclosure: This post contains affiliate links. If you click one of them, I may receive a small commission (for which I am very grateful for) at no extra cost to you.
Map Of Dolomites Itinerary 7 Days
Below is a Google Map of my Dolomites 7 day itinerary. Save the map and print it because there is not much service in the mountains.
Where To Stay
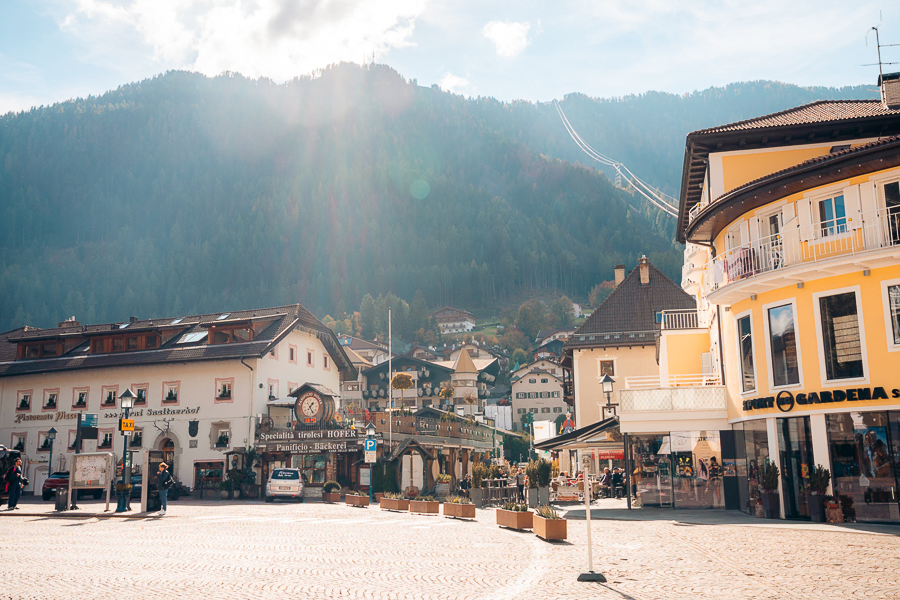
Ortisei
Linder Cycling Hotel: I highly recommend this hotel, which is where we stayed in Val Gardena. Breakfast was terrific, dinner was good, and the views were beautiful. I really enjoyed my time here. >Book Hotel Here
Cortina d’Ampezzo
HOTEL de LEN: Beautiful modern yet warm hotel with a fantastic restaurant. >Book Hotel Here
Booking.comTours Of The Dolomites
What To Pack For The Dolomites Itinerary
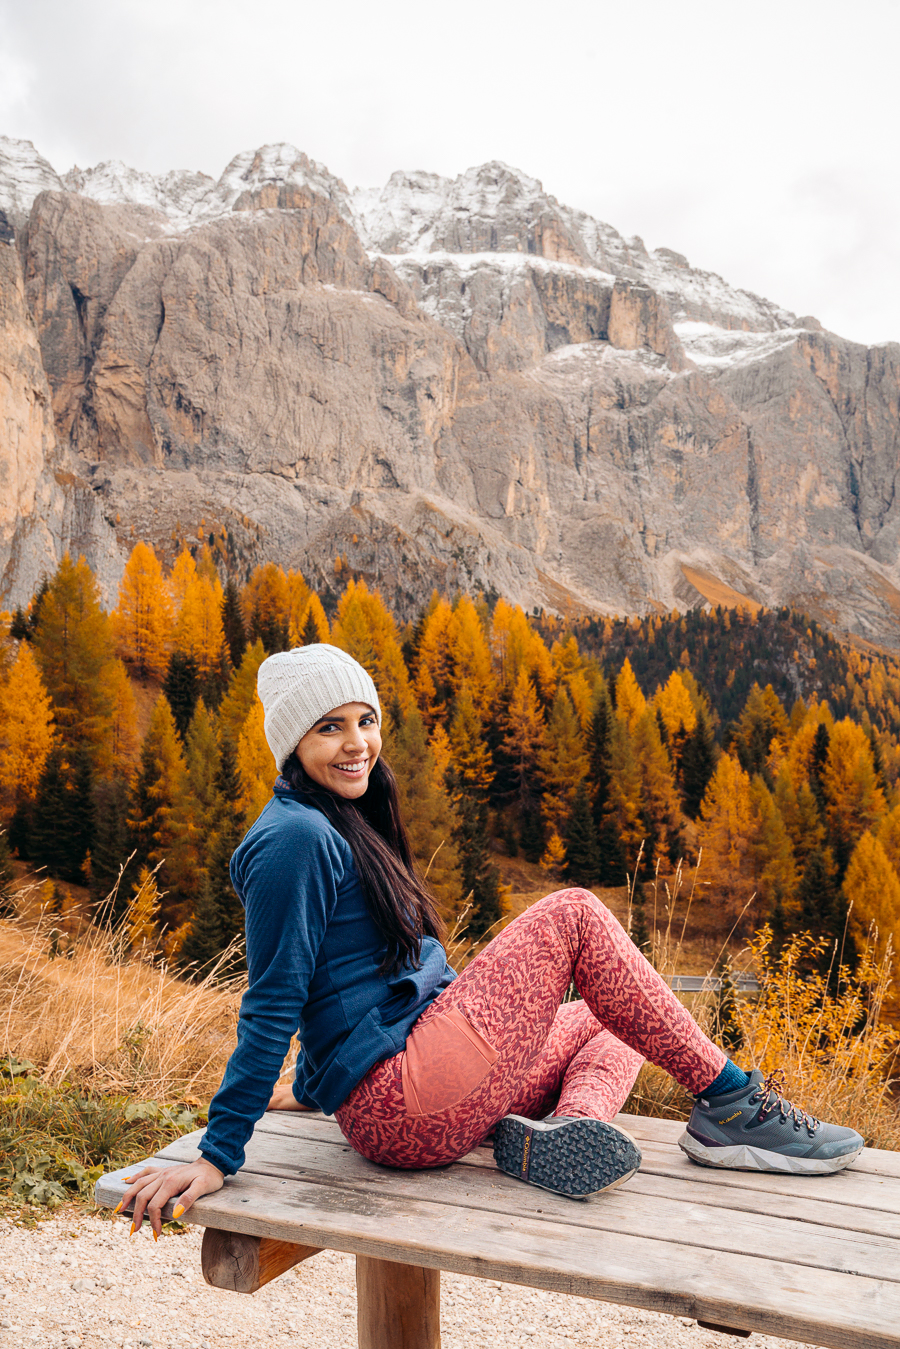
What to pack for the Dolomites depends on what time of year you go. Since I went in the Fall, I brought more layers, so I will list those layers below but will also list summer attire.
- Warm Jacket: I loved this jacket that I wore in the Dolomites. It kept me warm and looked terrific in my pictures. >Buy This Jacket Now
- Midlayer Sweater: I like to have a sweater just in case I get a little chilly outside. >Buy This Warm Sweater
- Leggings: I wore comfy leggings throughout the whole hiking trip. >Buy My Fav Leggings Here
- Base Layers: On the colder days, I wore these under my leggings and sweaters. >Buy Top Here >Buy Bottoms Here
- Hat: Depending on when you go, you can bring a beanie or a sun hat. I brought a beanie to keep my head warm in the Fall. >Buy Sun Hat Here >Buy Beanie Here
- Breathable Shirts: Try not to wear cotton because it soaks up your sweat. >Buy Shirt Here
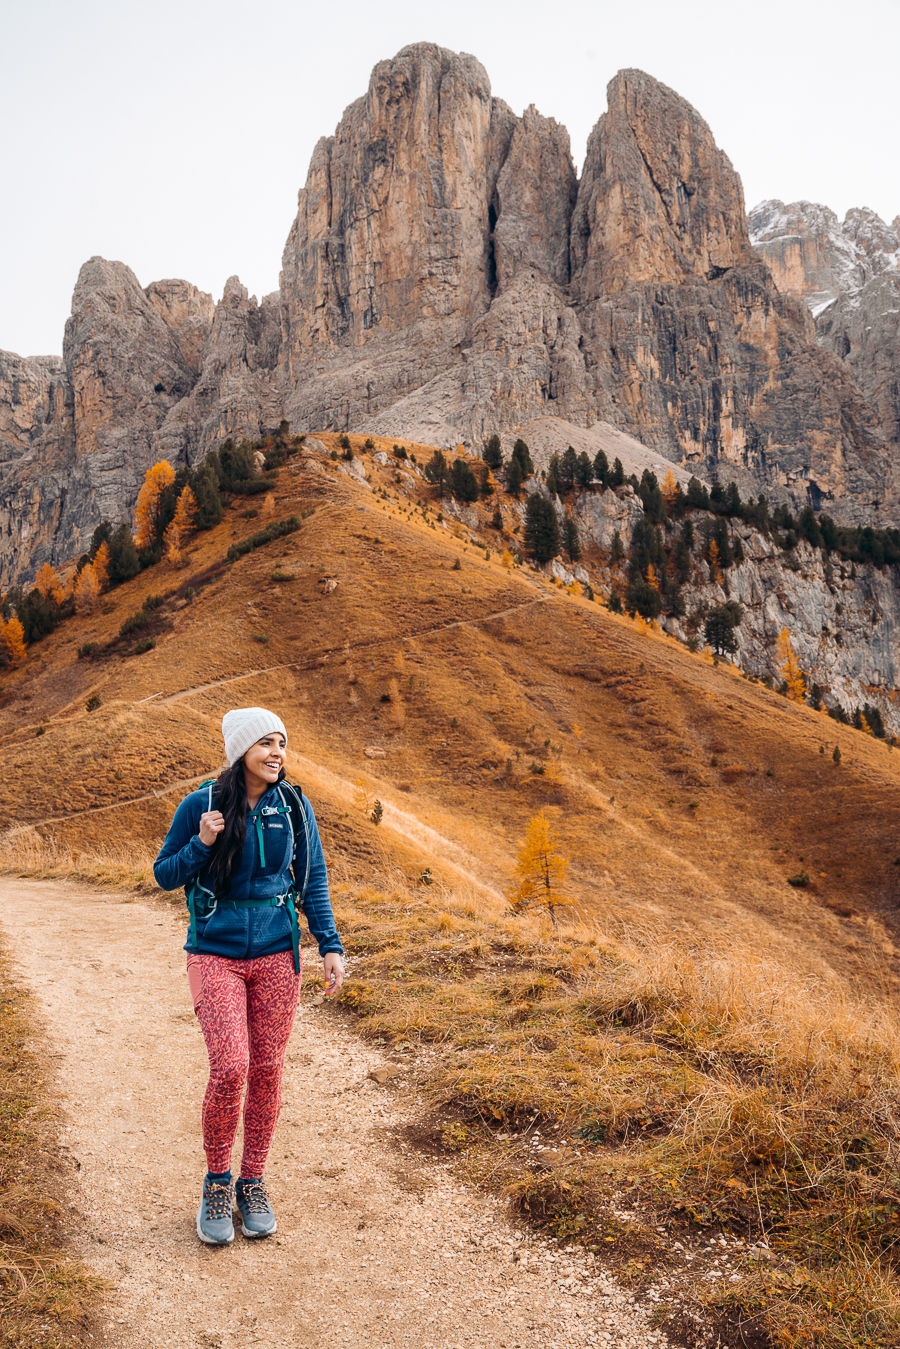
- Hiking Backpack: To carry snacks, water, ten essentials, and a camera. >Click Here for my favorite backpack
- Water Bladder: Stay hydrated while hiking all around Italy. >Buy Water Bladder Here
- Fanny Pack: I Felt so safe carrying my passport in this pack. >Check It Out Here
- Hiking Boots: I used hiking boots on the more difficult trails like Lago Federa, and Tre Cime. It gave me so much support on the more difficult all-day hiking trail days. >Check Out These Merrel’s That I Wore
- Hiking Socks: Wool hiking socks prevent blisters on all-day hiking days. >Buy Some Here
- Cute Boots: I love walking around in the cute northern Italy towns. I have used the Blundstone boots for years on my travels! They are so comfy. >Buy The Comfiest Travel Boots Here
- Regular Socks: >Love These Comfy Socks
- Cute Sweaters: On the more chill days, I wore very comfy sweaters. In the summer you can wear comfy shirts. >Get A Cute Define Jacket
- Jeans: In my itinerary below, I have a few days which are pretty chill and do not require hiking attire. >Check Out My Jeans
- First Aid Kit: In case you need a bandaid while hiking all around northern Italy. >Buy One Here
- Rain Jacket: The worst feeling in the world is being wet and cold while hiking. >Check Out My Rain Jacket Here
- Tripod: This is an optional item, but it is excellent for getting the ideal sunset pictures. >Check out this tripod
- Snacks: The best snacks are jerky, nuts, and energy bars. >>>Check Out These Snacks
- Sunglasses: It can get sunny all year long, so make sure to pack some sunglasses. >Check Out These Sunglasses
- Sunscreen: It was sunny at times, even in the Fall, and sunscreen is part of the ten essentials! >Buy Sunscreen
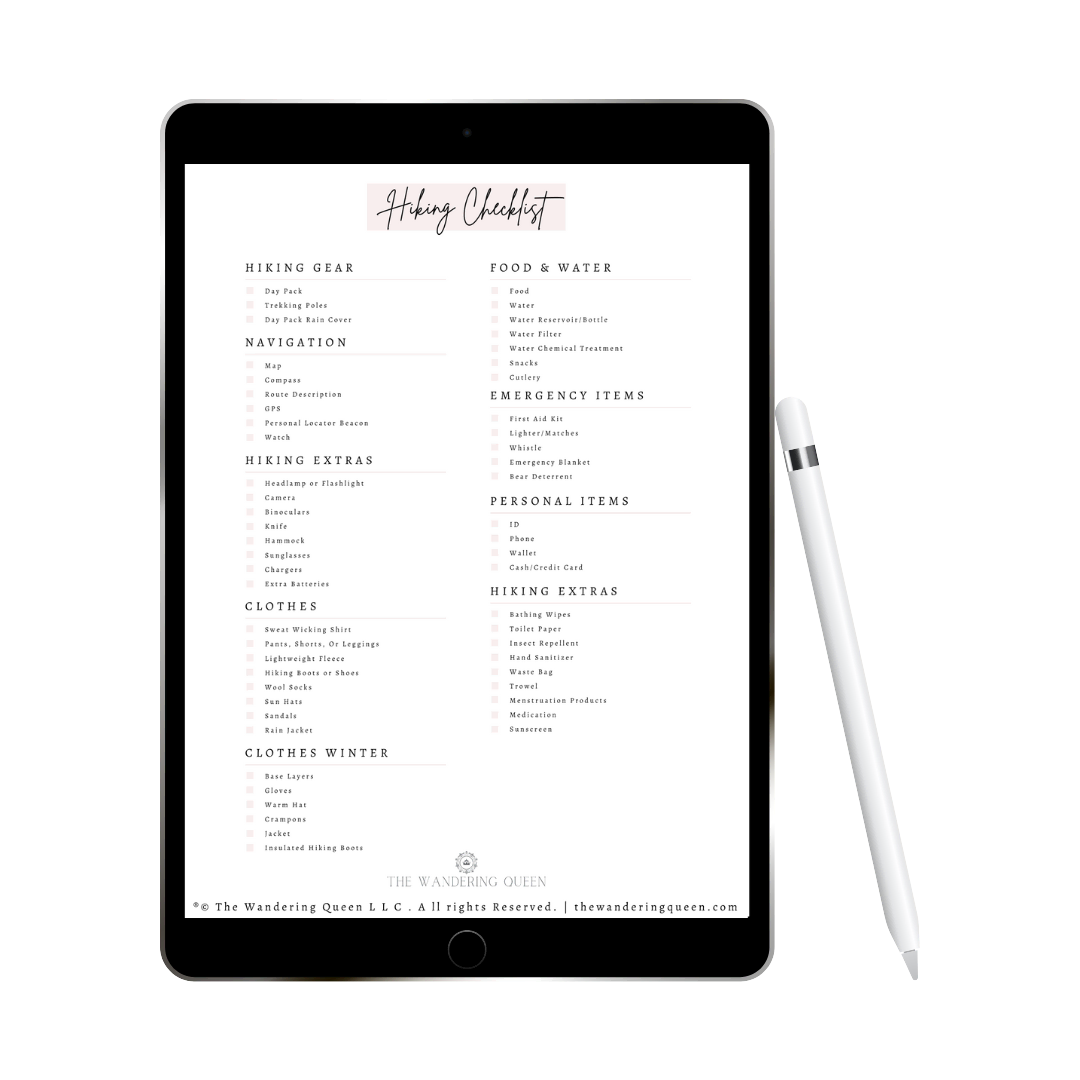
Claim your FREE Hiking Checklist
Ready to start hiking? Grab my free hiking checklist and never forget anything at home!
The Best Dolomites Itinerary
Day 1
Karersee
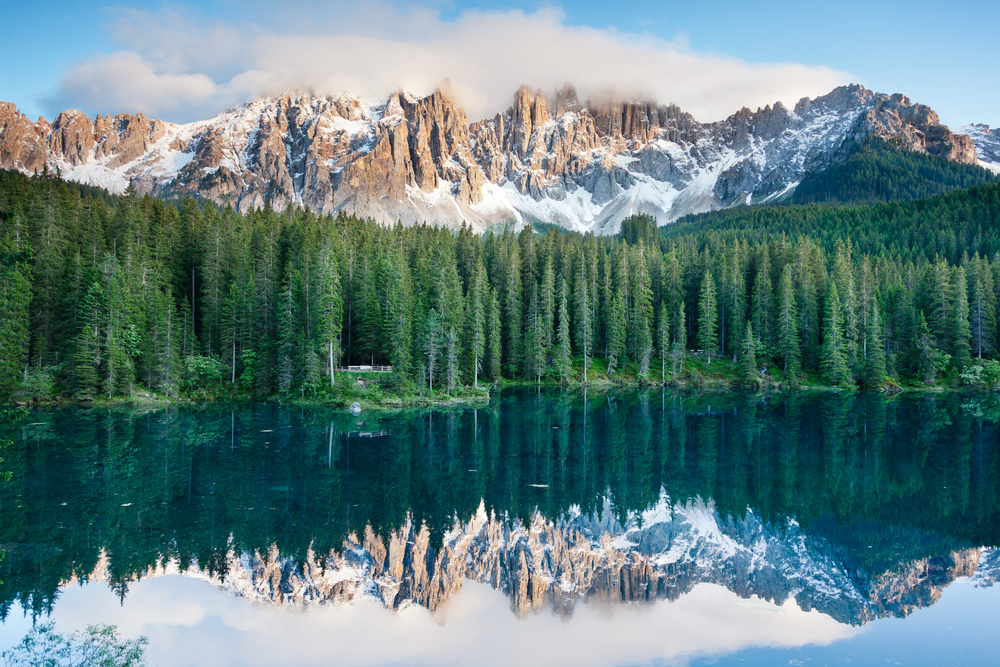
If you get to Italy pretty early in the morning and you have some energy to see a fantastic viewpoint, then you need to stop by the Karersee Lake. The lake looks like glass on a beautiful still day and is an easy way to get a magnificent view on the first day in the Dolomites. If you are hungry after traveling all day, there are some restaurants here, like Pizzeria Kupferkanne.
Like most other viewpoints in Italy, you have to pay for parking. But what I love is that the parking in Italy usually has machines so you can pay with a credit card! The road to Karersee is not always open so make sure to check beforehand if it is.
St. Valentin Church
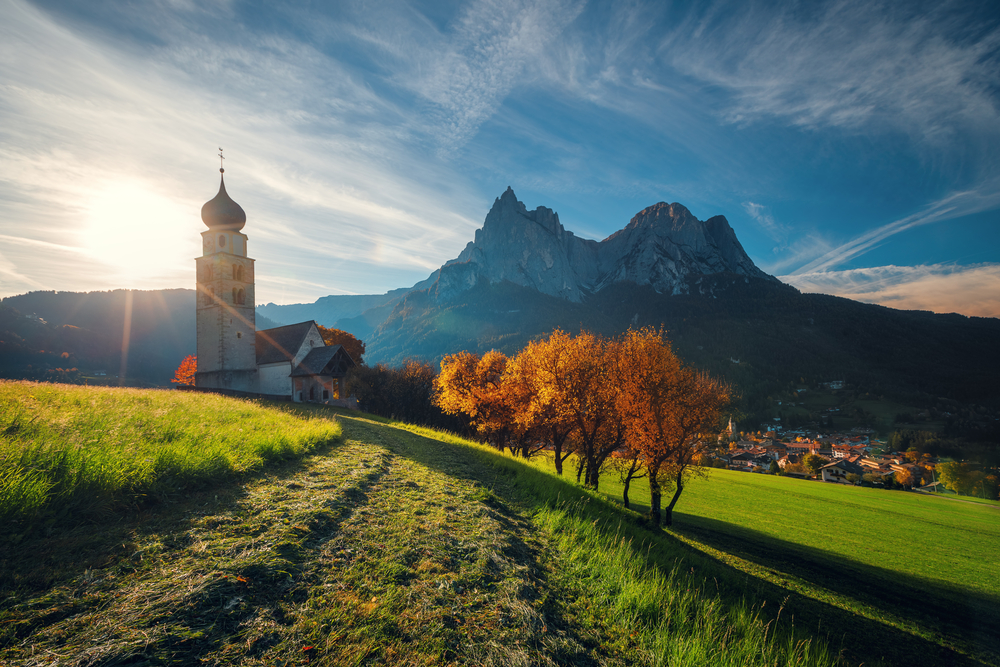
St. Valentin Church is on the way to Karersee Lake, so you can make a quick stop and take in the glorious views from afar or walk on over for a closer view. There is no known date of when the church was first built, but the first records of its existence are around 1244.
Drive To Ortisei
Drive to Ortisei and check into your hotel. If you are following this itinerary, I recommend staying here on the first and second nights. There are plenty of restaurants and hotels. I mention where we stayed above.
Day 2
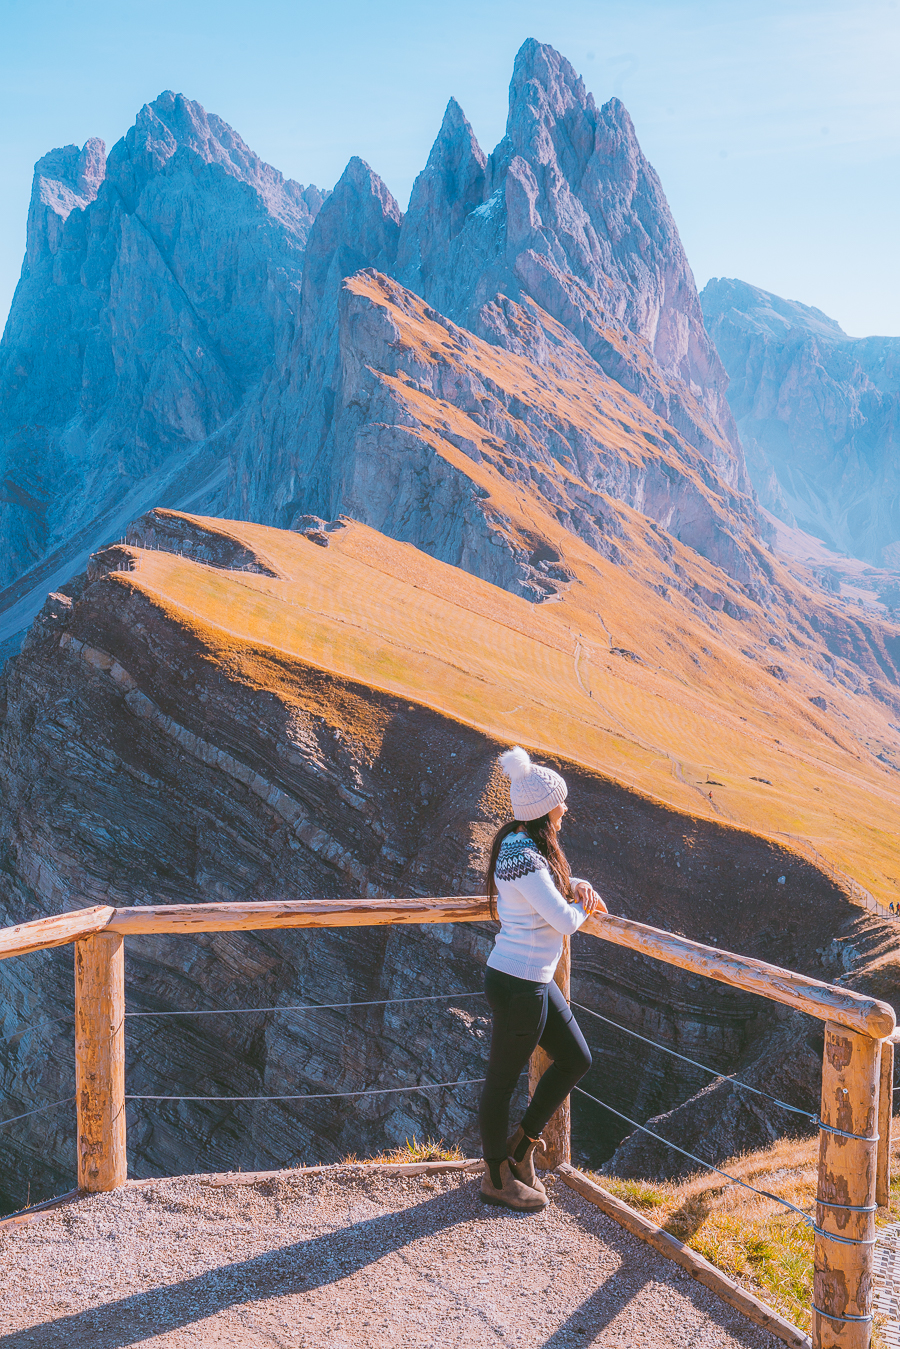
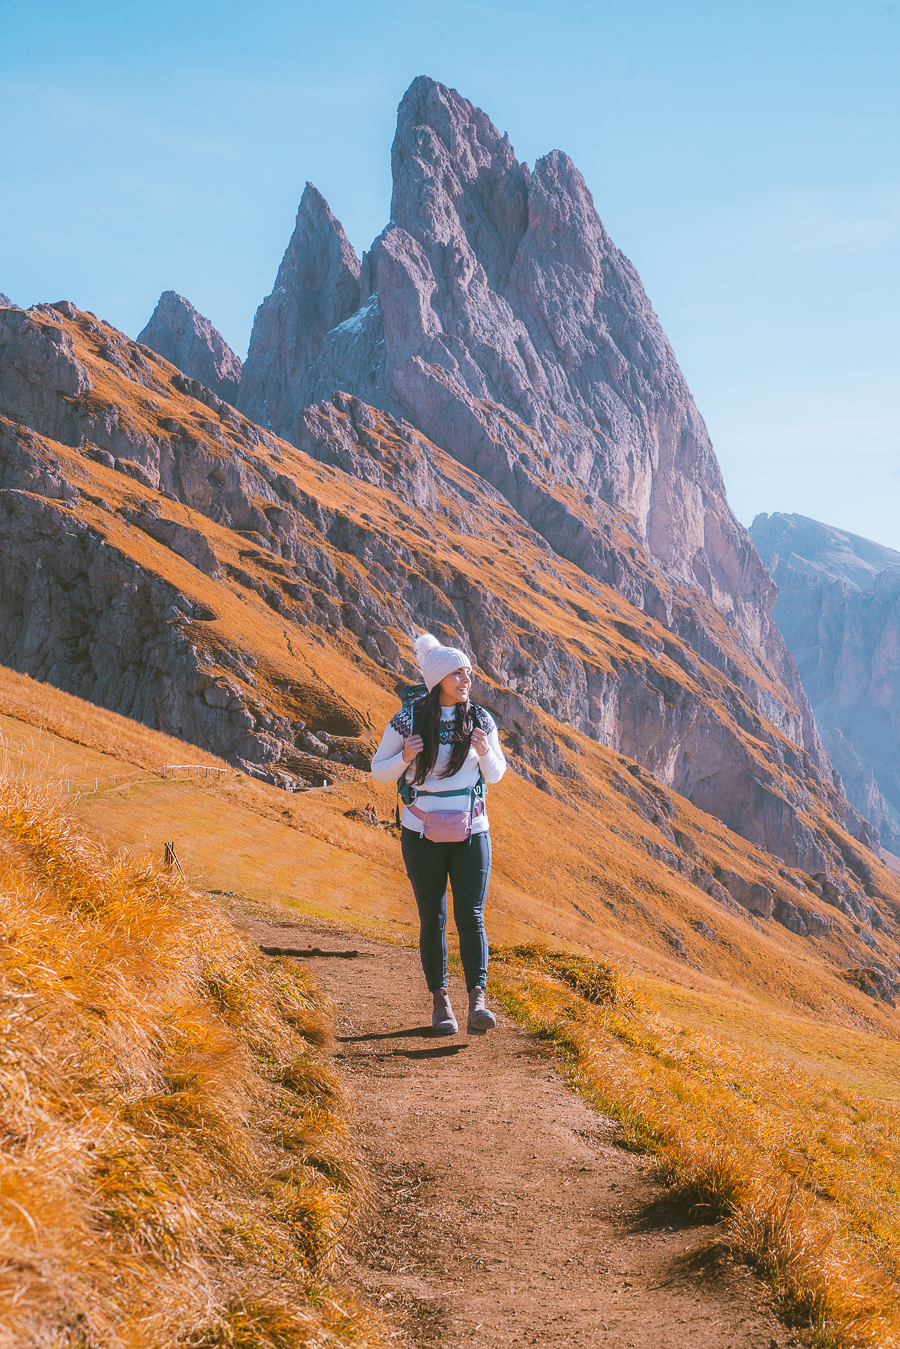
Seceda
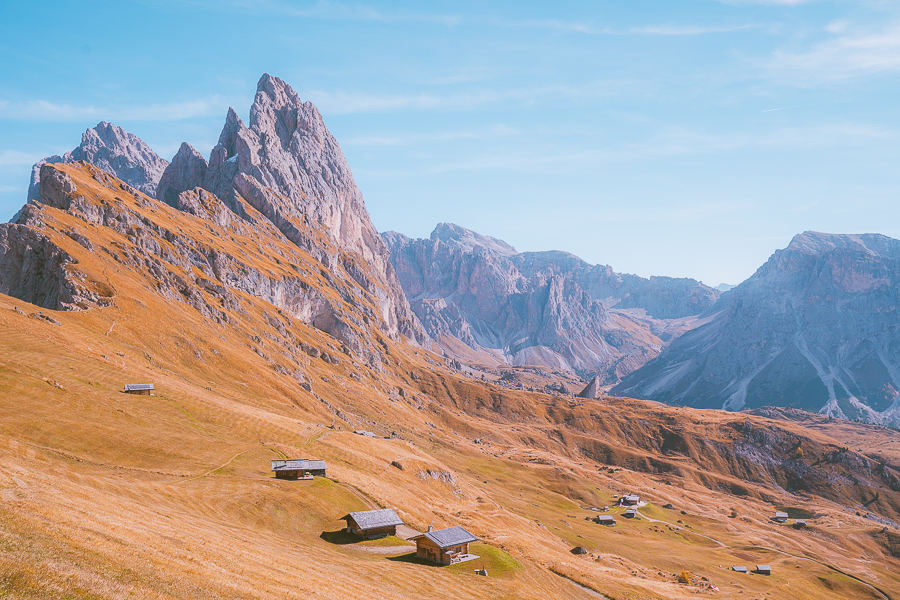
The Seceda is what brought me over to the Dolomites. Years ago, I saw a picture of sharply jagged mountains that looked to be jutting out of the ground. It was one of the most beautiful pictures I had ever seen, and I was thinking to myself, “This can’t be real”.
Luckily it was, and I found out how easy it was to get here! All I did was buy a gondola ticket which took me to the viewpoints you see above and below. I was in shock! I always thought I had to hike a long strenuous trail to be able to see these fantastic mountains.
There are many side trails around the Seceda, as you can see in the pictures below, so we walked around and explored a bit, took many photos, and ate lunch at the “Restaurant Seceda”. The food was good, the drinks were plenty, and the views were out of this world.
Kirche St. Johann in Ranui
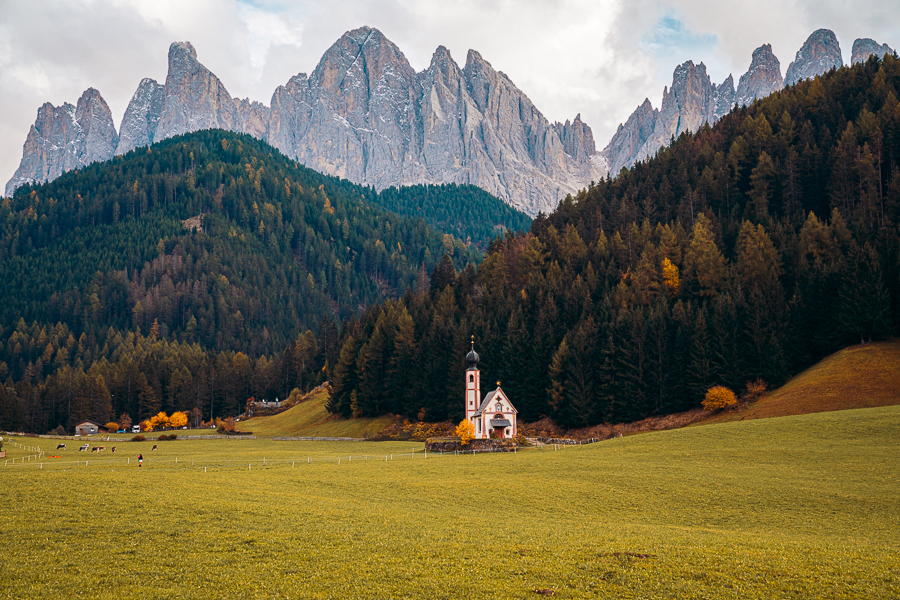
The view of Kirche St. Johann in Ranui cannot be missed! I was in awe when we saw it. It was absolutely wonderful. We paid for parking at a parking lot right next to the viewpoint shown above, so it was effortless to get out of the car and take pictures.
There is an option of getting up and close to the church and taking better photos, but you have to pay additional money (Euros in cash), so we decided not to do it.
Viewpoint over the church of St. Magdalena
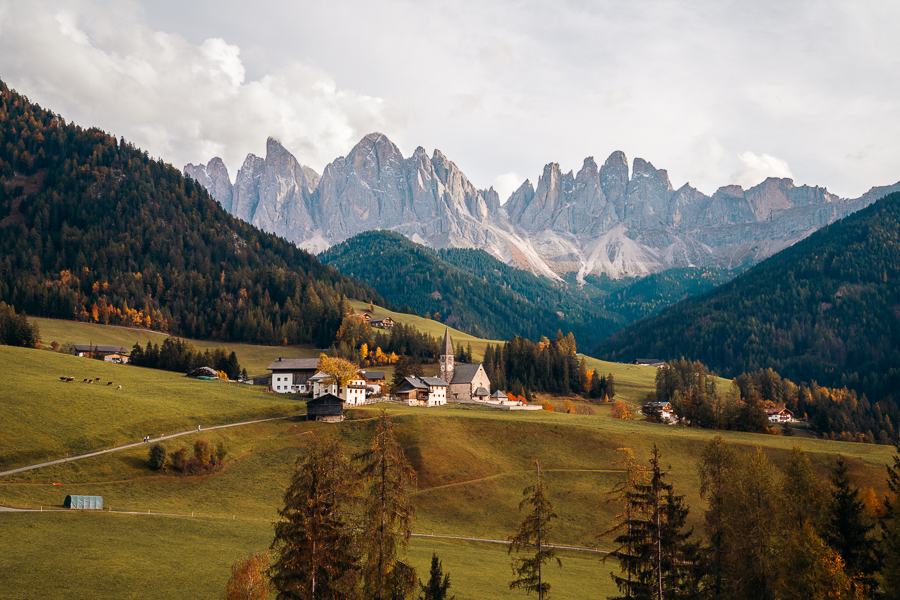
It can be pretty confusing to view the church of St. Magdalena with the enormous mountain peaks in the distance, but you have to park in the town and then walk over to the viewpoint.
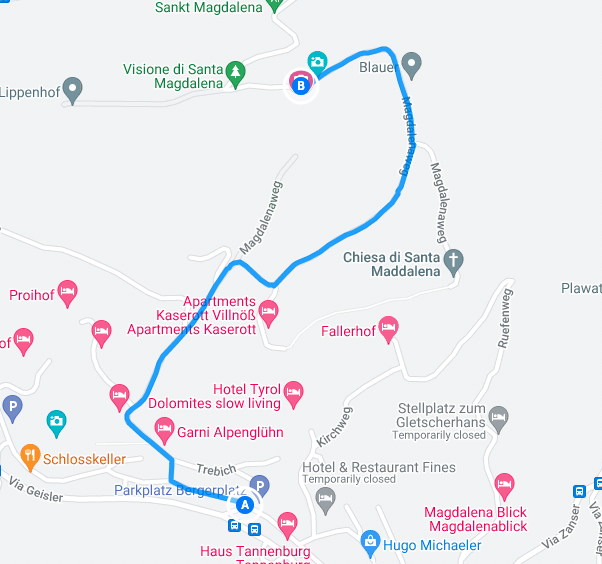
There are technically roads, but locals get upset if you drive on the roads because they are private. You can park at Parcheggio Putzen (shown in Google maps), then walk on over to the Santa Magdalena Viewpoint (also shown on Google Maps, type it in).
Below I have a map of where you have to walk. You might be able to find parking a bit closer, but when you start to see signs with a red circle, don’t go any further, that is private property. After walking back from the viewpoint, get dinner at Viel Nois Guest house if you are hungry.
Day 3
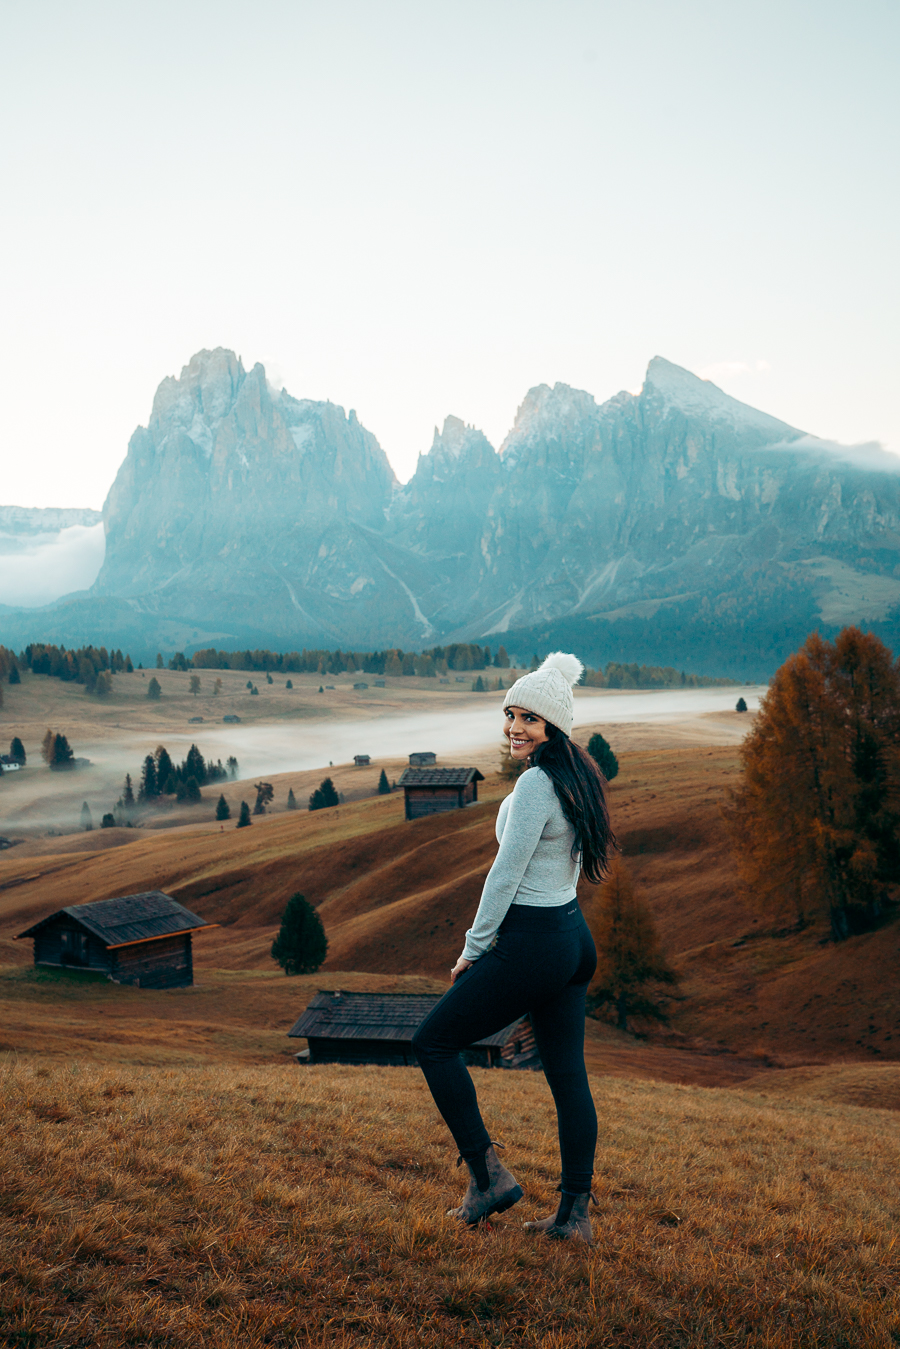
Alpe di Siusi
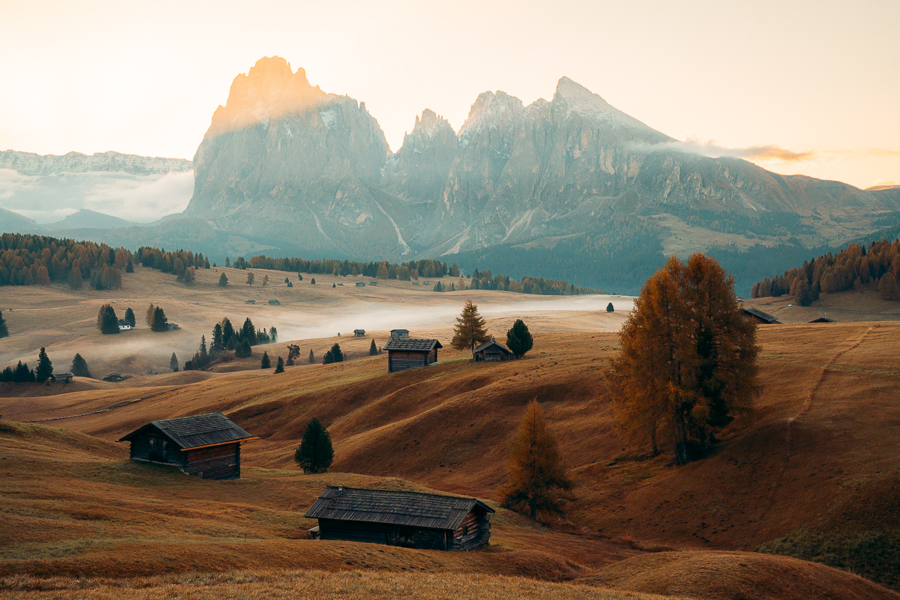
Another confusing viewpoint is the world-famous Alpe di Siusi. Unless you are staying at the hotel, you have to walk for about an hour to see this magnificent scenery. I highly recommend getting up for sunrise to see it.
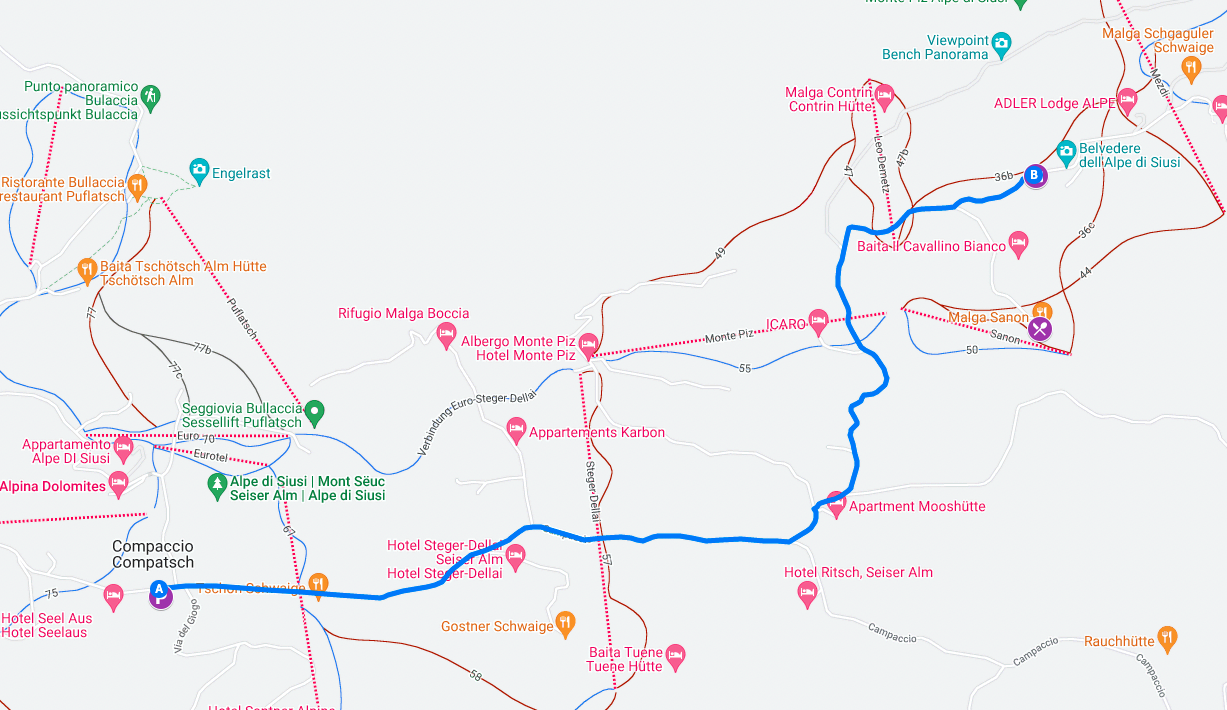
Type in “Parkplatz P4” on Google Maps for parking and “Belvedere dell’ Alpe di Siusi” for the viewpoint, as shown above, and below. I have also attached a map, so you know exactly where to park and walk. Bring cash for parking.
If you are hungry for some breakfast (and good views), stop by SANON Hut for some grub after taking your hundreds of photos. Just walk on over.
Vallunga
- Mileage: 5.9 miles
- Elevation Gain: 1,105 feet
- Difficulty: Moderate
- Type of Trail: Out & back
- Trail Guide: Link
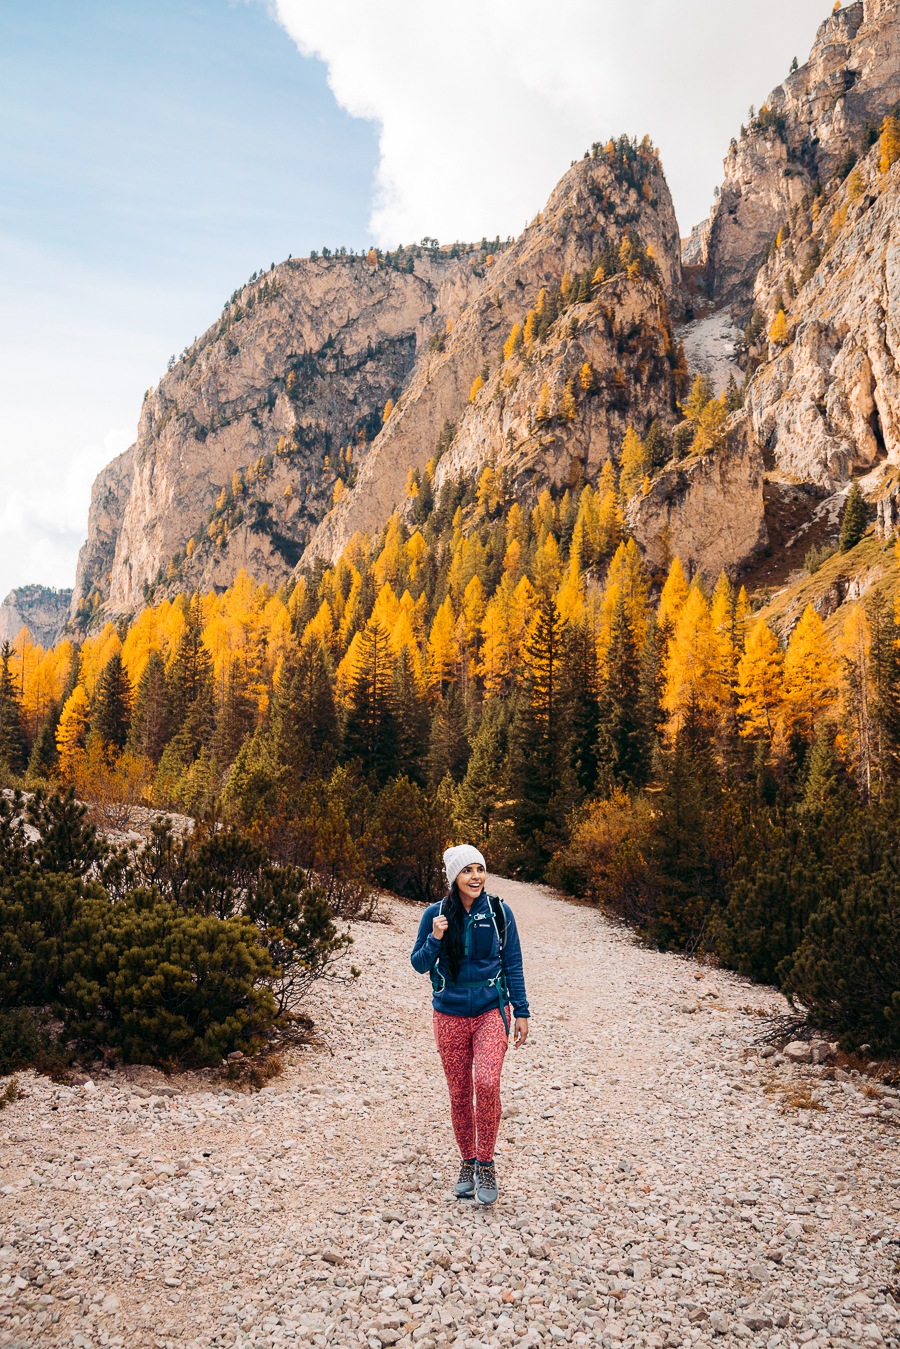
I hadn’t even heard of this trail until I arrived in Italy. I stumbled upon it online when researching good trails with golden larches. This trail delivered! There were so many bright yellow larches, and it was probably the most family-friendly hike in the area. It was filled with benches and picnic tables, and the trail was pretty flat for the first few miles. I liked how throughout the hike, mountains surrounded me, so the views were glorious the whole time.
I can see why this trail isn’t always listed on the best things to do in the Dolomites because there are more insane views like the Seceda and Alpe di Siusi, but this is such an easy activity to do with the whole family, and if you are a bit tired from all the difficult hikes, this is a great one to add. Plus, if you go in the Fall, there are yellow larches galore!

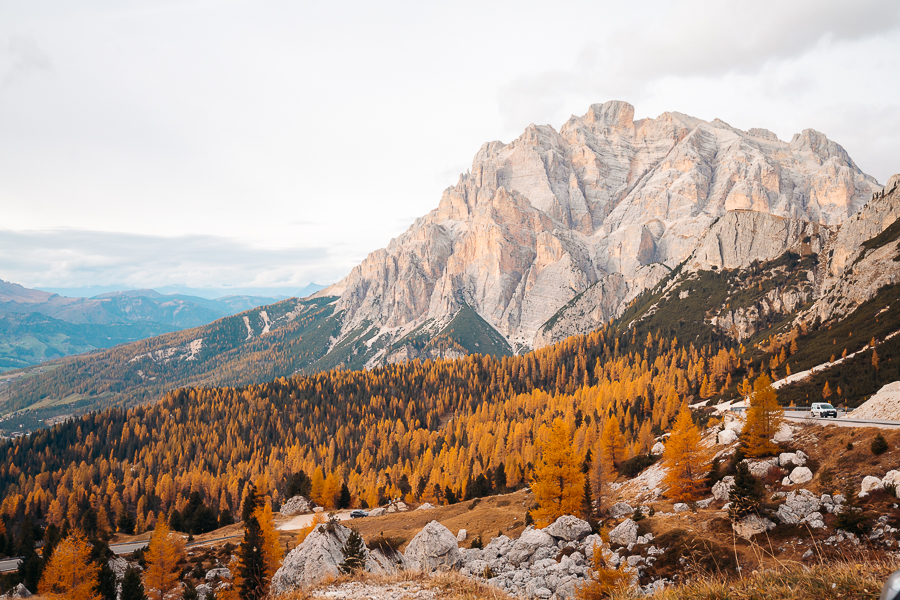
Gardena Pass
 Picnic area we found right before the Pass
- Short trail at the Pass
When driving to Cortina d’Ampezzo, you NEED to stop at Gardena Pass. I pulled off at a picnic table near the top and got some pretty epic pictures with the larch trees and mountains. There are many pullouts right before you get to the pass.
We also stopped for a bit at the Pass and walked around and took in the grand views surrounding us. I really loved the cute short trail, as shown in the picture above. Don’t worry, it is right next to the parking lot at the pass. It is very hard to miss.
Grab Your Free Car Camping Checklist! 🚗🌲
Ready to elevate your car camping game? Snag our essential checklist to ensure you’ve got everything you need for a stress-free, fun-filled adventure! Perfect for beginners and seasoned campers alike. Download now and hit the road prepared! 🌟🎒
Drive To Cortina d’Ampezzo
Today is the day you pack up your bags and head on over to the next hotel located in Cortina d’Ampezz. The drive from Ortisei to Cortina d’Ampezzo is breathtaking! We stopped at many pull-offs to take photos, so take your time and enjoy the drive.
Day 4
Croda da Lago – Lago Federa
- Mileage: 7.9 miles
- Elevation Gain: 2,969 feet
- Difficulty: Hard
- Type of Trail: Loop
- Trail Guide: Link
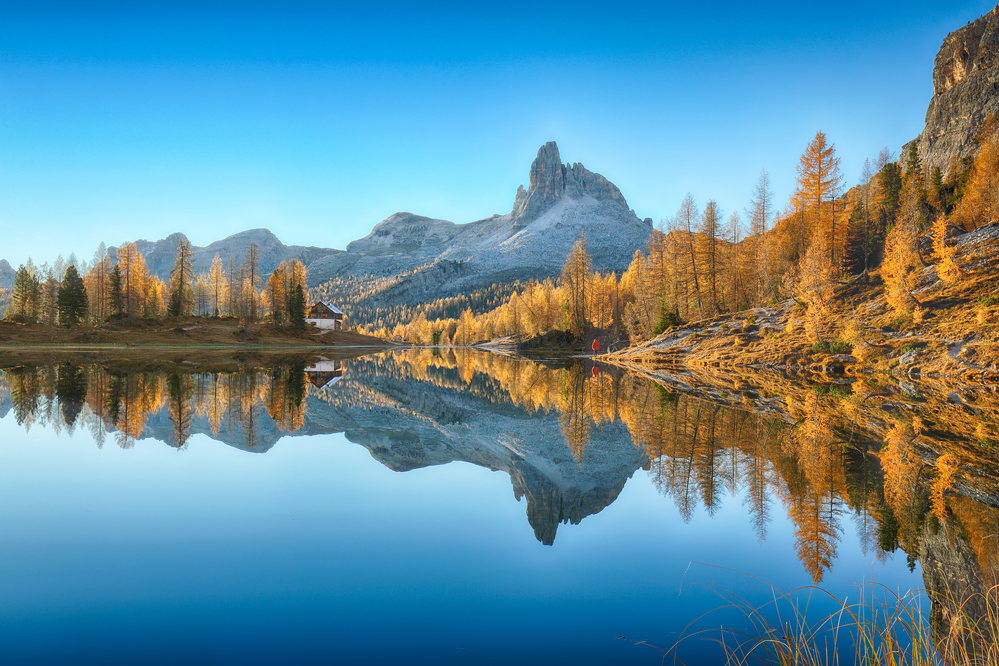
Lago Federa is an all-day trek kind of hike. If you hike the whole loop as I have linked above, then you will be hiking a very steep, challenging trail. The loop is not for beginner hikers. But there is a way to make the trail into a more moderate hike.
If you hike from the trailhead to Lago Federa then you hike back the same way (out and back), it will make your trek a lot easier. Lago Federa is an excellent destination to experience during sunrise in the Fall. The sun illuminates the trees a brilliant yellow in the early morning.
There is also a Refugio at the lake, which has drinks and food. It was quite the spot when we arrived, as there was barely anywhere to sit. This is definitely a very popular hike.

Even though the loop hike was very steep, I still highly recommend it. The views at the top are out of this world! Just magnificent. My husband and I just laid around the top and took in the views, and ate lunch. It was very glorious.
Read More: 16 Best Hikes in the Dolomites, Italy: Hiking Trails To Try
This trail is one of my favorite hikes I have ever done. It was very challenging, but I love a good challenge! And in the Fall, the Larch Trees are endless. So many photo opportunities, you cannot miss this trail!

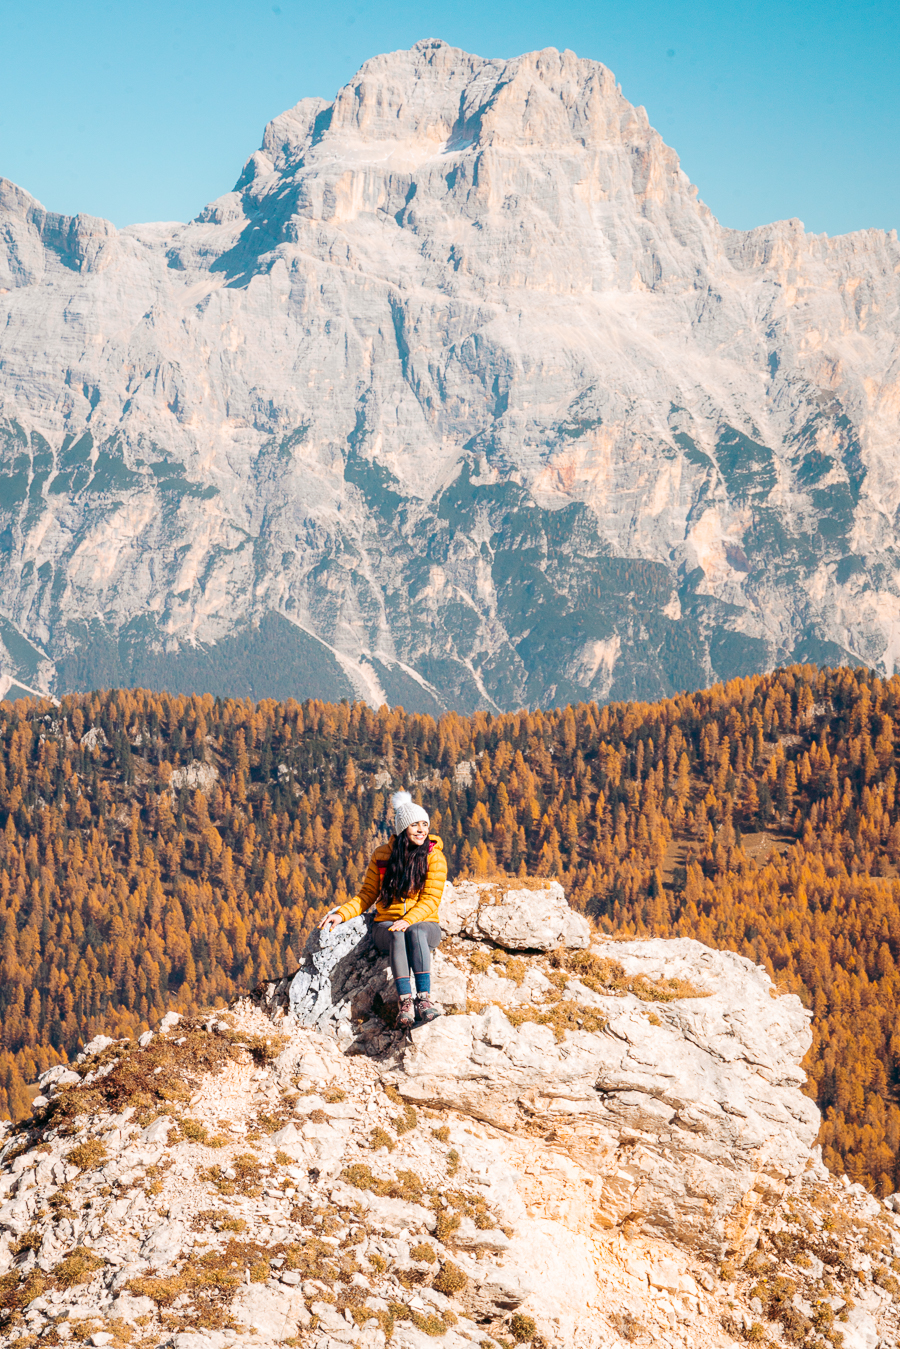
Giau Pass
Before or after completing Lago Federa make sure to check out Giau Pass, which is located near the trailhead. The views are incredible up here, and you don’t need to hike far to get a picture, as I took above. If you are hungry, there is a restaurant called Ristorante Da Aurelio at the pass.
Day 5
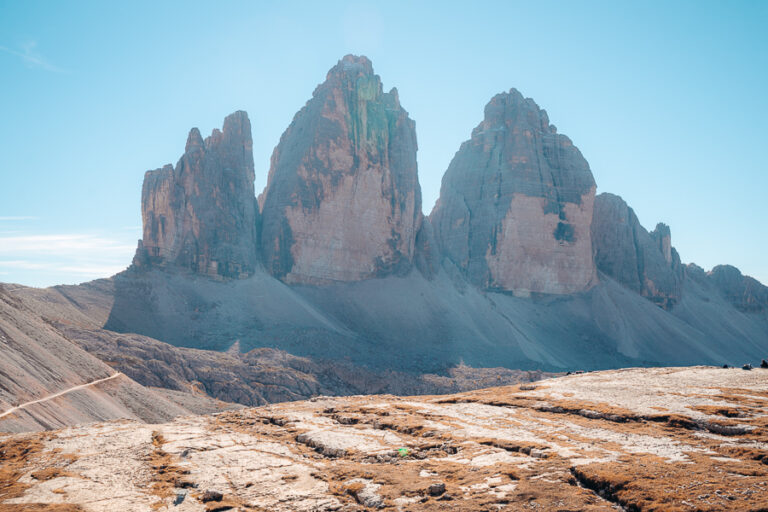
Tre Cime di Lavaredo
- Mileage: 6.2 miles
- Elevation Gain: 1,646 feet
- Difficulty: Moderate
- Type of Trail: Loop
- Trail Guide: Link
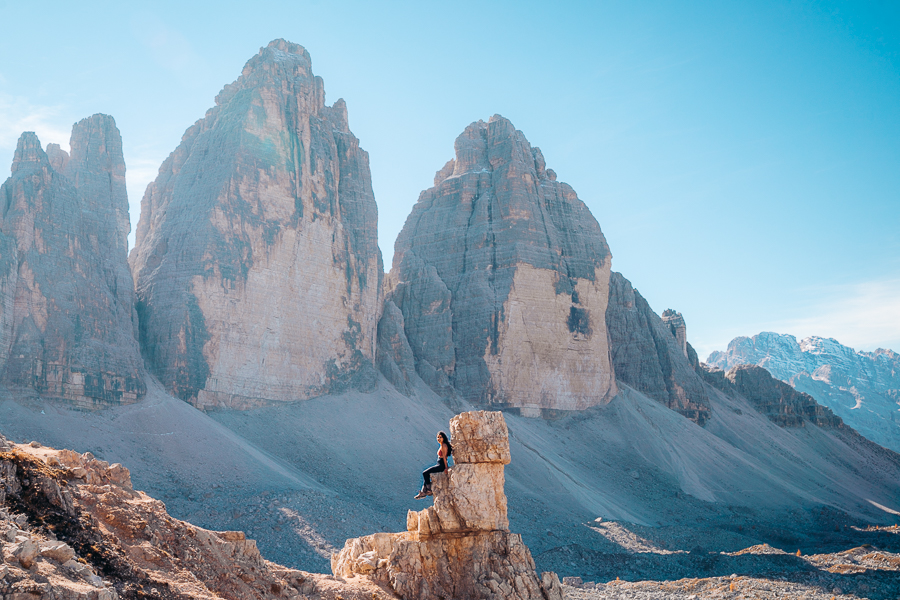
Tre Cime di Lavaredo is the most popular trail on this whole list. You will notice the moment you get there as there are hoards of people hiking this trail. It has become so popular that they have a toll booth where you have to pay 30 euros (in cash) to get to the parking lot next to the trailhead.
I have heard of people parking right before the toll booth to avoid the payment, but after driving up to the trailhead, I was so glad I paid the 30 euros. The drive up looked steep, and even though I am an avid hiker, I could not imagine having to trek back down after hiking the Tre Cime di Laveredo all day. But if you want to save money, parking farther is an option.
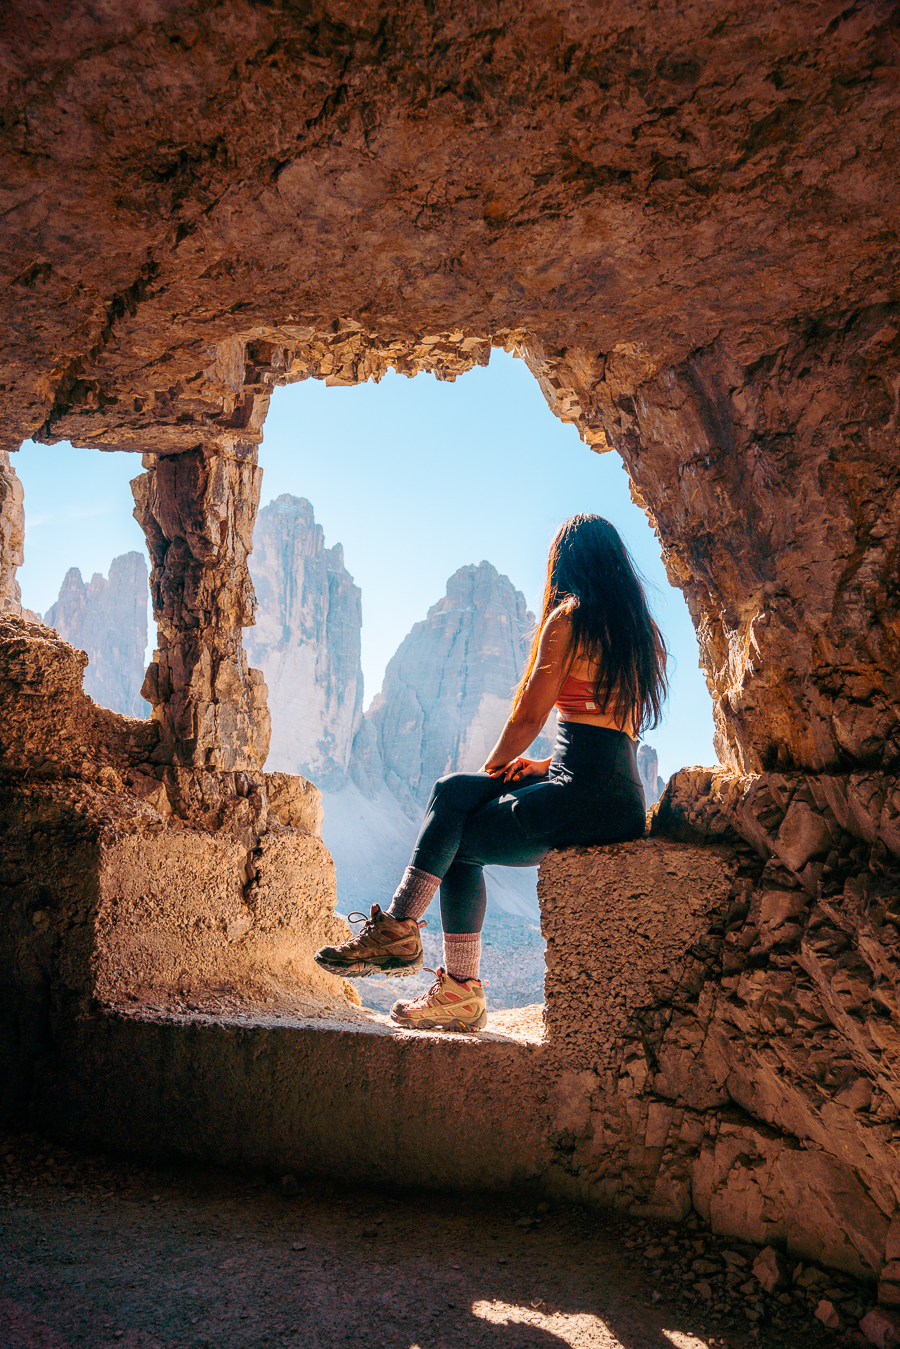
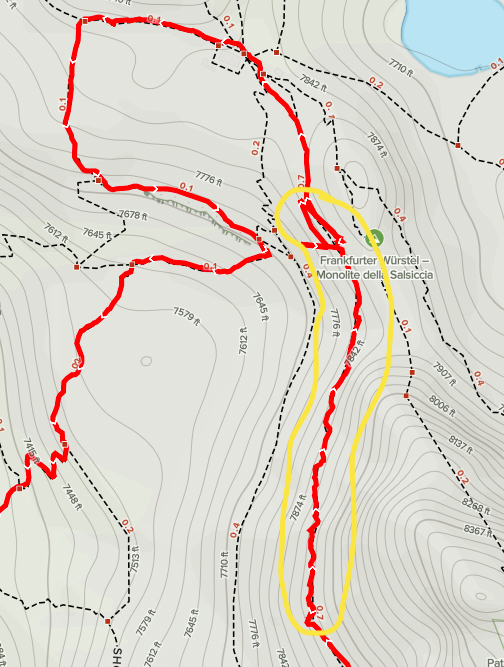
Tre Cime di Lavaredo is a loop trail, and I recommend taking your time and exploring it for most of the day. We got here in the morning and left around sunset. My favorite parts were the hidden cave and “rocks” shown in the picture above.
If you want to see the cave and the area with the rocks, I will warn you that the path is very narrow and a little sketchy. Also, the “rock,” as shown above, freaked me out a bit, so I sat down instead of standing up at the top. Below is a map of where the two areas are located in yellow. Be careful and be safe!
Cadinini di Misurina viewpoint
- Mileage: 2.3 miles
- Elevation Gain: 685 feet
- Difficulty: Moderate
- Type of Trail: Loop
- Trail Guide: Link
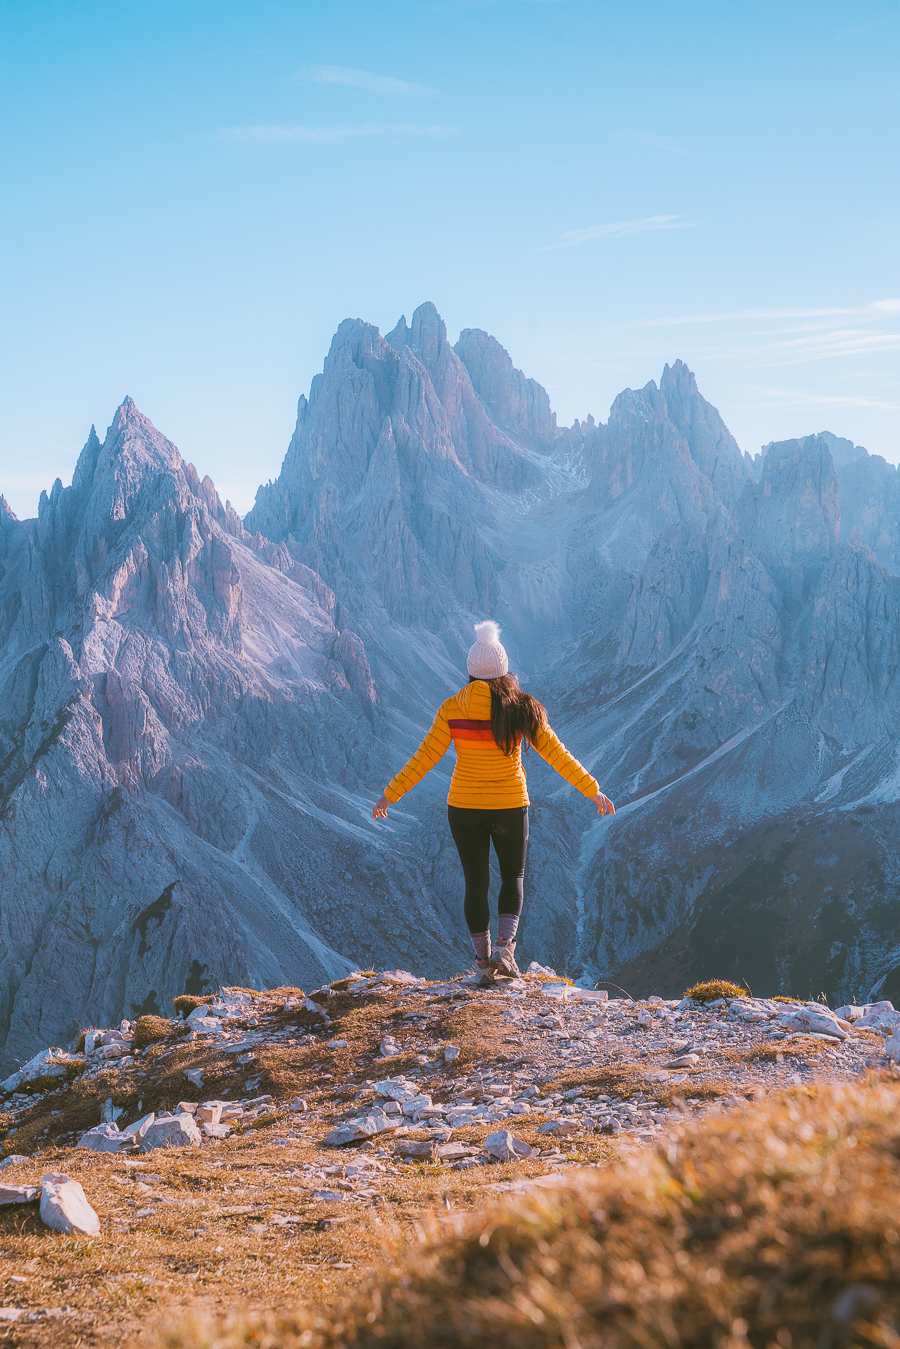
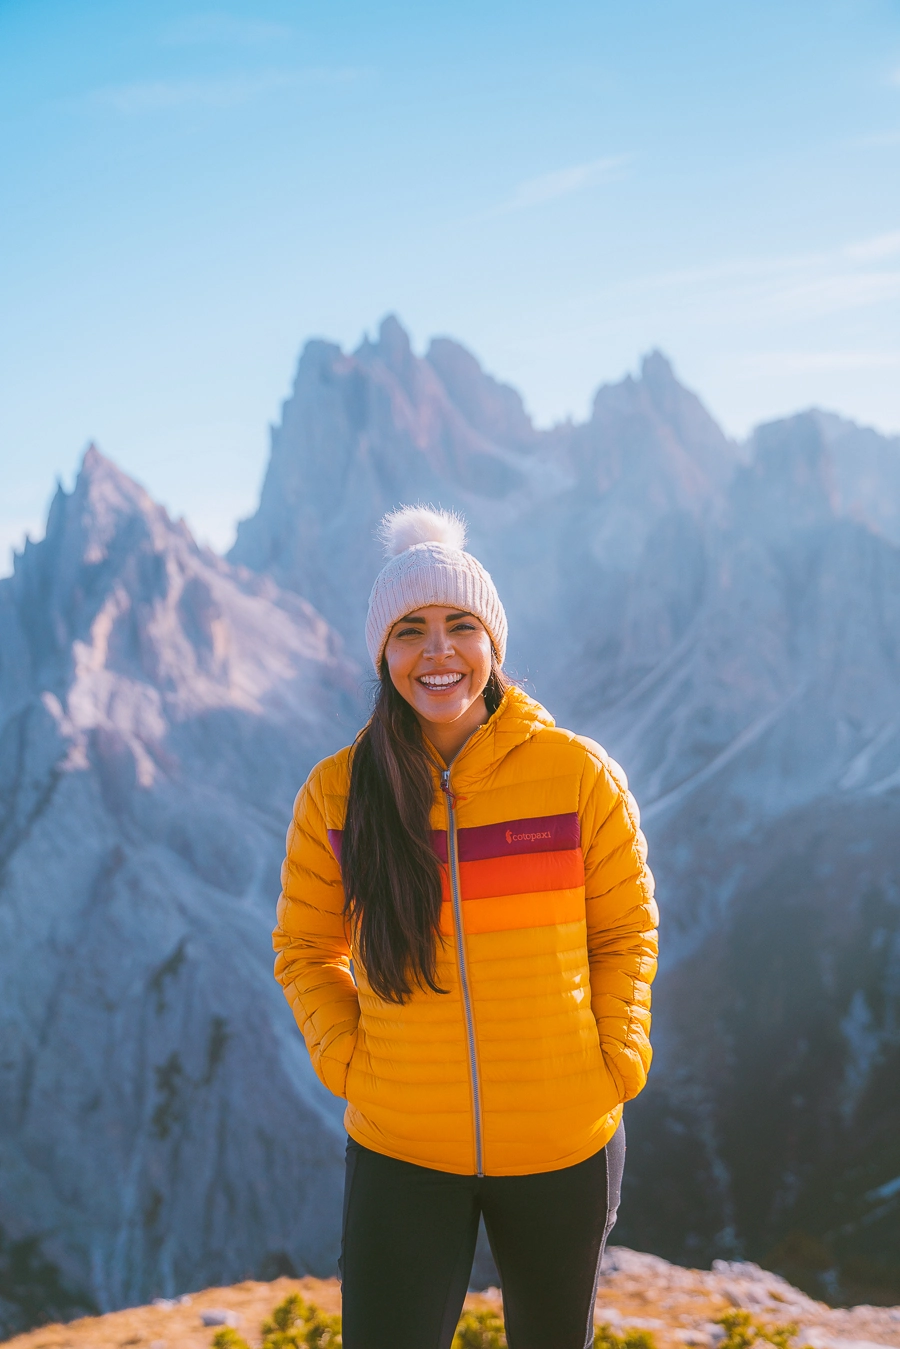
After hiking Tre Cime di Lavaredo, you HAVE to go to the Cadinini di Misurina viewpoint. I enjoyed it more than Tre Cimi. And the trail is super short, only 2.3 miles round trip total!
The best time to take pictures is for sunset, which is why we went right after Tre Cime di Lavaredo, and our pictures turned out so well! There are so many places to take photos of the mountains, including the “flying banana viewpoint,” which is a narrow viewpoint and can be a little scary, but there are so many other areas you can take photos of if you are not up for it.
There was a long line to get on the narrow ledge for sunset, so we decided to take pictures at another spot.
Day 6
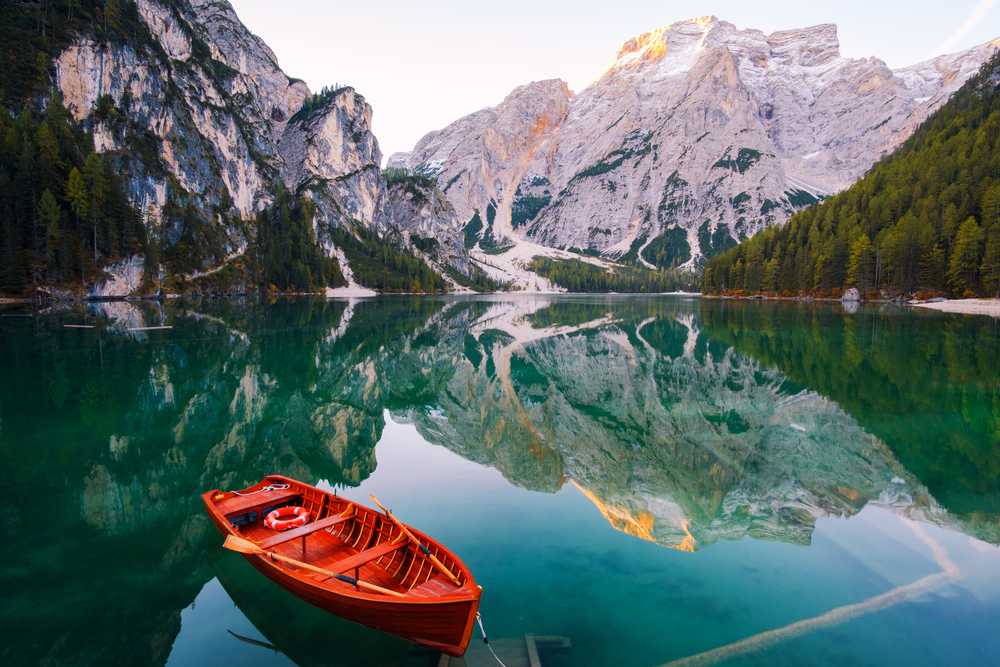
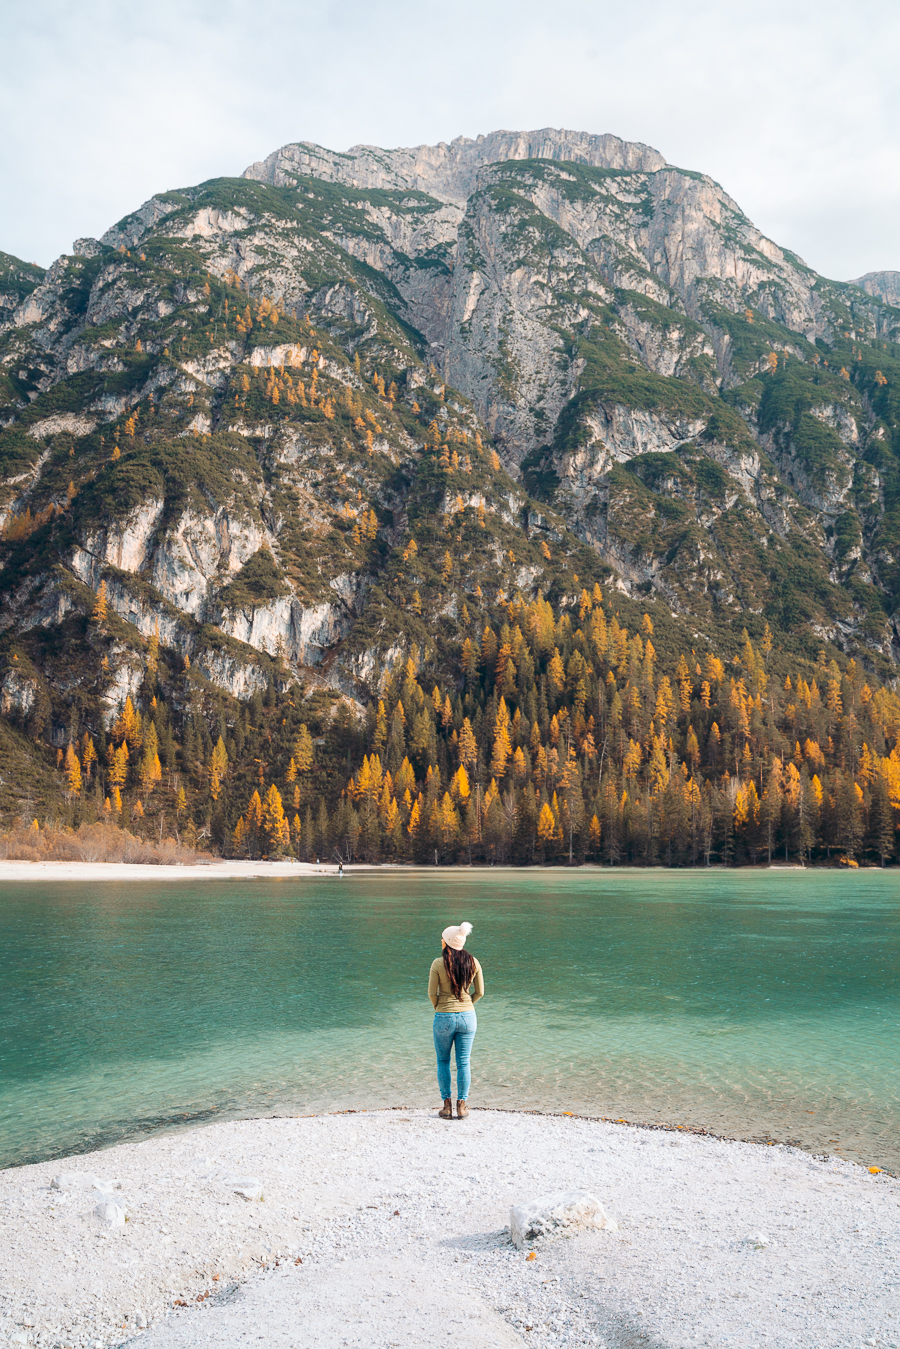
Lago di Braies

Many people book a trip to the Dolomites to see the world-famous Lago di Braies. This lake has become extremely popular due to the glass green lake that usually has a perfect reflection. The best time to photograph this lake is at sunrise when no boats are on the lake and the crowds are low.
You can also rent a boat which is what we did, and we decided to pay for a 30-minute trip. We paid for a full hour upfront, though, and if I returned in half an hour, we could get some of our money back. I felt like 30 minutes was the perfect amount of time for canoeing the lake.
The parking lot is pretty large, but we had to pay for it. I have heard that the parking can get pretty wild in high season mid-day, so plan accordingly and get there early! Since we went in Fall, it was pretty calm and not as busy as I thought it was going to be.
Many people only take in the first view of the lake and then leave, but you can also hike around the lake and get a different perspective of this fantastic beauty.
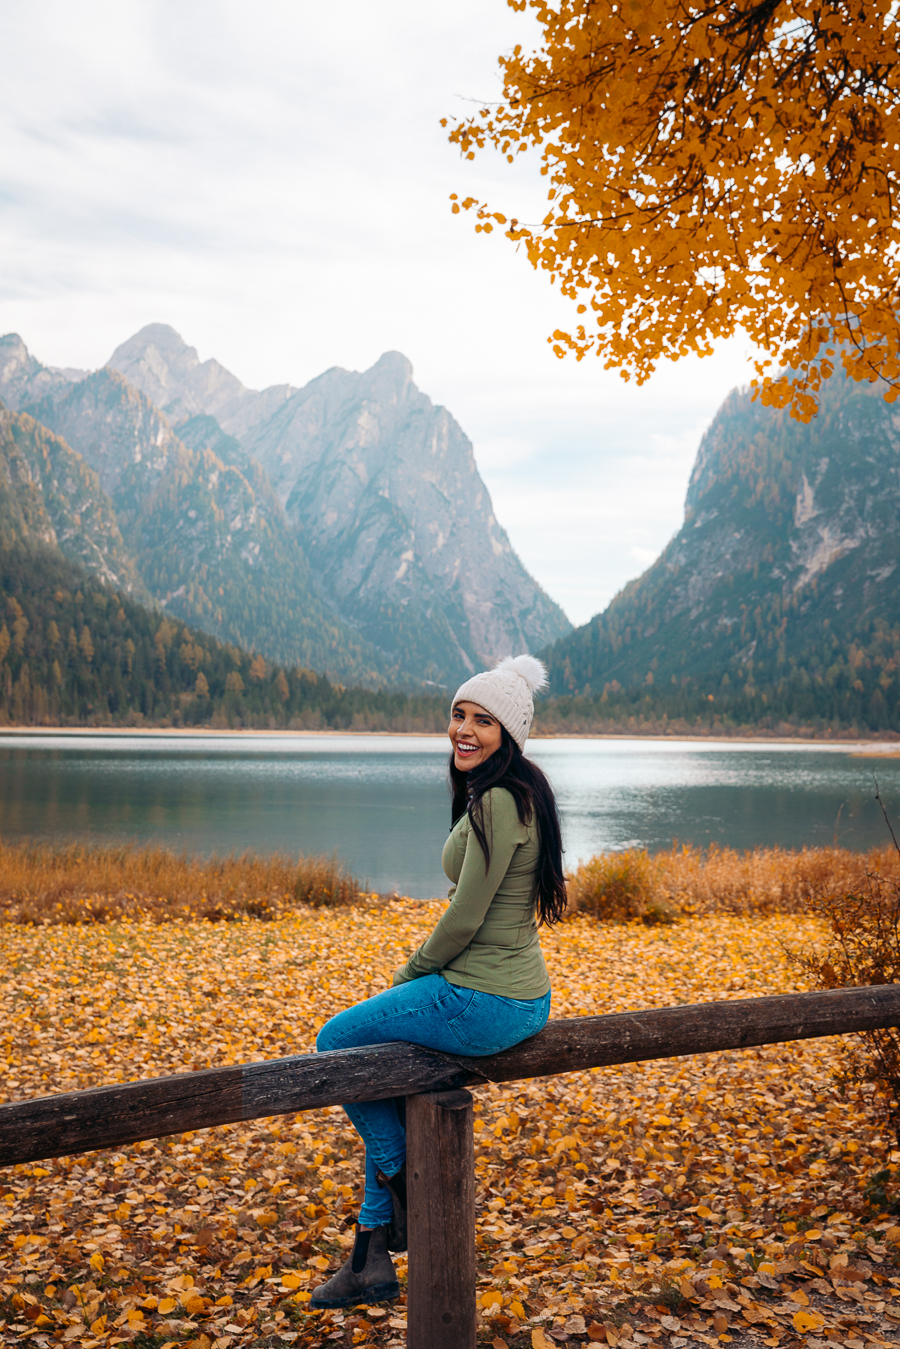
Toblacher See
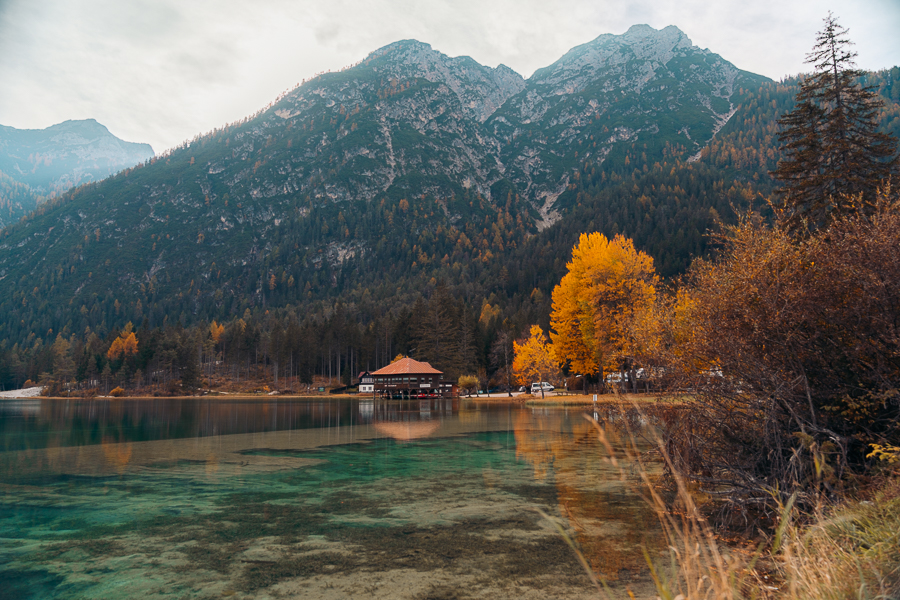
Toblacher See is the second most popular lake on the list for this day. There is plenty of parking, but you have to pay, and there is a restroom. I note this about restrooms because I noticed during this trip how difficult it was to find public bathrooms.
No hiking is required to see the lake, but you can walk around the lake to see different aspects of it. It is lovely in the Fall. If you are hungry, they also have a restaurant with a patio setting (called Seerestaurant), so you can take in these lovely views while you have a beer and food.
Dürrensee
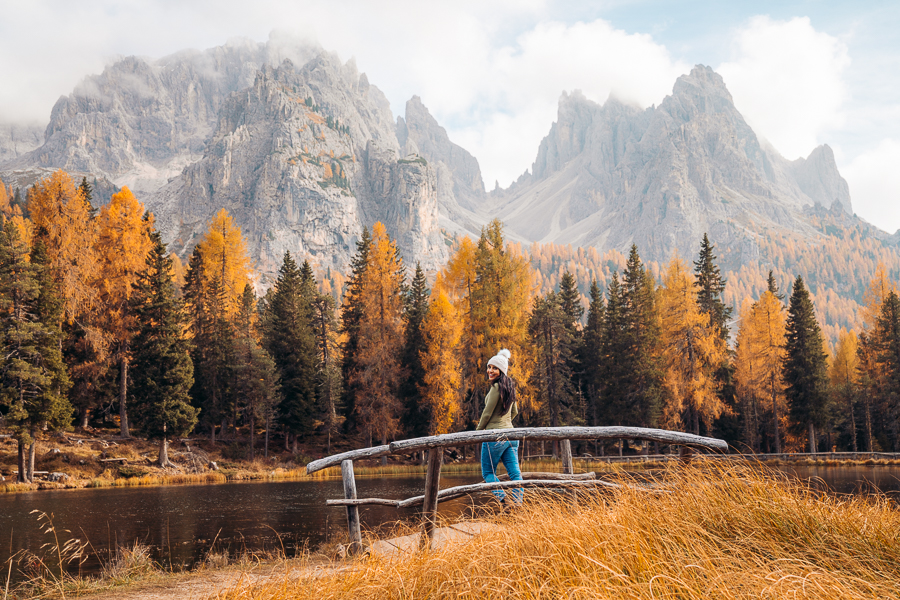
I didn’t even know this cute bridge at the Dürrensee Lake was so famous until I talked to a nice german couple that let us know they had to come back a day later because it was too crowded for sunset the night before.
I went midday, and there was only my husband and me, and the german couple, and we snapped many photos and videos. I then passed by this lake again during sunset, and it was packed! There was no way I would have been able to get any photos of the sunset.
So I am glad I came to this cute lake during midday. The lighting wasn’t the best, but I still feel like my photos and videos still turned out pretty great, and I did not have to fend off the hoard of people.
This lake is easy to get to, and no hiking is required, but you have to pay for parking.
Read More: 25 Things to Do When Visiting Switzerland in the Winter
Lake Antorno
Lake Antorno is another great lake to pull off and stop and take in all these amazing views. This is why I loved day six so much. The lakes are all so fantastic without much effort.
Lake Misurina
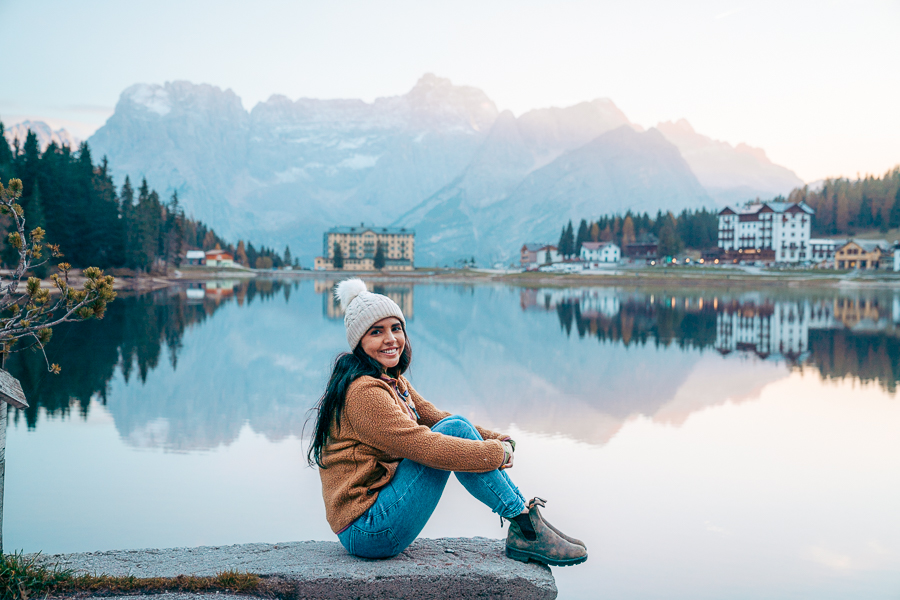
I stopped by Lake Misurina in the afternoon and really enjoyed taking photos, but I returned for sunset and was blown away! The lake looked like glass, and the reflection of the hotel and mountains in the distance was fantastic. We then had some pizza at a restaurant called Locanda Al Lago(the restaurant is right next to where the picture above was taken) to end the day.
Day 7
Lago Sorapis
- Mileage: 7.6 miles
- Elevation Gain: 1,978 feet
- Difficulty: Moderate
- Type of Trail: Out-and-back
- Trail Guide: Link

Lake Sorapis is one of the most breathtaking views of the Dolomites. The hike is long but so worth it. The lake is a milky blue color and can have some excellent reflections of the outstanding mountains behind it. There is also a Refugio there which you can get food from.
I want to note that the lake can be pretty low when there has been a drought for a while. After a long summer, the lake might not be as majestic as you would think.
El Brite de Larieto
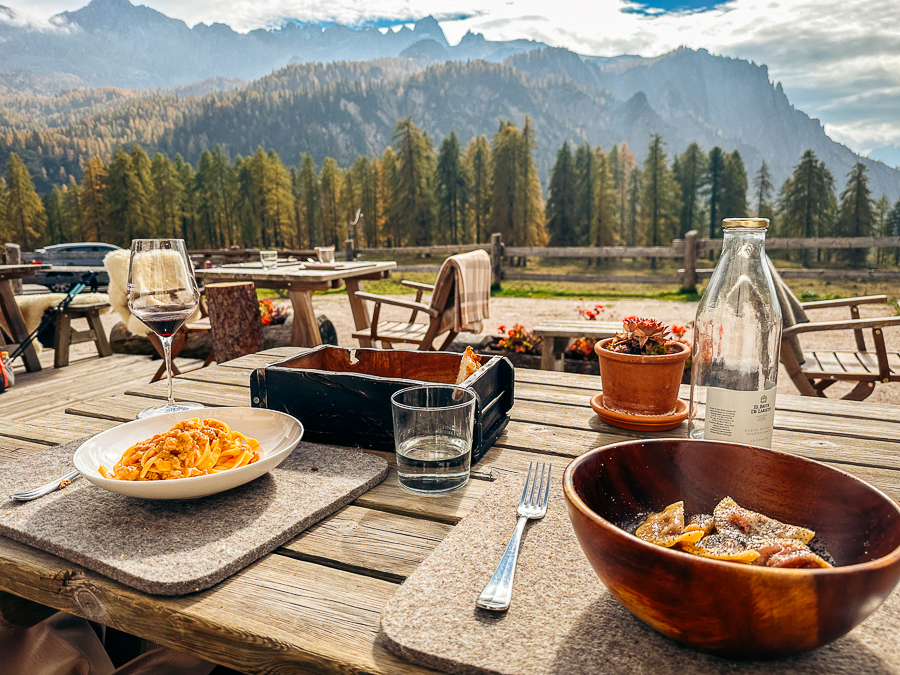
Before or after your hike to Lake Sorapis, you have to stop by El Brite Larieto. The views are incredible on this cute farm. We made sure to get a table outside, and we drank some wine and ate cheese.
This place gets busy! Make a reservation or get there right when they open. We were able to get a table only because we got there pretty early.
How To Get To The Dolomites
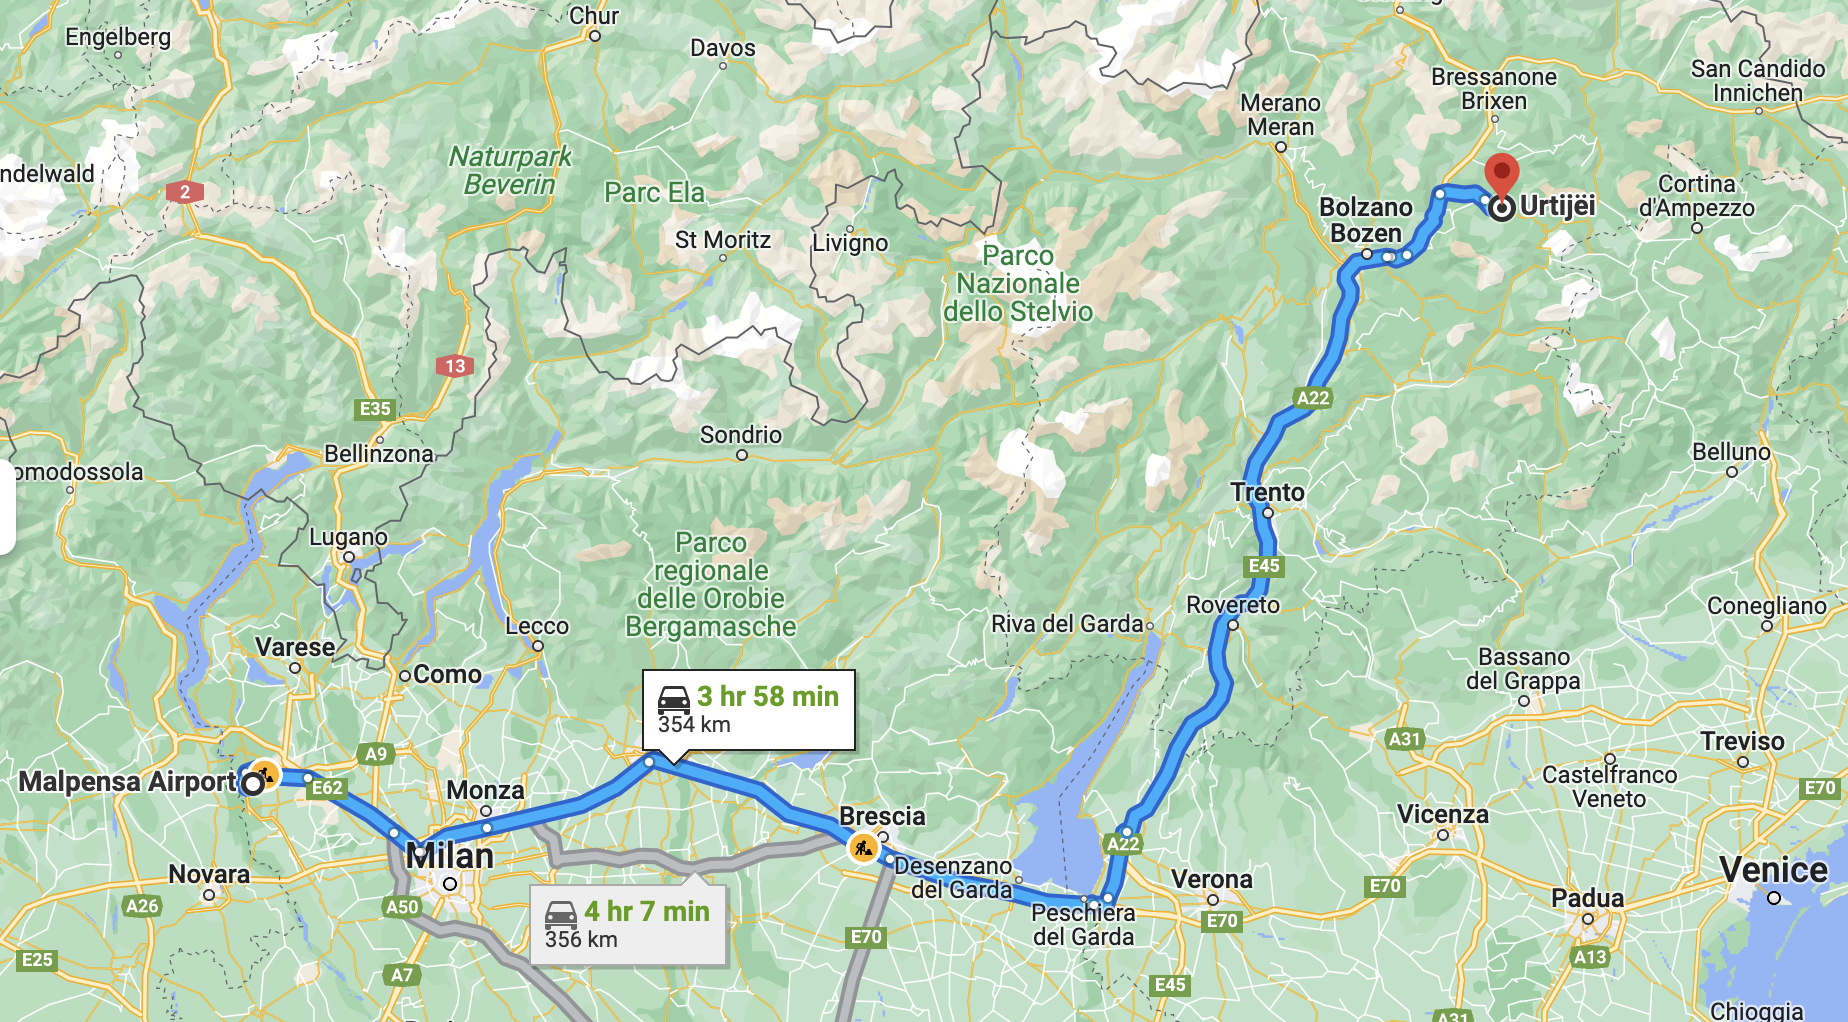
I recommend either flying into Milan or Venice. If you fly into Milan, you can follow the above itinerary. If you fly into Venice, you can start from Cortina d’Ampezzo and then head to Ortisei; I recommend renting a car to explore The Dolomites to its fullest. We ended up renting a car from Milan Airport, where we arrived from.

When To Visit The Dolomites
- Spring: Spring brings in few crowds, which is why it is relatively cheap to visit during the Spring. The weather is cool, but the snow has not fully melted yet, but there is a chance to hike in the lower elevation levels.
- Summer: The weather is fantastic in the Summer, and the hiking and mountain biking is perfect. The main problem is the crowds and the prices.
- Fall: We ended up going in the Fall because flights were cheaper (from Seattle, WA), and I wanted to see the beautiful Fall colors. It did not disappoint! It did not feel crowded, and the temperature was cool but not freezing. The only negative was that many of the restaurants closed, but it wasn’t too hard to find at least one that was open. The exact days that we were in the Dolomites were October 11- October 18.
- Winter: Skiing is lovely during the Winter in the Dolomites. The crowds come back, and all the restaurants and huts open back again. Winter is long and lasts from December through April.
Other Sample Itineraries For The Dolomites
Dolomites Itinerary 1 Day
- Day 1: Seceda, or Lago di Braies
Dolomites Itinerary 2 Days
- Day 1: Seceda, Kirche St. Johann in Ranui, Viewpoint over the church of St. Magdalena
- Day 2: Alpe di Siusi, Karersee, St. Valentin Church
Or
- Day 1: Tre Cimi di Lavaredo, Cadinini di Misurina
- Day 2: Lago di Braies, Toblacher See, Dürrensee, Lake Antorno, Lake Misurina
Dolomites Itinerary 3 Days
- Day 1: Seceda, Kirche St. Johann in Ranui, Viewpoint over the church of St. Magdalena
- Day 2: Alpe di Siusi, Karersee, St. Valentin Church
- Day 3: Vallunga, Gardena Pass
Or
- Day 1: Tre Cimi di Lavaredo, Cadinini di Misurina
- Day 2: Lago di Braies, Toblacher See, Dürrensee, Lake Antorno, Lake Misurina
- Day 3: Lago Sorapis
Dolomites Itinerary 4 Days
- Day 1: Seceda, Kirche St. Johann in Ranui, Viewpoint over the church of St. Magdalena
- Day 2: Alpe di Siusi, Karersee, St. Valentin Church
- Day 3: Vallunga, Gardena Pass
- Day 4: Lago di Braies, Toblacher See, Dürrensee, Lake Antorno, Lake Misurina
Or
- Day 1: Tre Cimi di Lavaredo, Cadinini di Misurina
- Day 2: Lago di Braies, Toblacher See, Dürrensee, Lake Antorno, Lake Misurina
- Day 3: Lago Sorapis
- Day 4: Croda da Lago – Lago Federa
Dolomites Itinerary 5 Days
- Day 1: Seceda, Kirche St. Johann in Ranui, Viewpoint over the church of St. Magdalena
- Day 2: Alpe di Siusi, Karersee, St. Valentin Church
- Day 3: Vallunga, Gardena Pass
- Day 4: Lago di Braies, Toblacher See, Dürrensee, Lake Antorno, Lake Misurina
- Day 5: Tre Cimi di Lavaredo, Cadinini di Misurina
Or
- Day 1: Tre Cimi di Lavaredo, Cadinini di Misurina
- Day 2: Lago di Braies, Toblacher See, Dürrensee, Lake Antorno, Lake Misurina
- Day 3: Lago Sorapis
- Day 4: Croda da Lago – Lago Federa
- Day 5: Seceda, Kirche St. Johann in Ranui, Viewpoint over the church of St. Magdalena
Dolomites Itinerary 6 Days
- Day 1: Seceda, Kirche St. Johann in Ranui, Viewpoint over the church of St. Magdalena
- Day 2: Alpe di Siusi, Karersee, St. Valentin Church
- Day 3: Vallunga, Gardena Pass
- Day 4: Lago di Braies, Toblacher See, Dürrensee, Lake Antorno, Lake Misurina
- Day 5: Tre Cimi di Lavaredo, Cadinini di Misurina
- Day 6: Croda da Lago – Lago Federa or Lago Sorapis (If going in summer Sorapis is better, if going in Fall, Federa is better; Lago Sorapis can have almost no water in Fall)
Or
- Day 1: Tre Cimi di Lavaredo, Cadinini di Misurina
- Day 2: Lago di Braies, Toblacher See, Dürrensee, Lake Antorno, Lake Misurina
- Day 3: Lago Sorapis
- Day 4: Croda da Lago – Lago Federa
- Day 5: Seceda, Kirche St. Johann in Ranui, Viewpoint over the church of St. Magdalena
- Day 6: Alpe di Siusi, Karersee, St. Valentin Church
Tips On Visiting The Dolomites
- Out of everyone I talked to, only one person did not speak English, so it was very easy to order food or ask questions.
- Be ready to pay for parking EVERYWHERE you go. They usually accept credit cards, but I would bring euros just in case.
- Rent a car when you visit the Dolomites.
- Most restaurants accept credit cards.
- Public restrooms were so tricky to find. If you find one just go because it might be a while before you see another.
Final Thoughts On Dolomites Itinerary Summer
Thanks for reading all about my 1 week Dolomites itinerary! Below are some of my other posts on Europe for inspiration:

Claim your FREE Hiking Checklist
Ready to start hiking? Grab my free hiking checklist and never forget anything at home!

Congrats on the baby!! Great post on your Dolomite itinerary. I really appreciate the specific details that you note as well as the photos. We are actually in the process of planning a trip for later this year to Italy and the Dolomites and found this incredibly helpful. Can you be more specific about *when* in the Fall that you went?
Cheers! -torrey in Liberty Lake, WA
Thanks for asking this question I have updated my blog post because of it but the exact days we were in the Dolomites were October 11- October 18.