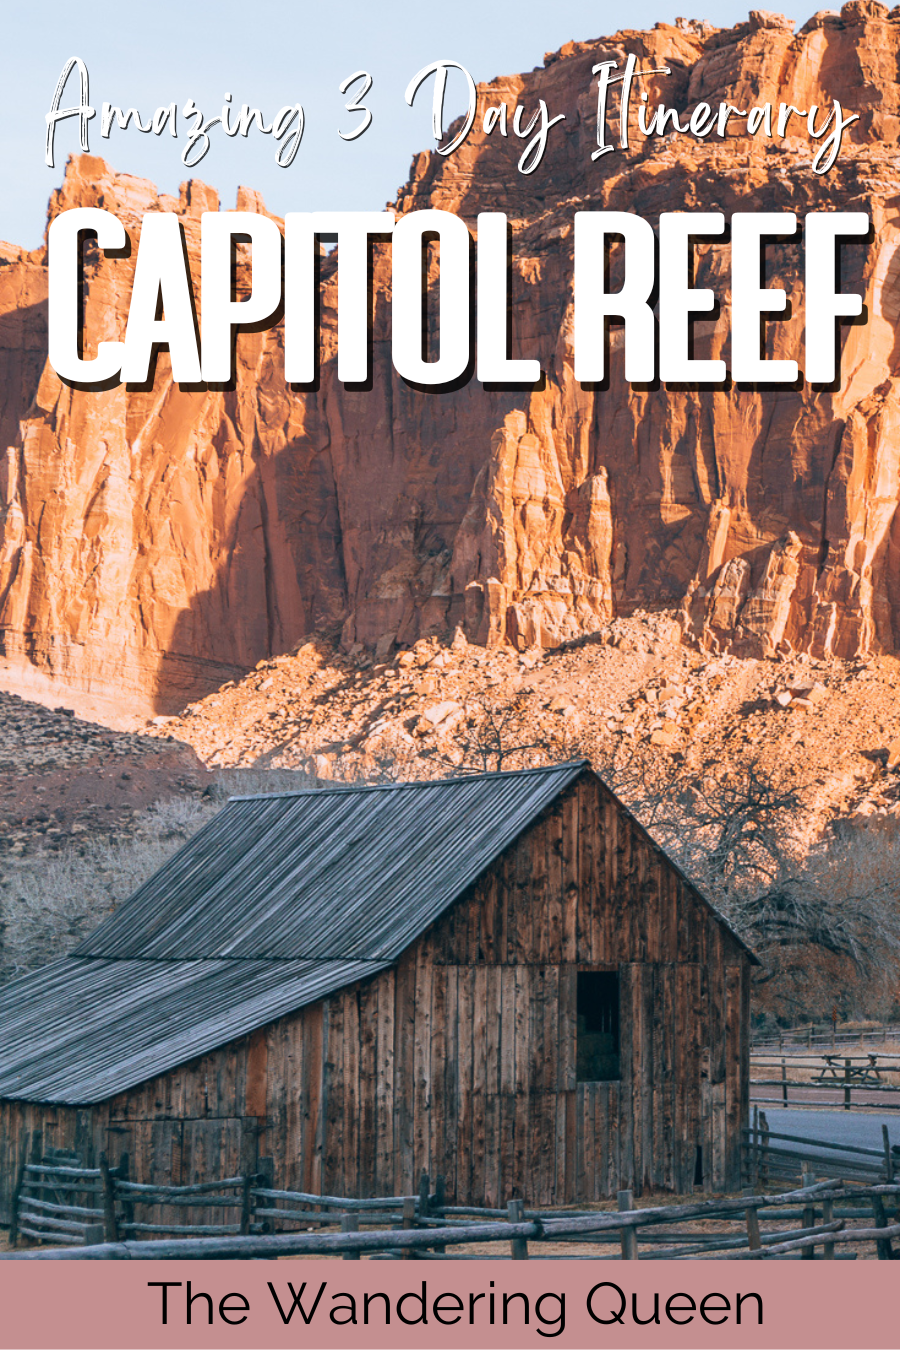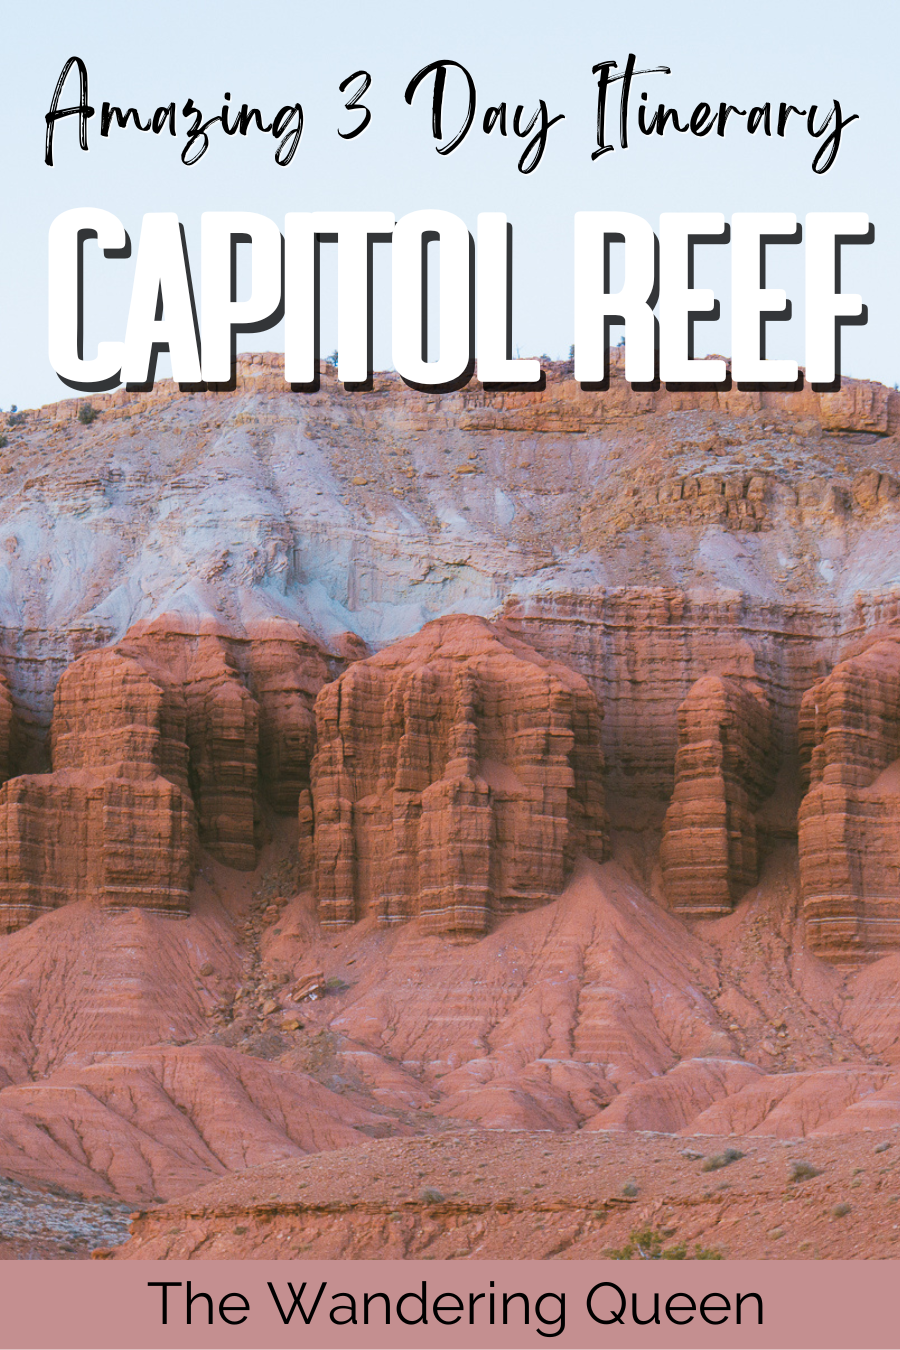
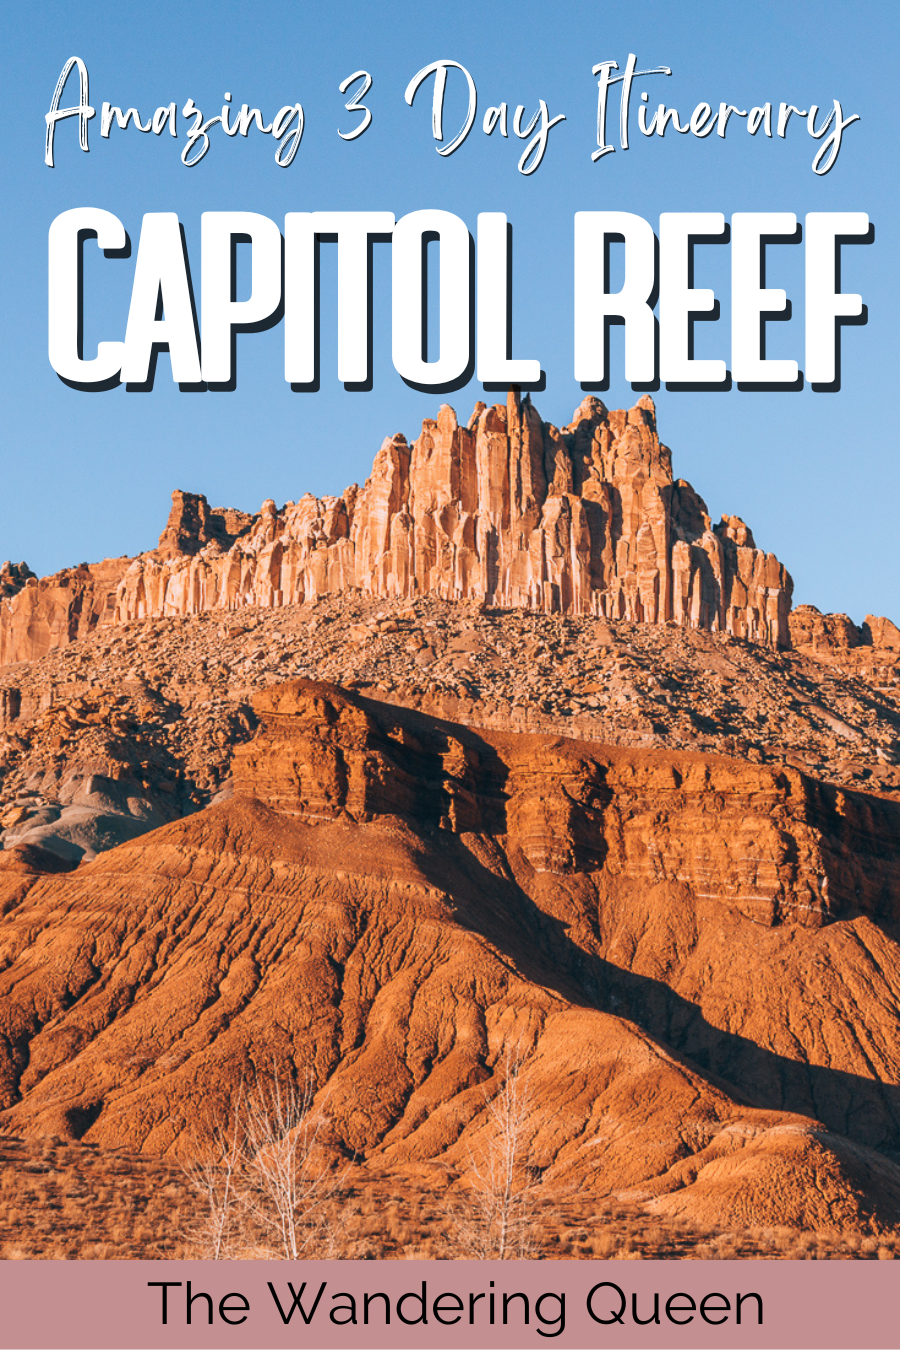
Amazing Capitol Reef National Park Itinerary | 3 Days | Top Hikes & Things to Do
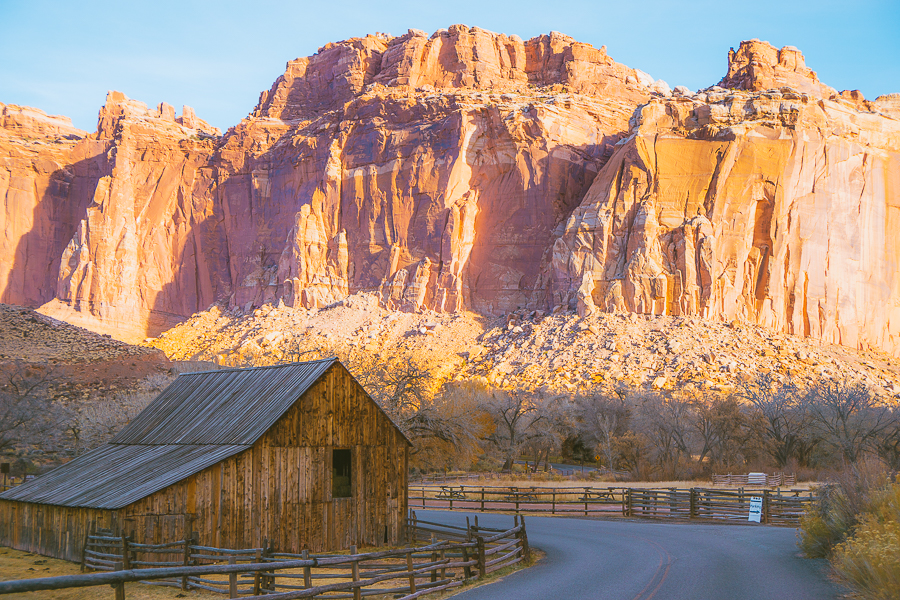
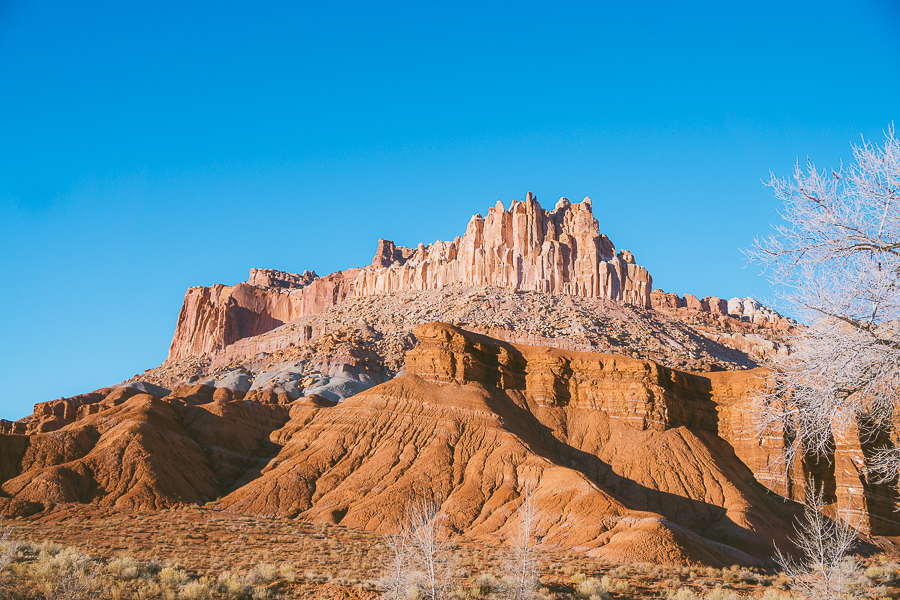
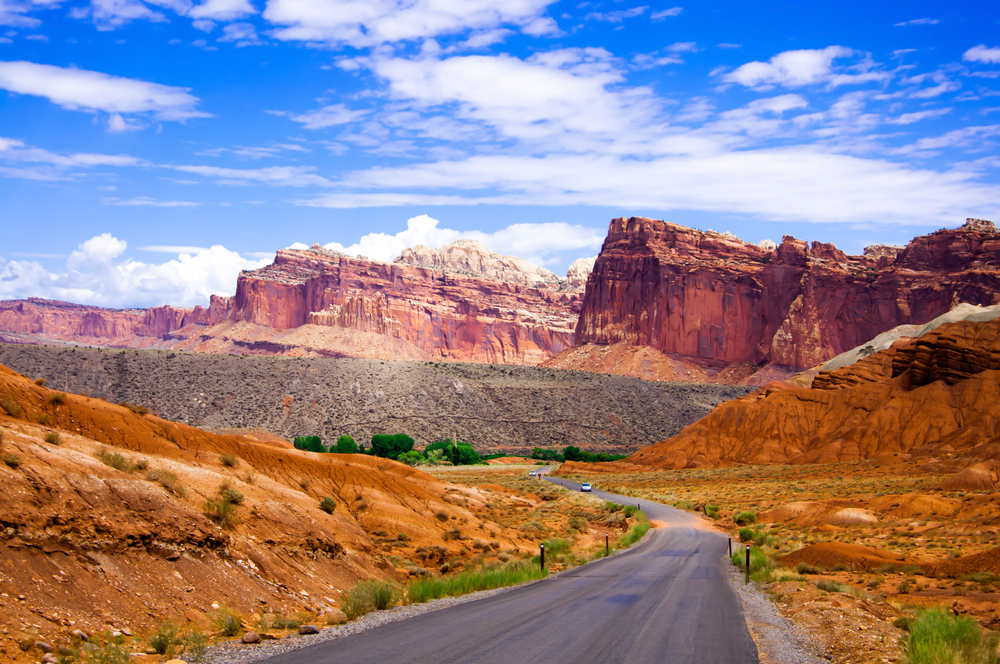
Zion and Bryce Canyon National Park may be all the rave in Utah, but don’t let Capitol Reef slip under your radar. Known for its wrinkle-like crust at Waterpocket Fold caused by layers of golden Sandstone, this is a park emanating natural beauty.
From stunning slot canyons to picturesque sunset spots, creating the ideal Capitol Reef National Park itinerary is no easy feat. So, why not save some time and follow this in-depth itinerary with everything you need to know?
Who knows, maybe once you’ve seen all the best things to do in Capitol Reef National Park, you’ll name this idyllic location as your favorite place on earth.
Without further ado, it’s time to get stuck into the ultimate Capitol Reef itinerary.
Disclosure: This post contains affiliate links. If you click one of them, I may receive a small commission (for which I am very grateful for) at no extra cost to you.
Capitol Reef National Park
Related Posts
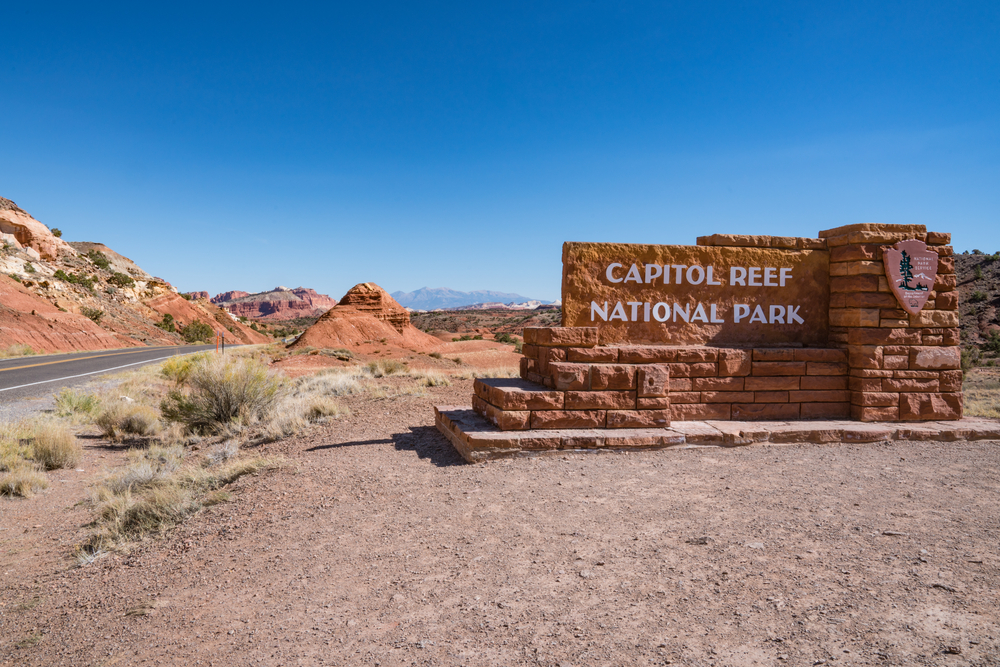
How to Get to the Capitol Reef National Park Entrance
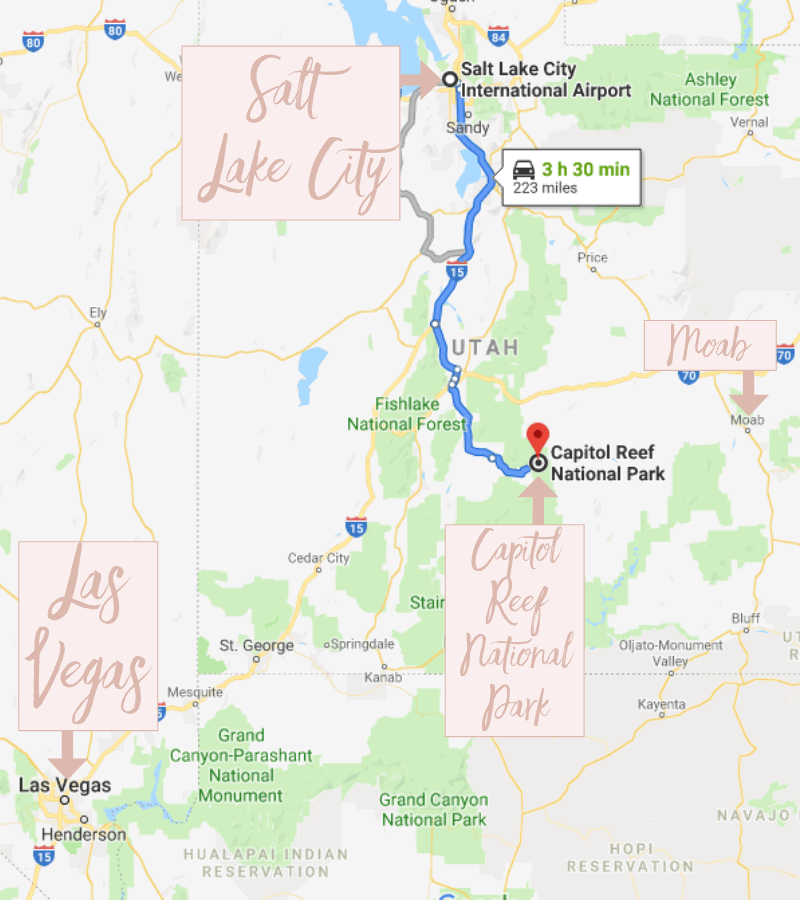
If you’re an international traveler looking to visit this unforgettable park, Salt Lake City International Airport (SLC) is the closest airport. You can then rent a car from there, and it’s a three-and-a-half-hour drive (218 miles) along the I-15 southbound and UT-24 eastbound.
If you’re completing a road trip through Utah’s national parks, then the route will alter slightly.
Bryce Canyon to Capitol Reef National Park is just over two hours (112 miles) via Johns Valley Road and UT-24 eastbound. Traveling from Zion National Park is a little bit longer — roughly three hours (176 miles) — with the majority of the trip along the I-15 northbound.
Despite being adjacent to one another, a Canyonlands National Park to Capitol Reef National Park trip will take around two and a half hours (145 miles) along UT-24 westbound. Lastly, an Arches to Capitol Reef drive will take you around two hours (133 miles), also via UT-24 westbound.

Note: There is a shuttle service, however, it is very restricting in terms of where it can take you. For this reason, it’s highly recommended you have a car.
Capitol Reef National Park Fees
You will need to acquire a Capitol Reef Pass in order to enter the park. While the standard Capitol Reef National Park entrance fee is $10, this does increase depending on the vehicle you are using. A personal vehicle pass is $20.
However, if you’re planning on visiting more than one of the parks in Utah, consider getting the America the Beautiful Pass. You’ll end up saving far more money in the long run.
Top Tip: You will need to get a canyoneering and bouldering permit if you plan on engaging in these activities. You can get these free permits at the Capitol Reef Visitor Center.
Map Of Capitol Reef National Park
I’ve embedded a Google map below with this itinerary! You can download and save it for offline use, but I recommend printing it out, too, so you’re covered if you find yourself without service on the trail.
Best Time to Visit Capitol Reef National Park
There is definitely a best time to visit Capitol Reef, and that’s in spring or fall (March to June or September to October). For starters, this is when the weather is at its best, as you’ll avoid the icy winter and sweltering summer temperatures.
Expect the temperatures to average between 55°F and 79°F during these months, which is perfect for hiking. You’ll also miss the dangerous flash flooding season, which usually occurs between July and September.
It’s still recommended to keep an eye on the weather conditions, no matter the time of year to visit, as flash floods can occur all year round.
What To Pack For Capitol Reef National Park
- Sunscreen: This is needed all year long! >Buy some sunscreen, so you don’t accidentally burn!
- Hiking Boots/Shoes: Hiking shoes or boots are needed for Capitol Reef. Don’t hurt your feet hiking in regular tennis shoes. >Buy my Hiking Shoes
- Hiking socks: Having the correct socks helps you prevent getting blisters. Smart Wool is probably my favorite brand out there. I also love how they now have pink socks too 🙂 >Buy Hiking Socks
- Refillable water bottle: I always bring a Hydroflask on all my adventures. They are on the heavier side, but I know for a fact they will not break. I have had a few cheap water bottles break on me before. >Check Prices Now
- Water: Hiking, for sure, requires water.
- Sunglasses: I usually wear the most fashionable sunglasses when I hike. 🙂 >Check Out These Sunglasses
- Snacks: The best snacks are jerky, nuts, energy bars for hiking. >Clif Bars are great for hiking so click HERE.
- Trekking Poles: This is an optional product, but they help with the knees. The poles I have listed are known to be one of the best in the market. >Buy My Trekking Poles Here
- Camera: I have linked the camera I used to take pictures of Capitol Reef. The Sony A6000 is an excellent camera for people that want to start improving at travel photography. >Buy Sony Camera Here
- First Aid Kit: This is one of the first things I bought when I first started backpacking and camping. It is super portable. >Buy This Awesome First Aid Kit Here
- Day Pack: The REI bag I have linked, we have had for seven years now, and it is still going strong! >Buy This Great Quality Backpack
- Good hiking pants or shorts: These are probably the best hiking pants that I have found. If you are hiking in the summer bring some shorts. It will get hot! >Buy my hiking pants here
- Breathable sweat-wicking shirts
- Sports Bra: For women. >Check Out This Awesome Sports Bra
- Jacket: This is needed in the Fall and winter. Also, it might be chilly at night. >Buy My Favorite Jacket
- Tripod: This is an optional item, but it is excellent for getting the perfect sunset pictures. >Check out this tripod
- Headlamp: Just in case you get stuck hiking at night! >Buy A Headlamp Now
- National Park Pass: I highly recommend getting a year-long America The Beautiful Pass. >>>Get It Here
- Map: I love the National Geographic Maps! They are the best! >Buy One Here

Claim your FREE Hiking Checklist
Ready to start hiking? Grab my free hiking checklist and never forget anything at home!
Where to Stay When Visiting Capitol Reef National Park
Like many national parks in the US, Capitol Reef doesn’t offer any accommodation besides rustic camping. As such, knowing where to stay in Capitol Reef and its surrounding areas is essential.
Torrey is the closest and most convenient place to stay when visiting Capitol Reef.
Budget | Quality Inn Richfield I-70
If you don’t mind a slightly longer drive from the park, then opt for Quality Inn, a fantastic budget option. The inn is around an hour’s drive from the park entrance, but its amenities more than make up for the travel time.
Each room is extremely spacious, offering you a calming space to relax after a long day of hiking. There’s also an indoor pool and hot tub to soak in, while the sun terrace provides lovely views of Bull Claim Hill.
Add its close location to popular restaurants like La Gringa and Main Street Perk into the mix, and you’ve got a stunning place to stay. >>>Check Availability
Mid-Range | Red Sands Hotel and Spa
For the full package of being close to the park entrance and staying in affordable lodging, the Red Sands Hotel is a splendid choice. Its farm-style cross-shabby chic interior will set you in the mood for truly relaxing afternoons.
The indoor pool offers majestic mountain views, while the on-site Rock Garden Eatery and Bar offers delectable meals both day and night. You can even make the most of your time here at their spa, with yoga classes providing the full body stretch you need ahead of a busy day. >>>Check Availability
Luxury | Capitol Reef Resort
After spending your day tackling the best hikes in Capitol Reef, you may just want to rest easy in a luxury resort. This is where the Capitol Reef Resort comes in, as it’ll make your stay near the park a truly memorable one.
With a range of lodging options, from classy suits to quirky tipis, you’re really spoilt for choice here. The Pioneer Kitchen serves up some classic American cuisine, while the wellness center offers all the amenities you need to defrag after a long day.
When you add the lodging’s bespoke mountain views from its outdoor pool and hot tub into the mix, you know you’re in for a real treat. >>>Check Availability
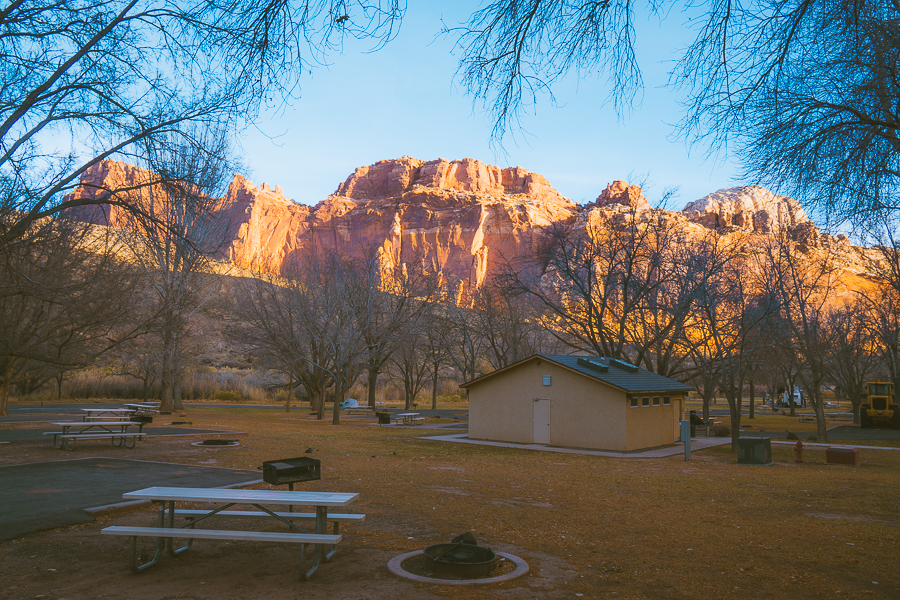
Camping | Fruita Campground
If you’re looking to camp at the heart of Capitol Reef National Park, look no further than Fruita Campground. This idyllic spot has 69 campsites on offer, which fills up fairly quickly in the peak tourist months, so it’s essential you book early.
Not only is it within walking distance from Gifford Homestead, but there’s also a vast range of amenities for you to enjoy. From picnic tables and grills to flush toilets and electric units, you’re sure to find a campsite that suits your every need. >>>Check Availability
Top Tip: A great alternative is the Cedar Mesa Campground along S Norton Road.
Read More: Where to Stay Near Capitol Reef National Park | 12 Best Hotels
How Long to Spend in Capitol Reef National Park

Now, to answer one of the most important questions: How many days in Capitol Reef National Park is enough? The short answer is three days.
While some would argue that you can see Capitol Reef National Park in one day, this just isn’t enough time to enjoy the park to its fullest. You’ll be rushed and end up missing many of the top hikes in the area.
If you are on a tight schedule, though, you can always join a day tour of Capitol Reef. Most of them are guided driving trips, like this tour from Torrey.
With all this in mind, it’s still better to try to mark out three days. After all, the park is bigger than you might expect, and some of the roads aren’t in great shape, so your time in the car may be longer than anticipated.
Tours Of Capitol Reef National Park
3-Day Capitol Reef Itinerary | Best Things to Do and Hikes
Now, it’s time to get stuck into the fun part of this itinerary. With otherworldly landscapes and epic vantage points, this itinerary is packed with only the best Capitol Reef hikes.
While it’s very easy to just focus on the hiking trails, there’s plenty more to enjoy in the park. From a picnic lunch at Gifford Homestead to a scenic drive of Capitol Reef, this itinerary has it all and more.
So let’s jump right in, shall we?
Day One of Your Capitol Reef Itinerary
To kickstart your Capitol Reef reef trip, day one is all about the history of the area. From ancient petroglyphs to a century-old homestead, you’ll get to discover the diverse history of this bountiful landscape.
PS: If you plan on doing a backcountry trip, be sure to visit the National Park Service at the visitor’s center to get your free backcountry permit. You can only get these permits at the visitor center.
Walk Along the Capitol Reef Petroglyph Panel Trail
- Elevation Gain: 49 feet
- Mileage: 0.31 miles (out-and-back)
- Difficulty: Easy
- Trail Guide: Link
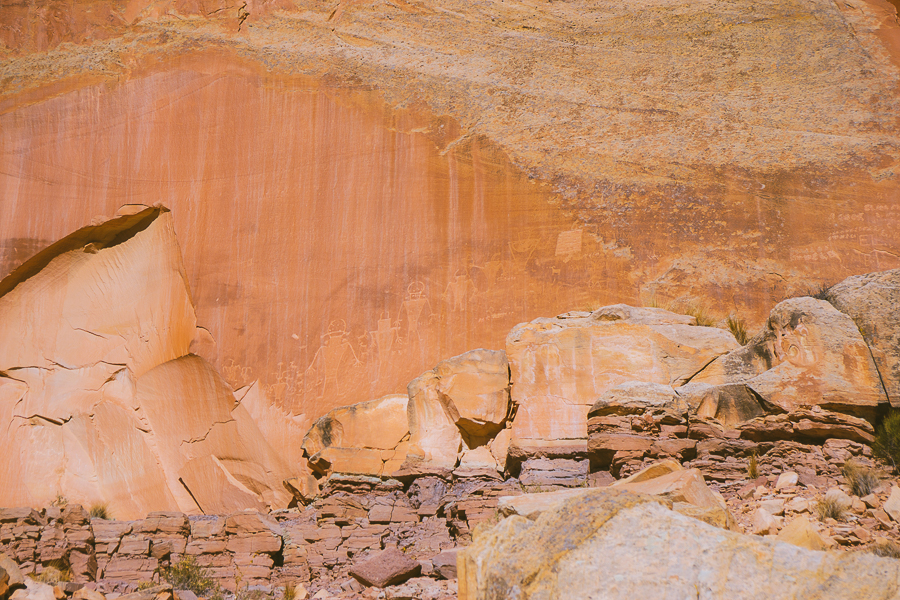
Get the show on the road with one of the shortest yet most interesting hikes in Capitol Reef National Park. Before embarking on the trek itself, it’s important to know there are no designated parking spots near the trail. The closest parking is at the visitor center, which is 1.1 miles away.
After making your way from the parking to the trailhead, this is where the real journey begins. It may be an easy and short hike, but it does have an average gradient of 8%. Despite the steep incline, it’s a quick walk along the well-maintained boardwalk up to the viewing deck.
From here, a series of petroglyphs turn the cliff face into a stunning array of stories. These rock carvings and paintings tell stories of the lives of the Fremont people, who lived in this area between 600 and 1,300 AD. It’s a stunning depiction of human history and quite possibly the perfect way to start your Capitol Reef adventure.
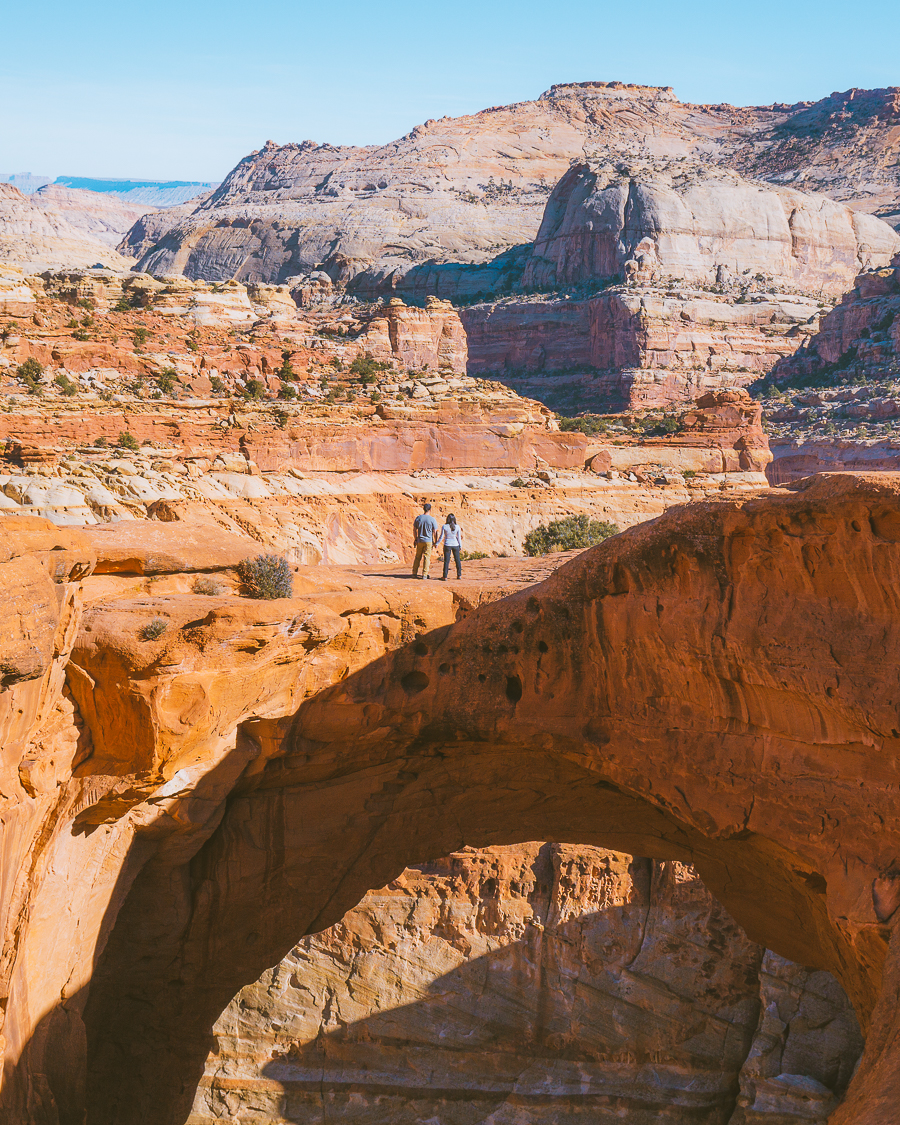
Discover the Stunning Hickman Bridge
- Elevation Gain: 417 feet
- Mileage: 1.7 miles (out-and-back)
- Difficulty: Easy
- Trail Guide: Link
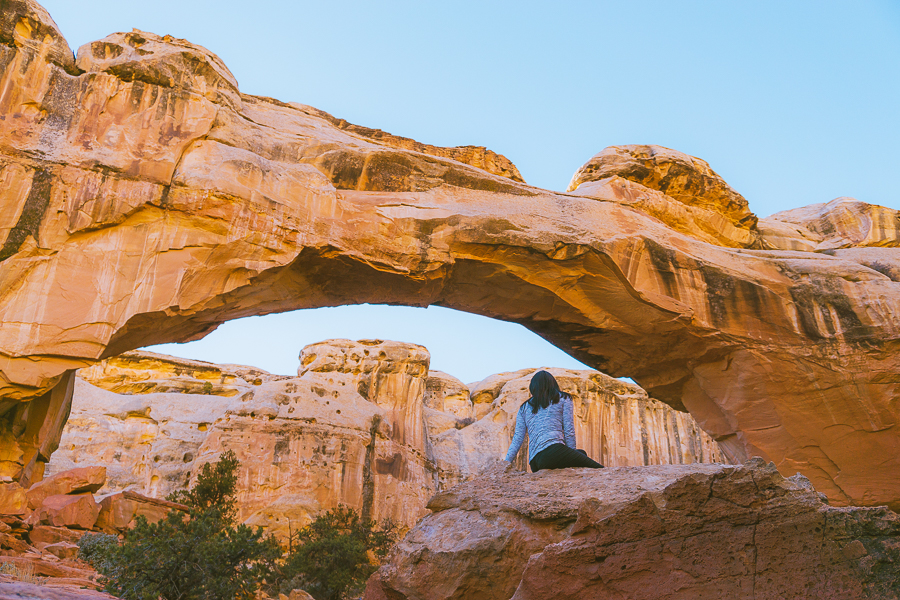
No more than a two-minute drive up the road from Petroglyph Panel, the Hickman Bridge trail awaits. Towering 300 feet above a Fremont River tributary, the Hickman Bridge is one of the most popular landmarks in the park.
The natural arch may be the showstopper, but there’s plenty to see throughout this relatively gentle hike. As you meander past the Fremont River, there’s a magical view of the Capitol Dome just after the first switch back.
As you continue along the path, keep an eye out for an ancient granary used by the Fremont people on the cliff to your north. You’ll then pass a small natural bridge (known as the Nels Johnson Natural Bridge). Before spotting Hickman Bridge, you’ll trek past a section of cliff face known as the Solution Cavities, which is peppered by small erosive holes.
The trail then wraps around Hickman Bridge, with each section offering magical photo opportunities. There’s also an area where you can see an example of the Kayenta Formation (layers of hard and soft rock), which helped create this massive natural bridge.
Tackle the Grand Wash Trail
- Elevation Gain: 341 feet
- Mileage: 5.0-mile (out-and-back)
- Difficulty: Easy
- Trail Guide: Link
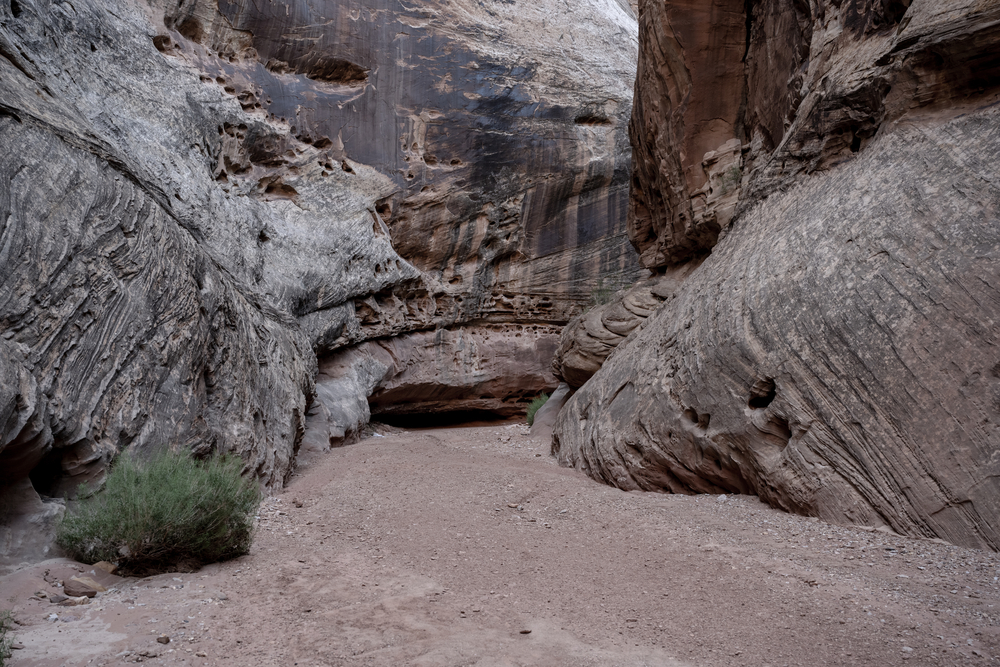
When people think of Utah’s slot canyons, the Antelope or the Spooky and Peekaboo canyons come to mind. That said, Capitol Reef has its own blockbuster that’s more than worth a visit.
Also known as The Narrows, you can enjoy a 5-mile out-and-back trek through one of the Waterpocket Folds that makes the Capitol Reefs landscape so iconic. Although it’s a relatively easy trek, there is some elevation gain involved as you wind your way through the crevice and up toward the southwest trailhead.
What makes this slot canyon worth visiting, though? For starters, you’ll be walking through the bottom of a 300-foot-high canyon. The cliff face also shows the power of water, as the stained walls show just how high the water levels can get.
Note: As this is a Waterpocket Fold, it’s essential to keep track of the weather. This slot canyon is notorious for flash floods, so it’s important to stay aware of this potential danger.
Enjoy the Picturesque Cassidy Arch Trail
- Elevation Gain: 666 feet
- Mileage: 3.1 miles (out-and-back)
- Difficulty: Moderate
- Trail Guide: Link
Once you reach the end of the Grand Wash Trail, you’ll get the opportunity to extend your hike by joining the Cassidy Arch Trail. The two treks bleed into one another, making it a convenient way to experience both hikes.
There will be some scrambling during this moderately challenging hike, so having some hiking poles can definitely come in handy. It can also get fairly hot during this trek as there are several exposed sections, so be sure to wear your sunscreen.
Throughout this winding trail, you’ll be able to enjoy sweeping views of the Grand Wash Road, one of the 4×4 routes in the park. However, the real treat is at the end of the hike, where you can admire Cassidy Arch from the viewpoint.
You’ll have the opportunity to go atop the arch, where more sweeping vistas of the Utah desert await.

Visit Gifford Homestead
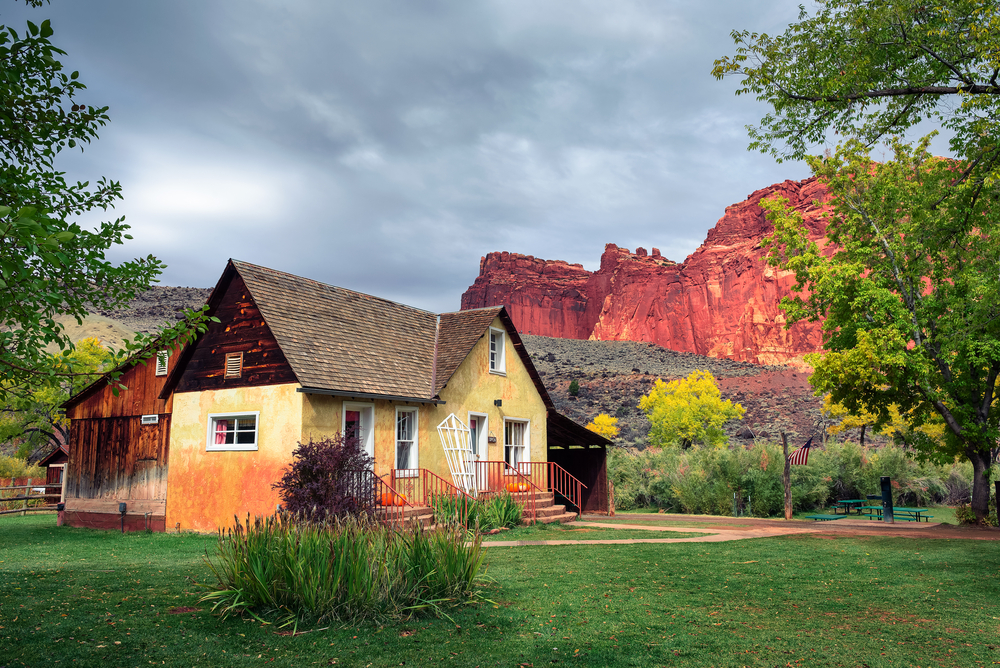
To end the day, visit the historic Gifford Homestead, a building that has stood tall since 1908. While here, you simply have to try their assortment of homemade pies using organic, natural ingredients straight from the farm.
If you’re visiting in summer, you can do some fruit picking while here. There are signs stating which fruits in the orchard are ready for picking based on the season. If you want to take the fruit home, you’ll just need to visit the self-pay station, where you’ll weigh and pay for the produce.
If you’re not visiting in summer, you can still reap the rewards of this traditional orchard. Gifford Homestead sells fruit preserves made from the farm’s produce.
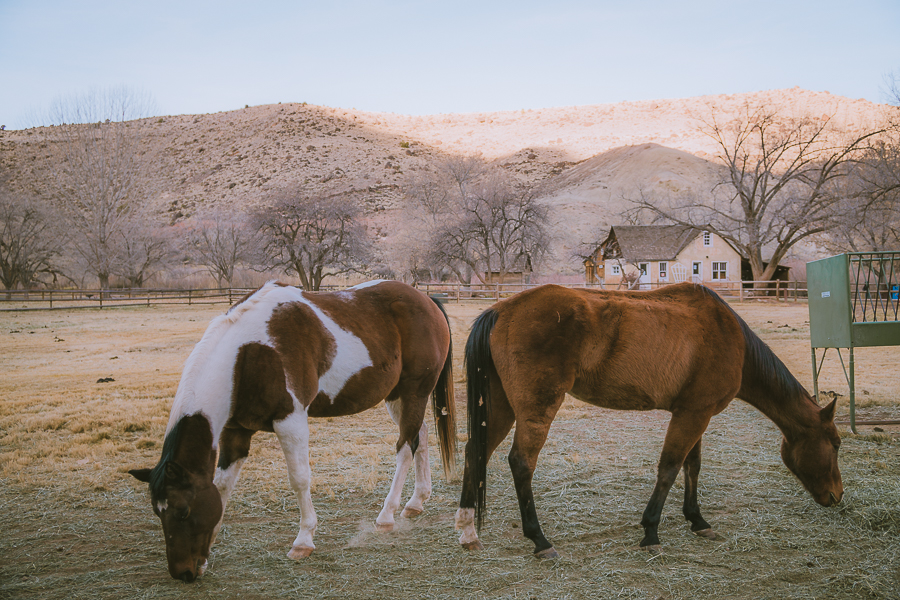
To end an already exceptional day, don’t forget to venture along the farm fields, where you’ll be able to admire horses roaming freely. If you get there just at the right time, seeing these majestic animals gallop at sunset is an unmissable opportunity.
Top Tip: Although Gifford Homestead is fairly easy to find, some of the other areas of the park are less so. As such, it may be worthwhile getting a guided audio tour to help you navigate Capitol Reef.
Day Two of Your Capitol Reef Itinerary
Day two is all about exploring the Cathedral Valley and its unmatched range of trails. From bentonite hills and the gypsum sinkhole to volcanic dikes and an orange-painted desert, you’ll find it all and then some in Cathedral Valley.
That said, it’s essential you know the unpaved roads in this region of the park aren’t great. You will need a high-clearance vehicle to access most of the trails in the area.
Top Tip: If you don’t have a high-clearance vehicle and don’t want to risk damaging your car, you can still enjoy the area on this Cathedral Valley tour.
Start With a Gentle Hike on Cathedrals Trail
- Elevation Gain: 324 feet
- Mileage: 2.5 miles (out-and-back)
- Difficulty: Easy
- Trail Guide: Link
You can’t help but feel the awe-inspiring atmosphere of the towering monoliths during this hour-long trek. It’s a relatively short out-and-back trail that clings to the side of the Needle Mountain and Cathedral Mountain.
This is a region of the park where the Waterpocket Fold makes way for a desert landscape packed with natural landmarks. The large monoliths tower above the orange, ocean-like desert as if they are shark fins wading through the seemingly barren abyss.
Okay, that may be a bit mellow-dramatic, but you’ll only truly understand their eclectic beauty once you see them for yourself. Throughout the first half of the trek, you can expect a gradual incline, which can work your calves a fair bit.
Since the trail is in the park’s northern Cathedral District, it’s perfect for those looking to escape the crowds.
Top Tip: If you need help getting into shape for hiking specifically, take a look at this fitness planner.
Hike the Jailhouse Rock and Temple Rock Route
- Elevation Gain: 347 feet
- Mileage: 4.9 miles (out-and-back)
- Difficulty: Moderate
- Trail Guide: Link
For a moderate hike through the dips and curves of the once-called Wayne Wonderland, take on this 1-hour-and-45-minute trek. This is a trail with several ups and downs as the path starts at the Lower South Desert Overlook and heads all the way down to a viewpoint of Deep Creek.
It’s a steep descent from the saddle onto what is a relatively flat and thin trail. Roughly 1.2 miles into the trail, you’ll be side-by-side with the Jailhouse Rock. This is a stunning monolith reminiscent of jail bars thanks to its deep vertical divots.
As you continue along the path, you’ll also get a glimpse of some hoodoos, which aren’t all that common in the park. The trail ends with an incredible view of a volcanic dike.
Heading back is slightly more difficult, as you’ll have a steep climb right at the end in order to reach the trailhead. Just keep in mind this is another trail with little to no cover, so sunscreen is essential.
Download my free Outdoor Photography Guide
Enjoy the Views at the Lower Cathedral Valley Overlook
- Elevation Gain: 150 feet
- Mileage: 1.7 miles (out-and-back)
- Difficulty: Easy
- Trail Guide: Link
While you can go right to the base of the Temple of the Sun and Moon monoliths, this trail offers a higher vantage point. As a lesser-visited trail, there won’t be loads of people during the hike.
Starting at Hartnet Road, it’s a fairly direct and flat trek to the base of the first rim. It’s then a short but steep trek up to the top of the saddle. There is another saddle that you’ll need to reach from there, where epic views await.
From there, you’ll be able to admire Cathedral Valley, the Temple of the Moon, and the Temple of the Sun. These massive monoliths aren’t something you’ll see every day, so be sure to soak up the stunning scenery.
Just be sure to wear lots of sunscreen, as there’s little to no cover during this hike.
Top Tip: If you’ve got eagle eyes, you may be able to catch a glimpse of Glass Mountain just beyond the Temple of the Sun.
Admire the Sunset at the Upper Cathedral Valley Overlook
- Elevation Gain: 22 feet
- Mileage: 0.2 miles (out-and-back)
- Difficulty: Easy
- Trail Guide: Link
End your day of adventure with vivid sunset views at the Upper Cathedral Valley Rim Overlook. From the parking spot, it’s a very short five-minute walk to the viewing spot.
As this vista point is in the harder-to-reach Cathedral Valley, there aren’t many people to come out here for sunset. As such, finding the perfect spot to prop up the camera for your sunset photo session won’t be difficult.
Majestic views of The Cathedrals spring to life as the sky becomes a tapestry of blues and pinks. When you pair that with the oranges of the desert and the deep purples of the shadows cast by the monoliths, it truly creates a magical site.
Note: If you decide to admire the sunset here, just be aware that it’s a two-hour drive (27 miles) back to UT-24 due to the road conditions.
Day Three of Your Capitol Reef Itinerary
After an extensive day of hiking, day three is all about admiring Capitol Reef with some scenic drives. That doesn’t mean there aren’t some idyllic hikes to try out throughout the drive.
After all, you need to stretch your legs every now and then, don’t you?
Have a Fresh Start on the Cohab Canyon Trail
- Elevation Gain: 793 feet
- Mileage: 3 miles (out-and-back)
- Difficulty: Moderate
- Trail Guide: Link
There’s no better way to start day three than on this hour-and-40-minute-long hike across the road from Gifford Homestead. The trek begins with a fairly steep climb up to the same ridge where you’ll find the Fruita Overlooks.
You can admire the sweeping views of Cohab Canyon and Boulder Mountain before venturing into the canyon itself. When walking through the canyon, you’ll see The Wives, a section of small slot canyons that make for a great detour.
The trail eventually leads to UT-24, which leads onto the Frying Pan Trail. However, it would be best to turn back at this point, as the Frying Pan Trail is an extra 8.5 miles.
Grab Your Free Car Camping Checklist! 🚗🌲
Ready to elevate your car camping game? Snag our essential checklist to ensure you’ve got everything you need for a stress-free, fun-filled adventure! Perfect for beginners and seasoned campers alike. Download now and hit the road prepared! 🌟🎒
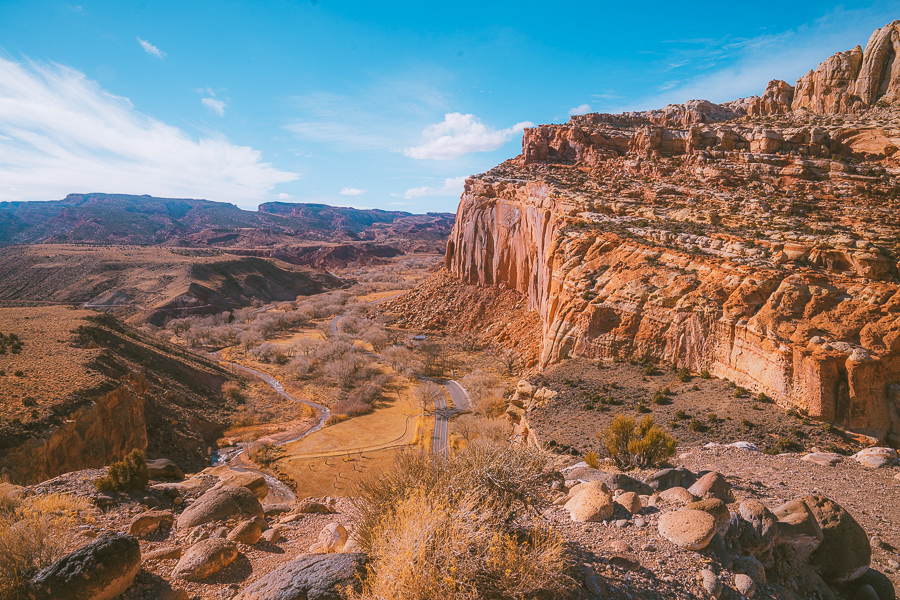
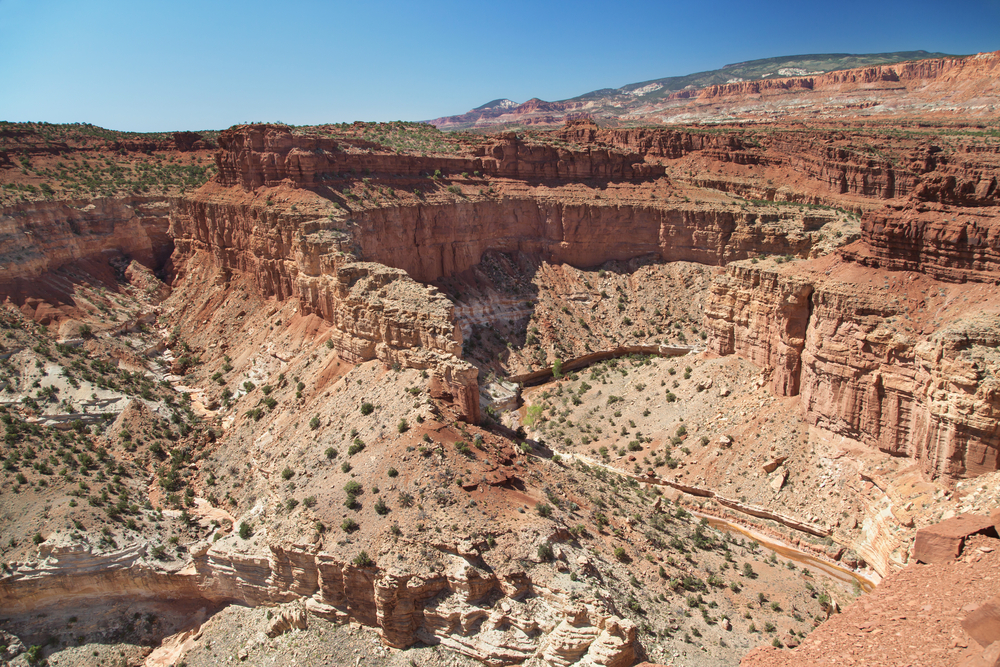
Capitol Reef Scenic Drive
Starting at the visitor center, it’s time to enjoy the incredibly beautiful 7.9-mile Capitol Reef National Park Scenic Drive. There are a few stops worth making along the way to snap some stunning photos.
Keep an eye out for the Chinle Formation, a 700-foot-thick collection of sedimentary rock with a large portion of it being petrified wood. Admire Cassidy Arch from the road and spot the Ferns Nipple sticking out from the landscape.
Don’t forget to stop at the Slickrock Divide for some scenic photos of solution pockets caused by the erosion of Wingate Sandstone. And, since you’ve already been to the Petroglyph Panel, see if you can spot any more petroglyphs during the drive.
Capitol Gorge Road
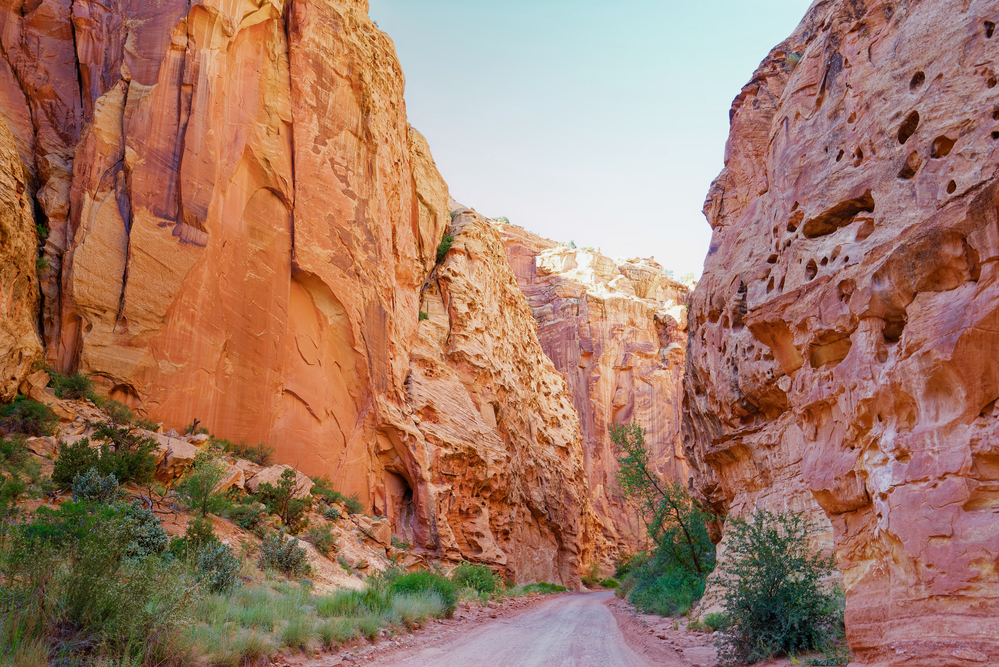
The scenic drive blends perfectly into Capitol Gorge Road, a 2.3-mile stretch of road leading to the Capitol Gorge Trailhead. This short route passes between the vibrant orange cliffs of Capitol Gorge.
While the drive alone is worth the trip, the road does lead to a unique landmark via its trail. Once you park your car, get ready to discover the Pioneer Register.
Hike the Capitol Gorge Trail
- Elevation Gain: 374 feet
- Mileage: 4.5 miles
- Difficulty: Easy
- Trail Guide: Link
This trail will take you an hour and 40 minutes to complete and is sure to captivate your imagination. Roughly half a mile from the parking lot, Capitol Gorge’s rock faces are covered in petroglyphs, pictographs, and old etching markings.
Better known as Pioneer Register, these are old carvings left by some of the early pioneers passing through the area. They date as far back as the 1800s, when the gorge was first used for wagon traffic.
Continuing along the path, you’ll find the water tanks. These are actually a series of large potholes, some still filled with water, which served as crucial watering points for early pioneers and the Fremont people.
Note: Please avoid touching the petroglyphs to help preserve them. Check out this post on the leave-no-trace principles to learn how you can help do your part for nature.
Enjoy the Sunset at Panorama Point and the Goosenecks and Sunset Point Trail
- Elevation Gain: 2.5 miles
- Mileage: 544 feet
- Difficulty: Easy
- Trail Guide: Link
Before taking on this hour-long hike, be sure to visit Panorama Point. This is an exceptionally breathtaking spot where extensive views of the Fremont Gorge await.
Once you’ve snapped your fair share of photos, it’s time to carry on along the trail, with the aim to reach Sunset Point with enough time to set up your camera gear. You’ll come across Gooseneck Overlook first, which gets its name from the long, identifiable shape of Sulphur Creek at this point.
You can then continue on to Sunset Point, where unmistakably gorgeous views of Utah’s desert will captivate you. As dusk creates a dramatic array of colors, you’ll be able to see Fruita Point in the distance as it’s lit up by the last rays of the day.
Extending Your Visit to Capitol Reef National Park, Utah
If you’re hoping to extend your itinerary, consider hiking through Goblin Valley for a day or two. It’s just an hour’s drive (60 miles) from Goblin Valley State Park to Capitol Reef’s east entrance, so it’s effortless to add to your travel plans.
Goblin Valley is also one of the lesser-visited destinations compared to Canyonlands and Bryce Canyon, so it’s worth heading off the beaten track for once.
FAQs About Visiting Capitol Reef National Park
Now that you have the itinerary all set, it’s time to get the short answers to the most asked questions.
What Is the Closest Town to Capitol Reef National Park?
The closest town to Capitol Reef is Torrey, just 4.6 miles away. It’s also the town with the best range of accommodations, so it’s a great place to stay during your Capitol Reef visit.
Is a One Day in Capitol Reef National Park Itinerary Possible?
In short, no. Unfortunately, the park is just too big, and there’s just too much to do and see in Capitol Reef in one day. The roads are also pretty daunting, so you’ll want to be careful and take your time when driving, which will increase travel time.
Can You Swim in Capitol Reef National Park?
Although the Fremont River and Sulphur Creek pass through the park, it’s highly advised not to swim in the waters. There has been an increase in coli bacteria in the water, which exceeds Utah’s water safety standards.
These bodies of water are also susceptible to flash floods, which are extremely dangerous and can happen without warning. So rather swim in the pools at your hotel.
Wrapping Up the Best Things to Do in Capitol Reef in Three Days
There you have it, a comprehensive Capitol Reef National Park itinerary. It covers everything you need to know, from how to get to the park and where to stay to the best activities to enjoy each day.
Once you’ve visited Capitol Reef, you’ll quickly see why it ranks amongst the best national parks in Utah. With that said, happy travel and safe hiking.